C-Beam Machine
CNC xPro Assembly
21
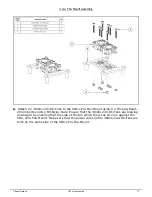
A.
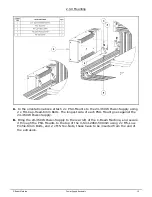
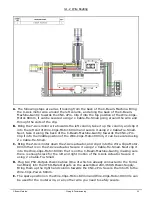
Insert 4 x M5-Low-Profile-50mm bolts through each mounting hole on the CNC-xPro-
Mount.
B.
On to each M5-Low-Profile-50mm bolt slide an Aluminium-Spacer-40mm and a Slot-
Washer. The rounded face of the Slot-Washer should be flush against the Aluminium-
Spacer-40mm.
C.
On to the end of each M5-Low-Profile-50mm bolt, slightly thread a M5-Drop-In-Tee-
Nut.
D.
Bring the CNC-xPro-Assembly to the back of the C-Beam-Machine-Gantry, and align
the M5-Low-Profile-50mm bolt assemblies from Step A/B/C with the back bottom two
slots on the C-Beam-Machine-Gantry.
E.
With the M5-Low-Profile-50mm bolt assemblies aligned, mate the CNC-xPro-Assembly
with the slots. It should be towards the right hand side of the C-Beam-Machine-Gantry
(If looking from the back), as seen in the images above.
F.
Screw each M5-Low-Profile-50mm bolt to engage the M5-Drop-In-Tee-Nut with the
slot. Fully tighten each M5-Low-Profile-50mm bolt.
Summary of Contents for C-Beam Machine
Page 1: ...C Beam Machine Electrical Assembly Instructions...
Page 2: ......
Page 4: ...C Beam Machine Getting Started 2 1 0 Getting Started...
Page 7: ...C Beam Machine Power Supply Assembly 5 2 0 Power Supply Assembly...
Page 12: ...C Beam Machine Power Supply Assembly 10 2 3 Connecting PSU Cover 2 3 1 Connecting Wires...
Page 17: ...C Beam Machine CNC xPro Assembly 15 3 0 CNC xPro Assembly...
Page 22: ...C Beam Machine CNC xPro Assembly 20 3 0 5 Mounting the CNC xPro Assembly...
Page 24: ...C Beam Machine Wiring Commissioning 22 4 0 Wiring Commissioning...
Page 33: ...C Beam Machine Appendix 31 5 0 Appendix...
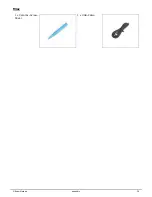
Page 38: ...C Beam Machine Appendix 36 Misc 1 x Ceramic Screw Driver 1 x USB Cable...


