background image

C-Beam Machine

Wiring & Commissioning

28

4.3  Testing

A.  

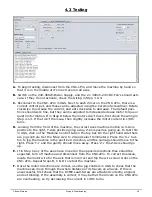
To begin testing, disconnect from the CNC-xPro, and move the machine by hand so 

that it is in the middle of it’s max travel on all axes.

B.  

Switch on the 24V-360W-Power-Supply, and the 2 x 30mm-24V-DC-Fan’s should acti-

vate. If they do not activate, check the wiring in Step 3.0.4.

C.  

Reconnect to the CNC-xPro in UGS. Next to each driver on the CNC-xPro, there is a 

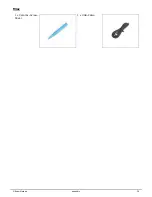
current control pot, and these can be adjusted using the Ceramic-Screwdriver. Rotate 

clockwise to increase the current, and anti-clockwise to decrease. The default posi-

tions should work fine, but they can be adjusted to increase/decrease motor torque or 

quiet motor motion. If in Step D below the motors don’t move, first check the wiring in 

Step 4.1.3. If that isn’t the issue, then slightly increase the motor current in 1/8th 

turns.

D.  

Looking from the front of the machine, the correct axes machine motion is: X-Axis 

positive to the right, Y-Axis positive going away, Z-Axis positive going up. To test this 

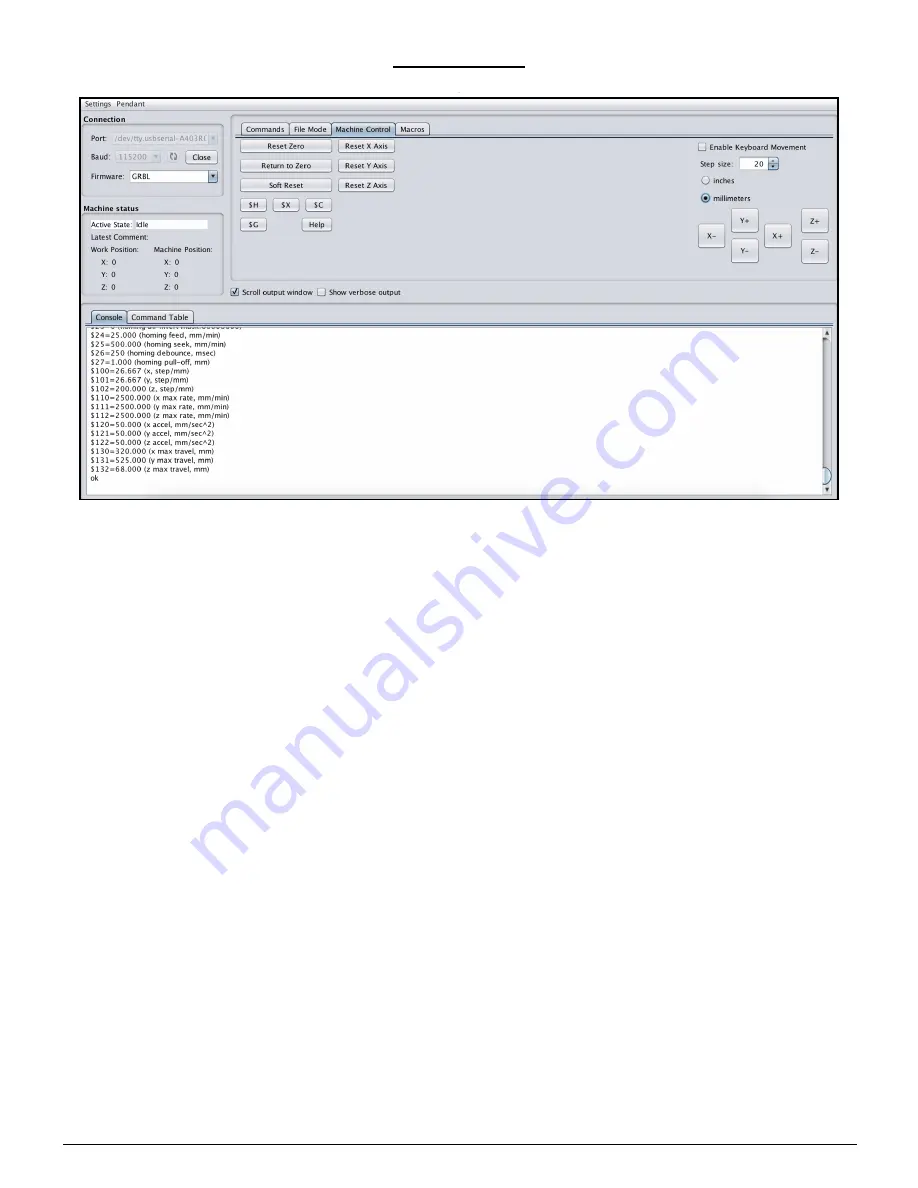
in UGS, click on the ‘Machine Control’ tab on the top bar. On the right hand side there 

are jog controls. Set the ‘Step size’ to 20 and select ‘millimeters’. Press the ‘X+’ but-

ton to jog the machine in the positive X direction, and the carriage should move to the 

right. Press ‘Y+’ and the gantry should move away. Press ‘Z+’ the Z-Axis should go 

up.

E.  

If in Step C any of the axes have moved in the opposite directions than should be 

expected, turn off machine and disconnect from the CNC-xPro. To correct this issue, 

locate the motor wire for the axis that is incorrect and flip the wire colour order on the 

CNC-xPro. Repeat Steps B, C & D to retest the machine.

F.  

Once the motor directions are correct, use the jog controls in UGS to check that the 

machine can move through the whole distance of its travels on all axes. If this is 

unsuccessful, first check that the ACME-Lead-Screw are attached correctly, aligned, 

and not binding. If the assembly is correct, it may be that the drivers on the CNC-xPro 

are overheating, so try decreasing the current in 1/8th turns.

Summary of Contents for C-Beam Machine

Page 1: ...C Beam Machine Electrical Assembly Instructions...

Page 2: ......

Page 3: ...Cover 12 2 3 3 Testing 13 2 3 4 Mounting 14 3 0 CNC xPro Assembly 15 3 0 1 Terminal Block Attachment 16 3 0 2 Fan Mount Assembly 17 3 0 3 Attaching The CNC xPro 18 3 0 4 Fans Wiring 19 3 0 5 Mounting...

Page 4: ...C Beam Machine Getting Started 2 1 0 Getting Started...

Page 5: ...mmunity of users who can mostly be found at http openbuilds com It is free to sign up to this community and it will allow you to share your builds interact with other members and download useful commu...

Page 6: ...take a step back and re read the instructions Assembly of this kit involves the use of electricity and therefore you should take appro priate precautions to ensure you are assembling the kit in a safe...

Page 7: ...C Beam Machine Power Supply Assembly 5 2 0 Power Supply Assembly...

Page 8: ...Male connector is not needed for the operation of this machine but is included so you have the option to add additional accessories For safety reasons if you do not intend to use it do not attach it t...

Page 9: ...wer Supply Assembly 7 2 1 2 Inserting LED Volt Meter A Gently push the LED Volt Meter into the provided gap on the top of the PSU Cover The wires on the LED Volt Meter should be oriented to the front...

Page 10: ...ply Assembly 8 2 2 Input 2 2 1 IEC Inlet Wires A Attach the receptacle end of the IEC Inlet Live Wire IEC Inlet Neutral Wire IEC Inlet Earth Wire to their respective terminal tabs on the IEC Inlet as...

Page 11: ...C Beam Machine Power Supply Assembly 9 2 2 2 Attaching IEC Inlet A Secure the assembled IEC Inlet to the PSU Cover using 2 x Plastite Screw M3 8mm Ensure the switch is on the right hand side...

Page 12: ...C Beam Machine Power Supply Assembly 10 2 3 Connecting PSU Cover 2 3 1 Connecting Wires...

Page 13: ...tach the left most XT60 Male connector to the PSU Cover then only connect the LED Volt Meter to the last empty output terminals If you intend to use a third XT60 Male connector then it must also be co...

Page 14: ...V 360W Power Supply This may be very fiddly to ini tially get into position so do take an extra bit of time to do so B On each side secure the PSU Cover using two Plastite Screw M3 8mms Go through the...

Page 15: ...icates the 24V 360W Power Supply has power If it doesn t come on this is most likely because the switch on the IEC Inlet is turned off turn this on C Once switched on the LED Volt Meter should read 24...

Page 16: ...ap Head 6mm Bolts The longest side of each PSU Mount goes against the 24 360W Power Supply B Bring the 24 360W Power Supply to the rear left of the C Beam Machine and secure it through the PSU Mounts...

Page 17: ...C Beam Machine CNC xPro Assembly 15 3 0 CNC xPro Assembly...

Page 18: ...t A Attach the Terminal Block to the CNC xPro Mount using 4 x M3 Cap Head 16mm Bolts Tighten the M3 Cap Head 16mm Bolts to M3 Nyloc Nuts on the other side of the CNC xPro Mount Double check that the T...

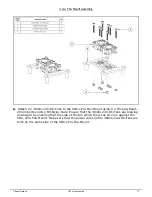
Page 19: ...unt using 8 x M3 Cap Head 20mm bolts and 8 x M3 Nyloc Nuts Ensure that the 30mm 24V DC Fans are blowing downward by ensuring that the side of the fan which the wires sit on is against the CNC xPro Fan...

Page 20: ...hrough the CNC xPro and each through a Nylon Spacer Quar ter Inch Finally go through the CNC xPro Mount and tighten each bolt into a M4 Nyloc Nut The CNC xPro Fan Mount should be orientated so the pow...

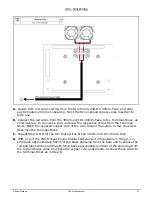
Page 21: ...m the Terminal Block Bend the exposed copper core of the wire around the screw Screw the screw back into the Terminal Block C Repeat Step A B for the two black wires of the 30mm 24V DC 30mm Fans D Wit...

Page 22: ...C Beam Machine CNC xPro Assembly 20 3 0 5 Mounting the CNC xPro Assembly...

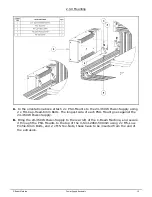
Page 23: ...M5 Drop In Tee Nut D Bring the CNC xPro Assembly to the back of the C Beam Machine Gantry and align the M5 Low Profile 50mm bolt assemblies from Step A B C with the back bottom two slots on the C Beam...

Page 24: ...C Beam Machine Wiring Commissioning 22 4 0 Wiring Commissioning...

Page 25: ...rom the back Use 2 x M5 Drop In Tee Nuts and 2 x M5 Low Profile 10mm Bolts The Wire Clips Motor 60mm should be half way up the pillar B Repeat Step A for a Wire Clips Motor 80mm shown in the Red Squar...

Page 26: ...nto the middle position of the Wire Clips Motor 80mm it can be secured using 2 x Cable Tie Small C Bring the Z Axis motor down the Z Axis actuator and clip it into the Wire Clips Motor 80mm that is on...

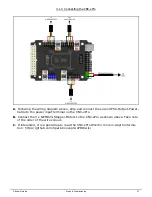
Page 27: ...the second PSU Output Power Cable to the power input terminal on the CNC xPro B Connect the 3 x NEMA23 Stepper Motors to the CNC xPro as shown above Take note of the order of the wire colours C If int...

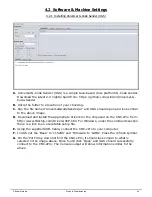
Page 28: ...to the above image D Download and install the appropriate drivers for the chip used on the CNC xPro from http www ftdichip com Drivers VCP htm For Windows under the comments section there is a link t...

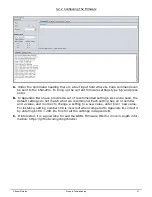
Page 29: ...t of recommended settings As can be seen the default settings do not match what we recommend Each setting has an id number and a value and in order to change a setting to a new value enter id new valu...

Page 30: ...positive to the right Y Axis positive going away Z Axis positive going up To test this in UGS click on the Machine Control tab on the top bar On the right hand side there are jog controls Set the Step...

Page 31: ...an interference kit with machine to reduce this In this kit ferrite beads are pro vided Clip the Motor Ferrite s on the motor wires as close as possible to the CNC xPro Clip the PSU Output Ferrite s o...

Page 32: ...the work piece Export the G Code file with a GRBL post processor If a GRBL post processor isn t available select a standard G Code file with no post processor and no arcs B In UGS position the machine...

Page 33: ...C Beam Machine Appendix 31 5 0 Appendix...

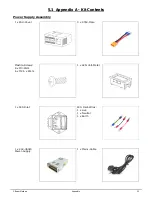
Page 34: ...endix A Kit Contents Power Supply Assembly 1 x PSU Cover 3 x XT60 Male Plastite Screws 6 x M3 8mm 6 x M2 5 x 8mm 1 x LED Volt Meter 1 x IEC Inlet IEC Inlet Wires 1 x Live 1 x Neutral 1 x Earth 1 x 24V...

Page 35: ...C Beam Machine Appendix 33 3 x PSU Output Power Cable 2 x PSU Mounts 2 x M4 Cap Head 6mm 2 x M5 Low Profile 8mm...

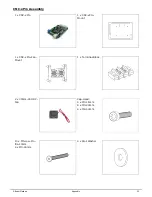
Page 36: ...ndix 34 CNC xPro Assembly 1 x CNC xPro 1 x CNC xPro Mount 1 x CNC xPro Fan Mount 1 x Terminal Block 2 x 30mm 24V DC Fan Cap Head 4 x M3 16mm 8 x M3 20mm 4 x M4 40mm 10 x M5 Low Pro file 10mm 4 x M3 16...

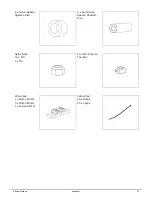
Page 37: ...Appendix 35 4 x Nylon Spacer Quarter Inch 4 x Aluminium Spacer OneHalf Ince Nyloc Nuts 12 x M3 4 x M4 14 x M5 Drop In Tee Nut Wire Clips 1 x Motor 60mm 3 x Motor 80mm 1 x Power 60mm Cable Ties 25 x Sm...

Page 38: ...C Beam Machine Appendix 36 Misc 1 x Ceramic Screw Driver 1 x USB Cable...

Page 39: ...C Beam Machine Appendix B 37 6 0 Appendix B...

Page 40: ...C Beam Machine Appendix B 38 6 1 Recommended GRBL Settings The settings below are for a CNC xPro set at 1 8 micro stepping...

Reviews: