HY
BRID 3.0
HY
BRID 3.0
O p a l e - P a r a m o d e l s . c o m
Opale Aero System SARL - 23 rue de la Motte
62250 MARQUISE - France
contact@opale-paramodels.com +33(0)981 144 387
O p a l e - P a r a m o d e l s . c o m
Opale Aero System SARL - 23 rue de la Motte
62250 MARQUISE - France
contact@opale-paramodels.com +33(0)981 144 387
Radio Setup
Connect the backpack servos (or pilot ones) to the radio receiver. Think of removing the propeller before
handling.
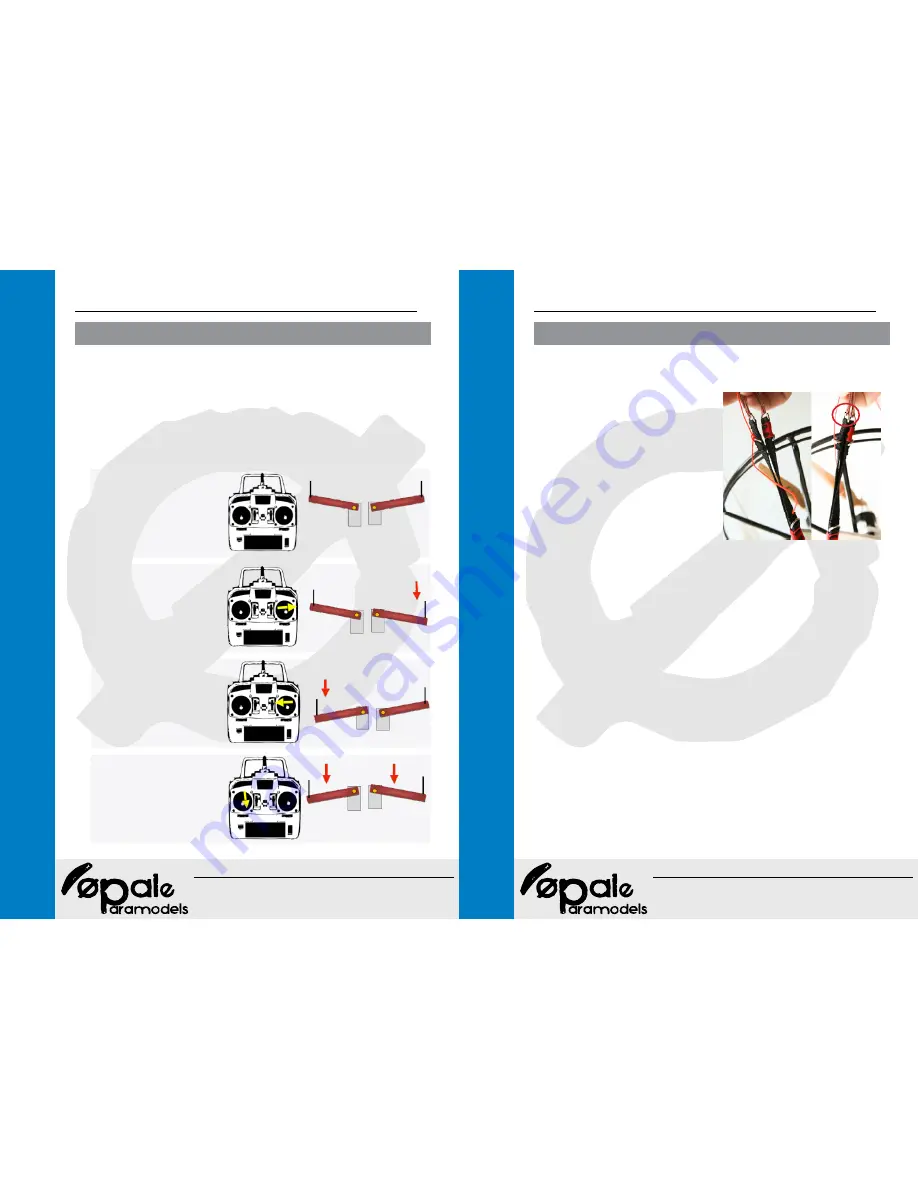
To fly the wing effectively, your radio must absolutely include a “Delta/V-Tail” mixer.
In case of using a non-programmable radio, you will have to use an additional Opale Rc Paramotor mixer
module between the receiver and the two servos, to do this mix. It is necessary to add a rubber band on
the left stick (in Mode 1) in order to maintain constantly in flight the arms in high position.
The amplitude of clearance of each servos must be 90° on a full clearance with each stick.
The Rc Paramotor mixer offers the advantage to fly the wing as a real.
As below:
Flight position maximum speed :
the trajectory is rectlinear
Right turn:
right arm move downwards, left
arm move upwards
Left turn:
Right arm move upwards, left
arm move downwards.
Flight position minimum speed:
both arms move downwards
Brakes Setup
Brakes setup is a crucial step to use your remote controlled paraglider. Without it, it will be impossi-
ble for you to fly your model.
Before proceeding, unknot the orange brake bridle fixed on the riser’s back ring.
Then, you just have to adjust the brake length according
to the “two inflating” method in order to have a total con-
trol on the aircraft during the take-off.
Adjust approximately your brake’s length, in a way to
obtain the same distance on left brake and right brake,
thanks to the black mark on the bridle (this mark must be
at the same height than the last bridle attachment ring
on the riser). Put the backpack in flight attitude, so the
servos, in high position, pushing the depth stick.
Then, make a knot in a shoelace style to ensure its attach-
ment at the arm’s endpoint.
•
FIrst step:
Put the servos in high position and perform an inflating
by pulling the backpack in a horizontal way. If the wing
encounters difficulties to inflate, increase brake’s length
until you obtain a satisfactory inflating.
If it inflates without problem, move to the next step.
•
Second step:
Put the arms in low position.
Try to inflate the wing. If it inflates, reduce brake’s length centimeter by centimeter until it can’t inflate any-
more.
If the wing doesn’t inflate, the adjustment is correct.
•
Third step:
During first flight, look if your wing deflect on the left or on the right while pulling simutaneously on both
brakes.
Then, you just have to adjust the concerned brake’s length until you obtain a perfectly rectilinear trajectory.
4
5


