background image

24

Keys, doors and windows

Fault in radio remote control

system

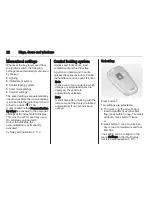
Unlocking

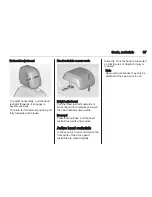
Manually unlock the driver's door by

turning the key in the lock. Switch on

the ignition and press the central

locking button 

c

 to unlock all doors,

load compartment and fuel filler flap.

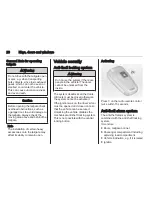
By switching on the ignition, the anti-

theft locking system is deactivated.

Locking

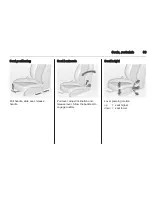
Manually lock the driver's door by

turning the key in the lock.

Fault in central locking system

Unlocking

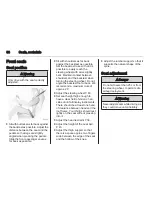
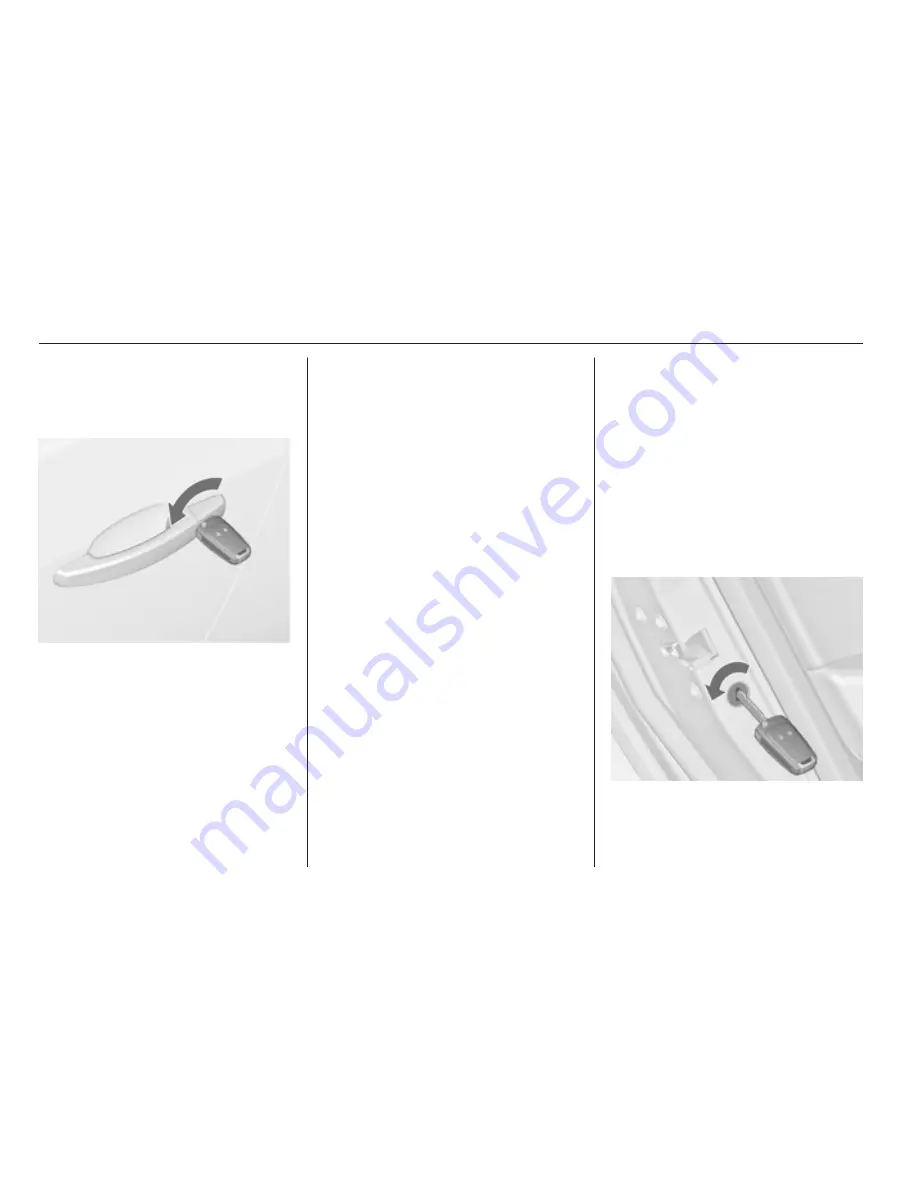
Manually unlock the driver's door by

turning the key in the lock. The other

doors can be opened by pulling the

interior handle twice. The load

compartment and fuel filler flap

cannot be opened. To deactivate the

anti-theft locking system, switch on

the ignition 

3

 26.

Locking

Push inside locking knob of all doors

except driver's door. Then close the

driver's door and lock it from the

outside with the key. The fuel filler flap

and tailgate cannot be locked.

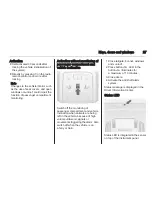
Automatic locking

This security feature can be

configured to automatically lock all

doors, load compartment and fuel

filler flap as soon as a certain speed

is exceeded.
Additionally it is configurable to

unlock the driver's door or all doors

after the ignition is switched off and

the ignition key is removed (manual

transmission) or the selector lever is

moved to P position (automatic

transmission).
Settings can be changed in the menu

Settings in the Info-Display. Vehicle

personalisation 

3

 113.

The settings can be saved for the key

being used 

3

 22.

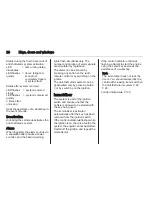
Child locks

Summary of Contents for 2011 Astra J

Page 1: ...d windows 20 Seats restraints 36 Storage 54 Instruments and controls 83 Lighting 119 Climate control 130 Driving and operating 138 Vehicle care 166 Service and maintenance 209 Technical data 212 Custo...

Page 2: ...2 Introduction Introduction...

Page 3: ...Opel instructions The customer literature pack should always be kept ready to hand in the vehicle Using this manual This manual describes all options and features available for this model Certain desc...

Page 4: ...arding this information may lead to injury Caution Text marked Caution provides information on possible damage to the vehicle Disregarding this information may lead to vehicle damage Symbols Page refe...

Page 5: ...Introduction 5...

Page 6: ...andles To open the tailgate push the touchpad switch below the handle Radio remote control 3 20 Central locking system 3 22 Load compartment 3 25 Seat adjustment Seat positioning Pull handle slide sea...

Page 7: ...eat to engage audibly Seat position 3 38 Seat adjustment 3 38 Seat height Lever pumping motion up seat higher down seat lower Seat position 3 38 Seat adjustment 3 38 Seat inclination Lever pumping mot...

Page 8: ...be twisted and must fit close against the body The backrest must not be tilted back too far maximum approx 25 To release belt press red button on belt buckle Seat position 3 38 Seat belts 3 42 Airbag...

Page 9: ...lding exterior mirrors 3 29 Heated exterior mirrors 3 30 Steering wheel adjustment Unlock the lever adjust the steering wheel then engage the lever and ensure it is fully locked Do not adjust the stee...

Page 10: ...10 In brief...

Page 11: ...Display 103 12 Anti theft alarm system status LED 26 13 Central locking system 22 Hazard warning flashers 124 Control indicator for airbag deactivation 95 Control indicator for front passenger seat b...

Page 12: ...12 In brief...

Page 13: ...f the automatic light control 8 sidelights 9 headlights On vehicles without automatic light control 7 off Press light switch front fog lights r rear fog light Lighting 3 119 Headlight flash high beam...

Page 14: ...ane change signals lever up right turn signal lever down left turn signal Turn and lane change signals 3 124 Parking lights 3 125 Hazard warning flashers Operated with the button Hazard warning flashe...

Page 15: ...ever down Windscreen wiper 3 85 Wiper blade replacement 3 172 Windscreen and headlight washer systems Pull lever Windscreen and headlight washer system 3 85 Washer fluid 3 170 Rear window wiper and wa...

Page 16: ...s Climate control Heated rear window heated exterior mirrors The heating is operated by pressing the button Heated rear window 3 33 Demisting and defrosting the windows Press button V Set the temperat...

Page 17: ...de move selector lever from D to the left higher gear lower gear The selector lever can only be moved out of P when the ignition is on and the brake pedal is applied To engage P or R press the release...

Page 18: ...rt the engine depress the clutch pedal again Stop start system 3 141 Parking Always apply the parking brake Activate the manual parking brake without pressing the release button Apply as firmly as pos...

Page 19: ...rface The high temperature of the exhaust system could ignite the surface Close the windows and the sunroof The engine cooling fans may run after the engine has been switched off 3 167 After running a...

Page 20: ...ag The key number must be quoted when ordering replacement keys as it is a component of the immobiliser system Locks 3 206 Key with foldaway key section Press button to extend To fold the key first pr...

Page 21: ...ral locking system by operating at frequent intervals the power supply is interrupted for a short time Interference from higher power radio waves from other sources Unlocking 3 22 Basic settings Some...

Page 22: ...d Vehicle personalisation 3 113 Central locking system Unlocks and locks doors load compartment and fuel filler flap A pull on an interior door handle unlocks the respective door Pulling the handle on...

Page 23: ...properly the central locking system will not work Unlocking and opening the tailgate Press button c when the ignition is off The tailgate is released to be unlocked and opened by pushing the touchpad...

Page 24: ...be opened To deactivate the anti theft locking system switch on the ignition 3 26 Locking Push inside locking knob of all doors except driver s door Then close the driver s door and lock it from the o...

Page 25: ...ld lock to the vertical position Doors Load compartment Tailgate Opening 5 door hatchback After unlocking push the touchpad switch below the handle and open the tailgate Sports tourer After unlocking...

Page 26: ...Anti theft locking system 9 Warning Do not use the system if there are people in the vehicle The doors cannot be unlocked from the inside The system deadlocks all the doors All doors must be closed ot...

Page 27: ...artment and vehicle inclination Switch off the monitoring of passenger compartment and vehicle inclination when animals are being left in the vehicle because of high volume ultrasonic signals or movem...

Page 28: ...ced by pressing any button on the radio remote control or by switching on the ignition The anti theft alarm system can be deactivated only by pressing button c or by switching on the ignition Immobili...

Page 29: ...just the mirror In position 0 no mirror is selected Folding For pedestrian safety the exterior mirrors will swing out of their normal mounting position if they are struck with sufficient force Reposit...

Page 30: ...ks with the engine running and is switched off automatically after a short time Interior mirrors Manual anti dazzle To reduce dazzle adjust the lever on the underside of the mirror housing Automatic a...

Page 31: ...ve window by pushing to open or pulling to close Pushing or pulling gently to the first detent window moves up or down as long as the switch is operated Pushing or pulling firmly to the second detent...

Page 32: ...o stop window movement Overload If the windows are repeatedly operated within short intervals the window operation is disabled for some time Initialising the power windows If the windows cannot be clo...

Page 33: ...n visors The sun visors can be folded down or swivelled to the side to prevent dazzling If the sun visors have integral mirrors the mirror covers should be closed when driving A ticket holder is locat...

Page 34: ...e or open the sunblind by sliding When the sunroof is open the sunblind is always open General hints Safety function If the sunroof encounters resistance during automatic closing it is immediately sto...

Page 35: ...n release switch briefly and press it again gently to the first detent for 10 seconds Relearning of safety function If the sunroof does not close correctly after initialising 1 Open sunroof fully by p...

Page 36: ...9 Warning Only drive with the head restraint set to the proper position The upper edge of the head restraint should be at upper head level If this is not possible for extremely tall people set to hig...

Page 37: ...ull the head restraint upwards or press the catch to release and push the head restraint downwards Removal Press both catches pull the head restraint upwards and remove Active head restraints In the e...

Page 38: ...t too far back We recommend a maximum rake of approx 25 Adjust the steering wheel 3 83 Set seat height high enough to have a clear field of vision on all sides and of all display instruments There sho...

Page 39: ...Seat positioning Pull handle slide seat release handle Seat backrests Pull lever adjust inclination and release lever Allow the backrest to engage audibly Seat height Lever pumping motion up seat hig...

Page 40: ...end lower Lumbar support Adjust lumbar support using the four way switch to suit personal requirements Moving support up and down push switch up or down Increasing and decreasing support push switch f...

Page 41: ...ressing the button for the respective seat one or more times The control indicator in the button indicates the setting Prolonged use of the highest setting for people with sensitive skin is not recomm...

Page 42: ...the belts are not damaged by shoes or sharp edged objects or trapped Prevent dirt from getting into the belt retractors Seat belt reminder X 3 95 Belt force limiters On the front seats stress on the b...

Page 43: ...whilst driving by pulling the shoulder belt Seat belt reminder 3 95 Loose or bulky clothing prevents the belt from fitting snugly Do not place objects such as handbags or mobile phones between the bel...

Page 44: ...Removing To release belt press red button on belt buckle Seat belts on the rear seats The seat belt for the rear centre seat can only be withdrawn from the retractor if the backrest is in the rear pos...

Page 45: ...hermore it might be necessary to have the steering wheel the instrument panel parts of the panelling the door seals handles and the seats replaced Do not make any modifications to the airbag system as...

Page 46: ...otect Side airbag system The side airbag system consists of an airbag in each front seat backrest This can be identified by the word AIRBAG The side airbag system is triggered in the event of a side i...

Page 47: ...mpact considerably 9 Warning Keep the area in which the airbag inflates clear of obstructions The hooks on the handles in the roof frame are only suitable for hanging up light articles of clothing wit...

Page 48: ...system on a seat with activated front passenger airbag Risk of fatal injury for an adult person on a seat with deactivated front passenger airbag As long as the control indicator is not illuminated t...

Page 49: ...e This makes sure that the child s backbone which is still very weak is under less strain in the event of an accident Children under the age of 12 years that are smaller than 150 cm are only allowed t...

Page 50: ...4 years X U1 U2 U Group II 15 to 25 kg or approx 3 to 7 years X X U U Group III 22 to 36 kg or approx 6 to 12 years X X U U 1 Only if front passenger seat airbag system is deactivated If the child res...

Page 51: ...oup I 9 to 18 kg D ISO R2 X IL X C ISO R3 X IL X B ISO F2 X IL IUF X B1 ISO F2X X IL IUF X A ISO F3 X IL IUF X IL Suitable for particular ISOFIX restraint systems of the specific vehicle restricted or...

Page 52: ...in the weight class 9 to 18 kg B1 ISO F2X Forward facing child restraint system for smaller children in the weight class 9 to 18 kg C ISO R3 Rear facing child restraint system for children of maximum...

Page 53: ...IL ISOFIX mounting brackets are indicated by a label on the backrest Top tether fastening eyes Top Tether fastening eyes are marked with the symbol for a child seat In addition to the ISOFIX mounting...

Page 54: ...ystem 81 Loading information 81 Storage compartments Glovebox The glovebox features a pen holder a credit card holder and a coin holder The intermediate shelf can be removed The glovebox should be clo...

Page 55: ...er backwards Bottles can be stowed after folding up the intermediate shelf 3 57 Additional cupholders are located in the rear armrest Fold down the armrest Front storage A storage compartment is locat...

Page 56: ...e Depending on the version the tyre repair kit is stowed in the drawer Tyre repair kit 3 193 Armrest storage Storage under the front armrest Press button to fold up the armrest The armrest must be in...

Page 57: ...r Slide cover backwards Press button to remove the frame of the cupholder The frame can be stowed in the glovebox A further storage compartment is located under the intermediate shelf Fold up the inte...

Page 58: ...ultifunction box is offered as an accessory for the rear carrier system The transportation of other objects is not permitted There must not be any objects on the bicycles that could become loose durin...

Page 59: ...ystem has been correctly engaged If the rear carrier system will not engage correctly do not fit objects to the system and slide the system back Seek the assistance of a workshop Install the tail lamp...

Page 60: ...located Lock the rear carrier system Swivel the right clamping lever 1 first followed by the left clamping lever 2 until a resistance is noticeable The rear carrier system is locked when the clamping...

Page 61: ...ld one or both pedal crank recesses upwards until the diagonal support engages Remove the pedal crank mounts from the pedal crank recesses Adapting the rear carrier system to a bicycle Press the relea...

Page 62: ...tically downwards The pedal on the left pedal crank must be horizontal The front bicycle must have its front wheel facing left The rear bicycle must have its front wheel facing right Attaching a bicyc...

Page 63: ...as shown in the illustration Caution Make sure that the pedal does not touch the surface of the rear end carrier Otherwise the crankset might be damaged during the transport Insert pedal crank mount i...

Page 64: ...recess If the two bicycles obstruct one another the relative positions of the bicycles can be adapted by adjusting the wheel recesses and the rotary lever on the pedal crank recess until the bicycles...

Page 65: ...cting the rear carrier system Push the pedal crank mounts into the pedal crank recess like shown in the graphic Insert the strap retainer and pull tightly downwards as far as possible Press release le...

Page 66: ...e tail lamps First place the front 1 tail lamp then the rear 2 tail lamp in the recesses and push down as far as possible Push cables all the way into all guides in order to prevent damage Open the ta...

Page 67: ...l the seat belts along with them Pull the release lever on one or both sides and fold down the backrests onto the seat cushion If the vehicle is to be loaded via a rear door take the seat belt out of...

Page 68: ...rtment extension Sports tourer Folding down rear backrests Remove the load compartment cover if necessary Press and hold the catch then push the head restraints down Fold up the rear armrest Guide the...

Page 69: ...an upright position until they engage audibly Ensure that the seat belts of the outboard seats are placed in the corresponding belt guides The backrests are properly engaged when the red marks on both...

Page 70: ...Pull the release lever on one or both sides of the backrests and fold down onto the seat cushion to get a flat load bay Remove the seat cushion Push both levers forward and remove seat cushion to exte...

Page 71: ...ding up The closed cover can be secured from the side of the load compartment Turn the knob 90 knob horizontal cover secured from the side of the passenger compartment knob vertical cover not secured...

Page 72: ...ing Engage cover in side guides and fold downwards Attach retaining straps to tailgate Sports tourer Closing cover Pull the cover towards the rear using the handle until it engages in the sideward ret...

Page 73: ...wn in the graphic Rear floor storage cover 3 73 Installing cover Insert the left side of the load compartment cover in the recess pull the release lever up and hold it insert the right side of the loa...

Page 74: ...of the height adjustable cover are attached to the same level Lifting To lift the cover to a higher level pull the loop backwards and lift the rear edge of the cover onto the corresponding supports Lo...

Page 75: ...cover is able to withstand a load of no more than 100 kg Opening the side covers e g when exchanging the rear light bulbs is only possible with the height adjustable cover mounted in position 1 or 2...

Page 76: ...rs and hooks Installation of adapters in the rails Fold open the handle plate insert the adapter into the upper and lower groove of the rail and move to the required position Turn the handle plate upw...

Page 77: ...he adapters Installation of hooks in the rails Insert the hook in the desired position first in the upper groove of the rail and then press in the lower groove To remove first pull out of the upper gr...

Page 78: ...ocks to open The belt can be tightened Safety net The safety net is available on the Sports tourer and can be installed behind the rear seats or if the rear seat backrests are folded and the seat cush...

Page 79: ...backrests forward To get a flat load bay first fold seat cushion before attaching the safety net Load compartment 3 67 Removal Detach straps from the eyes Unhook the safety net rods from the brackets...

Page 80: ...hback Stow the first aid kit in the stowage compartment behind the warning triangle Before first use press in the interior trim at the top and at the sides of the perforation Then fold the trim outwar...

Page 81: ...int by using a coin Sports tourer with roof railing To fasten the roof rack insert the mounting bolts in the holes indicated in the figure Loading information Heavy objects in the load compartment sho...

Page 82: ...nt 9 Warning Always make sure that the load in the vehicle is securely stowed Otherwise objects can be thrown around inside the vehicle and cause personal injury or damage to the load or car The paylo...

Page 83: ...ment Unlock lever adjust steering wheel then engage lever and ensure it is fully locked Do not adjust steering wheel unless vehicle is stationary and steering wheel lock has been released Steering whe...

Page 84: ...tton Activation is indicated by the LED in the button The recommended grip areas of the steering wheel are heated quicker and to a higher temperature than the other areas Heating is operational when t...

Page 85: ...Wiper lever in position P Turn the adjuster wheel to adjust the desired wipe interval short interval turn adjuster wheel upwards long interval turn adjuster wheel downwards Automatic wiping with rain...

Page 86: ...e sensor free from dust dirt and ice Windscreen and headlight washer Pull lever Washer fluid is sprayed onto the windscreen and the wiper wipes a few times If the headlights are on washer fluid is als...

Page 87: ...windscreen wiper is switched on and reverse gear is engaged Activation or deactivation of this function can be changed in the menu Settings in the Info Display Vehicle personalisation 3 113 The rear...

Page 88: ...hanges the time shown on the display Set date Changes the date shown on the display Set time format Changes indication of hours between 12 hours and 24 hours Set date format Changes indication of date...

Page 89: ...utlets are deactivated in the event of low battery voltage Electrical accessories that are connected must comply with the electromagnetic compatibility requirements laid down in DIN VDE 40 839 Do not...

Page 90: ...rning lights gauges and indicators Speedometer Indicates vehicle speed Odometer The bottom line displays the recorded distance Trip odometer The top line displays the recorded distance since the last...

Page 91: ...isplays the fuel level in the tank Control indicator i illuminates if the level in the tank is low Refuel immediately if it flashes Never run the tank dry Because of the fuel remaining in the tank the...

Page 92: ...lay the remaining engine oil life duration Press the MENU button to select the Vehicle Information Menu Turn the adjuster wheel to select Remaining Oil Life The system must be reset every time the eng...

Page 93: ...rsions Depending on the equipment the position of the control indicators may vary When the ignition is switched on most control indicators will illuminate briefly as a functionality test The control i...

Page 94: ...94 Instruments and controls Control indicators in the instrument cluster...

Page 95: ...d on until the seat belt has been fastened Flashes After having started the engine for a maximum of 100 seconds until the seat belt has been fastened Airbag and belt tensioners v illuminates red When...

Page 96: ...he engine starts Illuminates when the engine is running Fault in the emission control system The permitted emission limits may be exceeded Seek the assistance of a workshop immediately Flashes when th...

Page 97: ...parking brake is in service mode Stop vehicle apply and release the electrical parking brake to reset 9 Warning Have the cause of the fault remedied immediately by a workshop Antilock brake system ABS...

Page 98: ...shop Ultrasonic parking assist 3 156 Electronic Stability Control off n illuminates yellow The system is deactivated Electronic Stability Control and Traction Control system b illuminates or flashes y...

Page 99: ...a workshop Engine oil pressure I illuminates red Illuminates when the ignition is switched on and goes out shortly after the engine starts Illuminates when the engine is running Caution Engine lubrica...

Page 100: ...Adaptive forward lighting f illuminates or flashes yellow Illuminates Fault in system Seek the assistance of a workshop Flashes System switched to symmetrical low beam Control indicator f flashes for...

Page 101: ...iguration can be selected Vehicle Information Menu Trip Fuel Information Menu Some of the displayed functions differ between vehicle driving and standstill and some functions are only active when the...

Page 102: ...n be changed Tire Pressure 3 190 Remaining Oil Life 3 92 Coolant Temperature Display of engine coolant temperature 3 91 Relearn Remote Key Relearn after battery replacement Battery Voltage Display of...

Page 103: ...vehicle has a Graphic or Colour Info Display The Info Display is located in the instrument panel above the Infotainment system Graphic Info Display Depending on the Infotainment system the Graphic Inf...

Page 104: ...depends on the equipment of the vehicle and the settings made Selecting menus and settings Menus and settings are accessed via the display Selections are made via menus function buttons and multifunc...

Page 105: ...te the entire entry Vehicle personalisation 3 113 Memorised settings 3 22 Vehicle messages Messages are indicated mainly in the Driver Information Center DIC in some cases together with a warning and...

Page 106: ...Right front turn signal failure 28 Right rear turn signal failure 29 Check trailer brake light 30 Check trailer reversing light 31 Check left trailer turn signal 32 Check right trailer turn signal 33...

Page 107: ...icle message 83 Service adaptive cruise control 84 Engine power is reduced 94 Shift to park before exiting 95 Service airbag 128 Bonnet open 145 Check washer fluid level 174 Low battery Vehicle messag...

Page 108: ...verse gear is engaged and the rear end carrier extended If the diesel particle filter has reached the maximum filling level When the vehicle is parked and or the driver s door is opened When the key i...

Page 109: ...d is active up to a speed of 200 km h depending on the lighting conditions At night the system is active up to a speed of 160 km h As soon as the speed becomes slower than 55 km h the display will be...

Page 110: ...d as pop up on each page of the menu Pop up function The pop up function can be deactivated on the traffic sign page by pressing the SET CLR button on the turn signal lever Once setting page is displa...

Page 111: ...displayed by the system The system does not discern any other than the conventional traffic signs that might give or end a speed limit Do not let this special feature tempt you into taking risks when...

Page 112: ...Turn the adjuster wheel to select one of the submenus Trip odometer 1 Trip odometer 2 Range Average consumption Instantaneous consumption Average speed Digital speed Traffic sign assistant The inform...

Page 113: ...aneous consumption Display of the instantaneous consumption Average speed Display of average speed The measurement can be reset at any time To reset press the SET CLR button for a few seconds Digital...

Page 114: ...ng settings can be changed Sport mode settings The driver can select the functions which will be activated in Sport mode 3 153 Sport suspension Damping becomes harder Sport powertrain performance Acce...

Page 115: ...tion Rear auto wipe in reverse Activate or deactivate automatically switching on of the rear window wiper when reverse gear is engaged Park assist Collision detection Park assist Activate or deactivat...

Page 116: ...after unlocking without opening the vehicle Restore factory settings Restore factory settings Reset all settings to the default settings Personal settings in the Colour Info Display Press the CONFIG b...

Page 117: ...Phone settings See description for Infotainment system in the infotainment manual Navigation settings See description for Infotainment system in the infotainment manual Vehicle settings Climate and a...

Page 118: ...tivate or deactivate the automatic door locking function while a door is open Lock Unlock Start by remote Remote unlock feedback Activate or deactivate the hazard warning flasher feedback whilst unloc...

Page 119: ...ons m activation or deactivation of the automatic light control Switch turns back to AUTO 8 sidelights 9 headlights On vehicles without automatic light control 7 off In the Driver Information Center w...

Page 120: ...light While the daytime running light is active the tail lights are switched on or off depending on country specific variant Automatic headlight activation During poor lighting conditions the headligh...

Page 121: ...1 Key in ignition switch 2 Pull turn signal lever and hold headlight flash 3 Switch on ignition 4 After approx 5 seconds the control indicator f starts flashing and an acoustic signal sounds Control...

Page 122: ...ly at a speed range between approx 55 and 115 km h The beam of light and the brightness is different between the left and the right side Motorway lighting Activated automatically at a speed above appr...

Page 123: ...0 mph in a forward gear If the headlights are on and reverse gear is engaged both corner lights are switched on They remain illuminated for 20 seconds after disengaging reverse gear or until driving f...

Page 124: ...forward lighting system When the system detects a failure in the Adaptive forward lighting system the system moves to a preset position to avoid dazzling of oncoming traffic If this is not possible t...

Page 125: ...in position AUTO switching on front fog lights will switch headlights on automatically Rear fog lights Operated with the r button Light switch in position AUTO switching on rear fog light will switch...

Page 126: ...ts can be adjusted when the exterior lights are on Instrument panel illumination Info Display Illuminated switches and operation elements Turn thumb wheel A and hold until the desired brightness is ob...

Page 127: ...comes on when headlights are switched on Entry lighting Welcome lighting Headlights tail lights reversing lights number plate lights instrument panel light interior lights and puddle lights are switch...

Page 128: ...ove ignition key 3 Open driver s door 4 Pull turn signal lever 5 Close driver s door If the driver s door is not closed the lights switch off after two minutes Exit lighting is switched off immediatel...

Page 129: ...tivation of the battery discharge protection will be displayed in the Driver Information Center Switching off electric lights To prevent discharge of the battery when the ignition is switched off some...

Page 130: ...as reached normal operating temperature Air distribution s to windscreen and front door windows M to head area via adjustable air vents K to foot well All combinations are possible Fan speed Adjust th...

Page 131: ...be requested by the climate control system during an Autostop Air recirculation system 4 Operated with the 4 button 9 Warning The exchange of fresh air is reduced in air recirculation mode In operatio...

Page 132: ...ntrol allows different climatisation temperatures for driver and front passenger side Controls for Temperature on driver side Air distribution Fan speed Temperature on front passenger side AUTO automa...

Page 133: ...he air vents should therefore always be open Temperature preselection Temperatures can be set to the desired value If the minimum temperature is set the climate control system runs at maximum cooling...

Page 134: ...tion Deactive corresponding setting or press button AUTO Cooling Activate or deactivate with the n button The air conditioning system cools and dehumidifies dries when outside temperature is above a s...

Page 135: ...tion mode Activation is indicated by the LED in the button Basic settings Some settings can be changed in the menu Settings in the Info Display Vehicle personalisation 3 113 Auxiliary heater Air heate...

Page 136: ...to position 9 Warning Do not attach any objects to the slats of the air vents Risk of damage and injury in case of an accident Fixed air vents Additional air vents are located beneath the windscreen...

Page 137: ...year Operation with cooling is not possible when the outside temperature is too low Service For optimal cooling performance it is recommended to annually check the climate control system starting thre...

Page 138: ...rake servo unit power steering Driving in this manner is a danger to yourself and others All systems function during an Autostop but there will be a controlled reduction in power steering assist and v...

Page 139: ...to allow for charging the battery Diesel particle filter 3 143 Ignition switch positions 0 Ignition off 1 Steering wheel lock released ignition off 2 Ignition on for diesel engine preheating 3 Startin...

Page 140: ...ures below 30 C the automatic transmission need a warming phase of approx 5 minutes The selector lever must be in position P Automatic Starter Control This function controls the engine starting proced...

Page 141: ...low in this section are fulfilled Deactivation Deactivate the stop start system manually by pressing the eco button The deactivation is indicated by the LED in the button going off Autostop If the veh...

Page 142: ...several battery discharge protection features are implemented as part of the stop start system Power saving measures During an Autostop several electrical features such as auxiliary electric heater or...

Page 143: ...hill slope turn the front wheels away from the kerb If the vehicle is on a downhill slope engage reverse gear or set the selector lever to P before switching off the ignition Turn the front wheels tow...

Page 144: ...To activate cleaning process continue driving keep engine speed above 2000 revolutions per minute Shift down if necessary Diesel particle filter cleaning is then started If g illuminates additionally...

Page 145: ...c mode or manual gearshifting manual mode Transmission display The mode or selected gear is shown in the transmission display Selector lever P park position wheels are locked engage only when the vehi...

Page 146: ...Engine braking To utilise the engine braking effect select a lower gear in good time when driving downhill see manual mode Rocking the vehicle Rocking the vehicle is only permissible if the vehicle is...

Page 147: ...n completely in automatic mode the transmission shifts to a lower gear depending on engine speed Fault In the event of a fault g illuminates Additionally a code number or a vehicle message is displaye...

Page 148: ...rruption remedied by a workshop 4 Mount the selector lever trim onto the centre console and refit Manual transmission To engage reverse with the vehicle stationary press the release button on the sele...

Page 149: ...ABS prevents the wheels from locking ABS starts to regulate brake pressure as soon as a wheel shows a tendency to lock The vehicle remains steerable even during hard braking ABS control is made appare...

Page 150: ...ated even if the ignition is off Do not operate electrical parking brake system too often without engine running because this will discharge the battery Before leaving the vehicle check the electrical...

Page 151: ...ll braking Maintain steady pressure on the brake pedal for as long as full braking is required Maximum brake force is automatically reduced when the brake pedal is released Hill start assist The syste...

Page 152: ...necessary regardless of the type of road surface or tyre grip It also prevents the drive wheels from spinning As soon as the vehicle starts to swerve understeer oversteer engine output is reduced and...

Page 153: ...re In each driving mode Flex Ride networks the following electronic systems Continuous Damping Control Accelerator Pedal Control Steering Control Automatic transmission SPORT mode The settings of the...

Page 154: ...If for example TOUR mode is selected and whilst driving on a winding road a sudden hard brake is necessary DMC will detect the dynamic vehicle condition and changes the settings for suspension to SPO...

Page 155: ...the gear can be changed while the cruise control is activated Increase speed With cruise control active hold thumb wheel turned to RES or briefly turn to RES repeatedly speed increases continuously o...

Page 156: ...ng assist The parking assist makes parking easier by measuring the distance between the vehicle and obstacles and giving acoustic signals It is the driver however who bears full responsibility for the...

Page 157: ...w covered sensors is detected Vehicle messages 3 105 Important hints for using the parking assist systems 9 Warning Under certain circumstances various reflective surfaces on objects or clothing as we...

Page 158: ...ding up no active steering If the driver is active no warning will be issued Activation The lane departure warning system is activated by pressing the button The illuminated LED in the button indicate...

Page 159: ...ion Use of fuel with too low an octane rating could lead to uncontrolled combustion and engine damage Fuel for diesel engines Only use diesel fuel that complies with DIN EN 5902 The fuel must have low...

Page 160: ...ion when refuelling 9 Danger Fuel is flammable and explosive No smoking No naked flames or sparks If you can smell fuel in your vehicle have the cause of this remedied immediately by a workshop Cautio...

Page 161: ...c conditions All values are based on the EU base model with standard equipment The calculation of fuel consumption takes into account the vehicle s kerb weight ascertained in accordance with the regul...

Page 162: ...up to max 12 The permitted trailer load applies up to the specified incline and up to an altitude of 1000 metres above sea level Since engine power decreases as altitude increases due to the air beco...

Page 163: ...rating may be exceeded by 60 kg If the permissible rear axle load is exceeded a maximum speed of 100 km h applies Towing equipment Caution When operating without a trailer remove the coupling ball ba...

Page 164: ...wise the coupling ball bar must be tensioned before being inserted Unlock coupling ball bar by turning key to position c Pull out rotary knob and turn clockwise as far as it will go Inserting the coup...

Page 165: ...ted correctly If the coupling ball bar does not engage correctly seek the assistance of a workshop Dismounting the coupling ball bar Open the protective flap and turn the key to position c to unlock t...

Page 166: ...s of electronic control units chip tuning Caution When transporting the vehicle on a train or on a recovery vehicle the mud flaps might be damaged Vehicle storage Storage for a long period of time If...

Page 167: ...gine oil level Check the coolant level Fit the number plate if necessary End of life vehicle recovery Information on end of life vehicle recovery centres and the recycling of end of life vehicles is a...

Page 168: ...aged Engine oil Check the engine oil level manually on a regular basis to prevent damage to the engine Ensure that the correct specification of oil is used Recommended fluids and lubricants 3 210 Chec...

Page 169: ...nt The coolant provides freeze protection down to approx 28 C Caution Only use approved antifreeze Coolant level Caution Too low a coolant level can cause engine damage If the cooling system is cold t...

Page 170: ...brake lining a squealing noise sounds during braking Continued driving is possible but have the brake lining replaced as soon as possible Once new brake linings are installed do not brake unnecessaril...

Page 171: ...instructions given in this paragraph may lead to a temporary deactivation of the stop start system When the battery is being replaced please ensure that there are no open ventilation holes in the vic...

Page 172: ...engine for a maximum of 40 seconds Repeat this process after no less than 5 seconds If the engine fails to start seek the assistance of a workshop Wiper blade replacement Lift the wiper arm until it s...

Page 173: ...th bare hands Use only the same bulb type for replacement Replace headlight bulbs from within the engine compartment Halogen headlights Headlights have separate systems for low beam 1 outer bulbs and...

Page 174: ...ate the bulb holder anticlockwise to disengage Withdraw the bulb holder from the reflector 3 Detach the bulb from the bulb holder and replace the bulb 4 Insert the bulb holder engaging the two lugs in...

Page 175: ...swivel it backwards 2 Pull the bulb holder with bulb out of the reflector 3 Disengage the bulb holder from the plug connector by pressing the retaining lug 4 Remove and replace the bulb holder with bu...

Page 176: ...t from the reflector 2 Disengage the bulb holder from the plug connector by pressing the retaining lug 3 Remove and replace the bulb holder with bulb 4 Attach the plug connector 5 Insert the bulb hold...

Page 177: ...lb carrier 6 Unscrew the three screws with a coin and remove the bulb carrier 7 Remove and replace the bulb Tail lights 1 Brake light 2 Turn signal light 3 8 Insert the bulb carrier into the tail ligh...

Page 178: ...ce the bulb To replace the rear fog light 2 push the bulb slightly into the socket rotate anticlockwise remove and replace the bulb 6 Insert the bulb carrier into the tail light assembly Install the t...

Page 179: ...ring plug from bulb holder 5 Remove and replace the bulb Tail lights 1 2 Turn signal light 3 Brake light 4 6 Connect the wiring plug and press the cable into the retainer Install tail light assembly i...

Page 180: ...ew the screws and remove 3 Remove the tail light assembly 4 Remove and replace the bulb 5 Install the tail light assembly in the tailgate and tighten the screws Attach the covers 6 Switch on the ignit...

Page 181: ...pring Remove cover 2 Remove the bulb holder downwards taking care not to pull on the cable 3 Disengage the retaining lug and remove the bulb holder from the wiring plug 4 Remove and replace the bulb h...

Page 182: ...hand drive vehicles behind the glovebox behind a cover on the left side of the load compartment Before replacing a fuse turn off the respective switch and the ignition A blown fuse can be recognized...

Page 183: ...the fuse extractor on the various types of fuse from the top or side and withdraw fuse Engine compartment fuse box The fuse box is in the front left of the engine compartment Disengage the cover lift...

Page 184: ...l module 18 Heated rear window 19 Front power windows 20 Rear power windows 21 ABS 22 Left high beam Halogen 23 Headlamp washer system 24 Right low beam Xenon 25 Left low beam Xenon 26 Fog lights 27 D...

Page 185: ...until it engages If the fuse box cover is not closed correctly malfunction may occur Instrument panel fuse box In left hand drive vehicles the fuse box is behind the storage compartment in the instru...

Page 186: ...7 Air conditioning system 18 Prefuse radio Infotainment displays 19 Brake lights tail lights interior lights 20 21 22 Ignition switch 23 Body control unit 24 Body control unit 25 26 Power outlet load...

Page 187: ...wn the blind and remove Remove the cover Fuse assignments No Circuit 1 Trailer module 2 Trailer outlet 3 Parking assist 4 5 6 7 8 Anti theft alarm system 9 10 11 Trailer module Trailer socket 12 13 Tr...

Page 188: ...1 Amplifier Subwoofer 32 Active damping system Lane departure warning When assembling press the blind into the rubber grommets to reach full retention force Vehicle tools Tools Vehicles with tyre repa...

Page 189: ...res below 7 C and should therefore be fitted on all wheels Tyres of size 205 55 R 16 205 60 R 16 205 65 R 16 215 50 R 17 225 45 R 17 225 50 R 17 are permitted as winter tyres Tyres of size 235 40 R 19...

Page 190: ...ad The ECO tyre pressure serves to achieve the smallest amount of fuel consumption possible Incorrect tyre pressures will impair safety vehicle handling comfort and fuel economy and will increase tyre...

Page 191: ...ndicator w 3 99 Vehicle messages 3 105 If the tyre pressure shall be reduced or increased switch off ignition If a complete set of wheels without sensors is mounted e g four winter tyres a message is...

Page 192: ...n be displayed or pressure values can swap in the Driver Information Center If problems occur during the relearn process a warning message is displayed in the Driver Information Center Temperature com...

Page 193: ...ot factory approved the tyres must not have a rim protection ridge Wheel covers must not impair brake cooling 9 Warning Use of unsuitable tyres or wheel covers could lead to sudden pressure loss and t...

Page 194: ...ing and handling may be affected If you have a flat tyre Apply the parking brake and engage first gear reverse gear or P The tyre repair kit is in a compartment under the floor cover in the load compa...

Page 195: ...he rocker switch on the compressor to I The tyre is filled with sealant 11 The compressor pressure gauge briefly indicates up to 6 bar whilst the sealant bottle is emptying approx 30 seconds Then the...

Page 196: ...d of view 17 Continue driving immediately so that sealant is evenly distributed in the tyre After driving approx 6 miles but no more than 10 minutes stop and check tyre pressure Screw compressor air h...

Page 197: ...pter Wheel changing Some vehicles are equipped with a tyre repair kit instead of a spare wheel 3 193 Make the following preparations and observe the following information Park the vehicle on a level f...

Page 198: ...l the wheel wrench ensuring that it locates securely and loosen each wheel nut by half a turn Variant 2 Fold out the wheel wrench and install ensuring that it locates securely and loosen each wheel nu...

Page 199: ...s clear of the ground 5 Unscrew the wheel nuts 6 Change the wheel 7 Screw on the wheel nuts 8 Lower vehicle 9 Install the wheel wrench ensuring that it locates securely and tighten each nut in a cross...

Page 200: ...heels and country regulations The spare wheel has a steel rim The use of a spare wheel that is smaller than the other wheels or in combination with winter tyres could affect driveability Have the defe...

Page 201: ...own in the illustration 5 Mount the hook to the rear lashing eye 6 Tighten the strap and secure it using the buckle Storing a damaged wheel in the spare wheel well Sports tourer Use the extension bar...

Page 202: ...r vehicle gets a flat tyre on the rear while towing another vehicle mount the temporary spare wheel in the front and the full tyre in the rear Tyre chains 3 193 Directional tyres Fit directional tyres...

Page 203: ...the jump starting process Apply the parking brake transmission in neutral automatic transmission in P Lead connection order 1 Connect the red lead to the positive terminal of the booster battery 2 Co...

Page 204: ...e is stowed with the vehicle tools 3 188 Screw in the towing eye as far as it will go until it stops in a horizontal position Attach a tow rope or better still a tow rod to the towing eye The towing e...

Page 205: ...matic transmission The vehicle must be towed facing forwards not faster than 80 km h nor further than 100 km In all other cases and when the transmission is defective the front axle must be raised off...

Page 206: ...ke should be cleaned off immediately as they contain aggressive constituents which can cause paint damage If using a vehicle wash comply with the vehicle wash manufacturer s instructions The windscree...

Page 207: ...he glass Clean smearing wiper blades with a soft cloth and window cleaner Sunroof Never clean with solvents or abrasive agents fuels aggressive media e g paint cleaner acetone containing solutions etc...

Page 208: ...er and a soft cloth In case of heavy soiling use leather care The instrument panel should only be cleaned using a soft damp cloth Clean fabric upholstery with a vacuum cleaner and brush Remove stains...

Page 209: ...occurs first unless otherwise indicated in the service display The European service intervals are valid for the following countries Andorra Austria Belgium Bosnia Herzegovina Bulgaria Croatia Cyprus C...

Page 210: ...us Handle with care Pay attention to information given on the containers Engine oil Engine oil is identified by its quality and its viscosity Quality is more important than viscosity when selecting wh...

Page 211: ...ratures Coolant and antifreeze Use only silicate free long life coolant LLC antifreeze The system is factory filled with coolant designed for excellent corrosion protection and frost protection down t...

Page 212: ...identification 212 Vehicle data 214 Vehicle identification Vehicle Identification Number The Vehicle Identification Number is visible through the windscreen Identification plate The identification pla...

Page 213: ...ble gross vehicle weight rating in kg 8 Permissible gross train weight in kg 9 Maximum permissible front axle load in kg 10 Maximum permissible rear axle load in kg 11 Colour type 12 Colour number 13...

Page 214: ...ding CNG LPG E85 Diesel engines Petrol engines including CNG LPG E85 Diesel engines dexos 1 dexos 2 In case dexos quality is unavailable you may use max 1 litre engine oil quality ACEA C3 once between...

Page 215: ...CNG LPG E85 Diesel engines Petrol engines including CNG LPG E85 Diesel engines dexos 1 dexos 2 In case dexos quality is unavailable you may use the oil qualities listed below All countries outside Eur...

Page 216: ...iesel engines ACEA A3 B3 ACEA A3 B4 ACEA C3 API SM API SN Engine oil viscosity grades All countries outside Europe except Israel including Belarus Moldova Russia Serbia Turkey Ambient temperature Petr...

Page 217: ...98 1398 1364 1364 1598 1598 Engine power kW 64 74 88 103 85 132 at rpm 6000 6000 4200 6000 4900 6000 6000 5500 Torque Nm 130 130 200 200 155 230 at rpm 4000 4000 1850 4200 1850 4900 4000 2200 Fuel typ...

Page 218: ...A17DTR A20DTH Number of cylinders 4 4 4 4 Piston displacement cm3 1248 1686 1686 1956 Engine power kW 70 81 92 118 at rpm 4000 3800 4000 4000 Torque Nm 190 260 280 350 at rpm 1750 3250 1700 2550 2000...

Page 219: ...speed4 km h Manual transmission 1685 1785 192 202 221 188 Automatic transmission 200 211 182 2 The maximum speed indicated is achievable at kerb weight without driver plus 200 kg payload Optional equ...

Page 220: ...l transmission 175 181 195 215 Automatic transmission 209 2 The maximum speed indicated is achievable at kerb weight without driver plus 200 kg payload Optional equipment could reduce the specified ma...

Page 221: ...speed 2 mph Manual transmission 108 113 120 133 Automatic transmission 129 6 The maximum speed indicated is achievable at kerb weight without driver plus 200 kg payload Optional equipment could reduce...

Page 222: ...km h Manual transmission 172 180 192 212 Automatic transmission 207 7 The maximum speed indicated is achievable at kerb weight without driver plus 200 kg payload Optional equipment could reduce the s...

Page 223: ...7 1 7 1 8 0 8 0 9 6 8 4 9 9 8 9 9 9 extra urban l 100 km 4 6 4 6 4 7 4 7 5 5 5 2 5 7 5 6 5 7 total l 100 km 5 5 5 5 5 9 5 9 6 9 6 4 7 2 6 8 7 3 CO2 g km 129 129 139 139 163 149 169 160 170 Engine A13...

Page 224: ...9 6 8 6 9 9 8 8 10 1 extra urban l 100 km 5 1 4 9 4 9 5 5 5 3 5 7 5 6 5 8 total l 100 km 5 9 6 1 6 1 7 0 6 6 7 2 6 8 7 4 CO2 g km 139 144 144 164 154 169 159 174 Engine A13DTE A17DTJ A17DTR A20DTH eco...

Page 225: ...tomatic transmission without with air conditioning kg A14XEL 1373 1388 A14XER 1373 1388 A14NEL 1393 1408 A14NET 1393 1408 1453 A16LET 1490 1503 A16XER 1393 1408 1443 A13DTE 1393 1408 A13DTE8 1393 1408...

Page 226: ...ual transmission Automatic transmission without with air conditioning kg A14XEL 1545 A14XER 1545 A14NEL 1611 A14NET 1611 1613 A16LET 1613 1665 A16XER 1578 1613 A13DTE 1571 A13DTE8 1571 without with ai...

Page 227: ...al equipment Sports tourer Engine Manual transmission Automatic transmission without with air conditioning kg A14XER 1393 1408 A14NEL 1471 1486 1503 A14NET 1437 1452 1503 A16LET 1503 1550 A16XER 1437...

Page 228: ...kg A14XER 1571 A14NEL 1664 1664 A14NET 1664 1664 A16LET 1664 1701 A16XER 1613 1664 A17DTJ 1733 A17DTR 1733 A20DTH 1733 1733 Vehicle dimensions 5 door hatchback Sports tourer Length mm 4419 4698 Width...

Page 229: ...721 Wheelbase mm 2685 2685 Turning circle diameter m 11 5 11 5 Capacities Engine oil Engine A14XEL A14XER A14NEL A14NET A16LET A16XER including Filter l 4 0 4 0 9 4 0 4 5 4 5 between MIN and MAX l 1 0...

Page 230: ...bar psi kPa bar psi kPa bar psi kPa bar psi kPa bar psi A14XER A14XEL 205 55 R16 220 2 2 32 220 2 2 32 270 2 7 39 270 2 7 39 230 2 3 33 270 2 7 39 205 60 R16 215 50 R17 225 45 R17 A14NET A14NEL A16 X...

Page 231: ...11 230 2 3 33 230 2 3 33 270 2 7 39 270 2 7 39 240 2 4 35 280 2 8 41 215 60 R16 225 50 R17 235 45 R18 235 40 R19 240 2 4 35 220 2 2 32 250 2 5 36 290 2 9 42 205 60 R1612 250 2 5 36 230 2 3 33 260 2 6...

Page 232: ...a bar psi kPa bar psi kPa bar psi A17DTJ 205 65 R1612 11 230 2 3 33 230 2 3 33 270 2 7 39 270 2 7 39 240 2 4 35 280 2 8 41 215 60 R16 225 50 R17 235 45 R18 205 55 R16 240 2 4 35 220 2 2 32 250 2 5 36...

Page 233: ...a bar psi kPa bar psi kPa bar psi A17DTR 205 65 R1612 11 230 2 3 33 230 2 3 33 270 2 7 39 270 2 7 39 240 2 4 35 280 2 8 41 215 60 R16 225 50 R17 235 45 R18 205 55 R16 240 2 4 35 220 2 2 32 250 2 5 36...

Page 234: ...a bar psi A20DTH 205 65 R1612 11 230 2 3 33 230 2 3 33 270 2 7 39 270 2 7 39 240 2 4 35 280 2 8 41 215 60 R16 225 50 R17 235 45 R18 235 40 R19 240 2 4 35 220 2 2 32 250 2 5 36 290 2 9 42 205 60 R1612...

Page 235: ...Technical data 235 Towing hitch installation dimensions...

Page 236: ...o the vehicle is required This will take place when the vehicle is serviced in a workshop Some data is electronically fed into global diagnostic systems The manufacturer will not access information ab...

Page 237: ...ng and ignition system security It is also used in connection with conveniences such as radio remote controls for door locking unlocking and starting and in vehicle transmitters for garage door opener...

Page 238: ...l 120 Automatic locking 24 Automatic transmission 145 Auxiliary heater 135 B Battery 171 Battery discharge protection 128 Battery voltage 111 Bicycle rack 58 Bonnet 167 Brake and clutch fluid 210 Brak...

Page 239: ...y lighting 127 Event data recorders 236 Exit lighting 128 Exterior care 206 Exterior light 100 Exterior lighting 13 F Fault 147 First aid kit 80 Fixed air vents 136 Flex Fix system 58 Fog light 100 Fo...

Page 240: ...gs 22 Mirror adjustment 8 Misted light covers 126 N New vehicle running in 139 Number plate light 181 O Odometer 90 Oil engine 210 214 Outside temperature 87 Overrun cut off 140 P Parking 18 143 Parki...

Page 241: ...off 98 Traffic sign assistant 108 Trailer stability assist 165 Trailer towing 162 Transmission 17 Transmission display 145 Tread depth 192 Trip computer 112 Trip odometer 90 Turn and lane change sign...

Page 242: ...242...
Reviews: