ADA-8402-B User Manual (Iss. 02)
Installation • 2–3
Installing the ADA-8402-B
This section outlines how to install a rear module and card in an openGear frame. The same
procedure applies regardless of the frame or card type. However, the specific rear module you
need to install depends on the frame you are using.
Rear Modules for the ADA-8402-B
The rear module for the ADA-8402-B depends on the openGear frame you are installing the card
into.
•
DFR-8310 series frame
— When installing the ADA-8402-B in the DFR-8310 series
frames, the
8310AR-042
rear module is required. The ADA-8402-B is not compatible
with the DFR-8310-BNC frame.
•
DFR-8321
series frame
— When installing the ADA-8402-B in the DFR-8321 series
frames, the
8320AR-042
Full Rear Module, or the
8320AR-043
Split Rear Module can
be used. When using a Full Rear Module, use the even numbered slots, such as 2 or 4, to
ensure that the card aligns with the rear module.
Installing a Rear Module
If the rear module is already installed, proceed to the section “
Installing the ADA-8402-B
” on
page 2-4.
To install a rear module in your openGear frame
1.
Locate the card frame slots on the rear of the frame.
2.
Remove the Blank Plate from the slot you have chosen for the ADA-8402-B installation.
3.
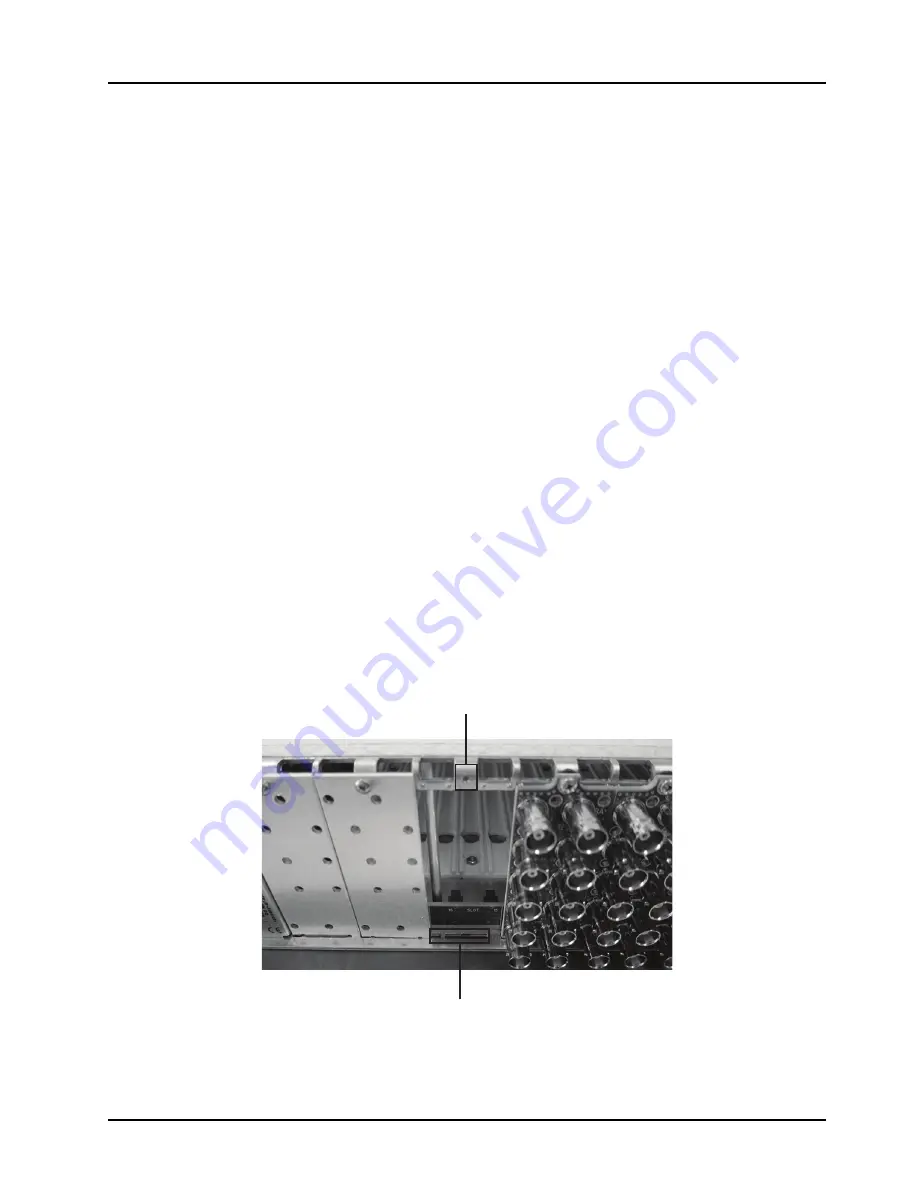
Install the bottom of the rear module in the
Module Seating Slot
at the base of the
frame’s back plane. (
Figure 2.1
)
Figure 2.1
Rear Module Installation in an openGear Frame (ADA-8402-B not shown)
4.
Align the top hole of the rear module with the screw on the top-edge of the frame back
plane.
Screw Hole
Module Seating Slots


