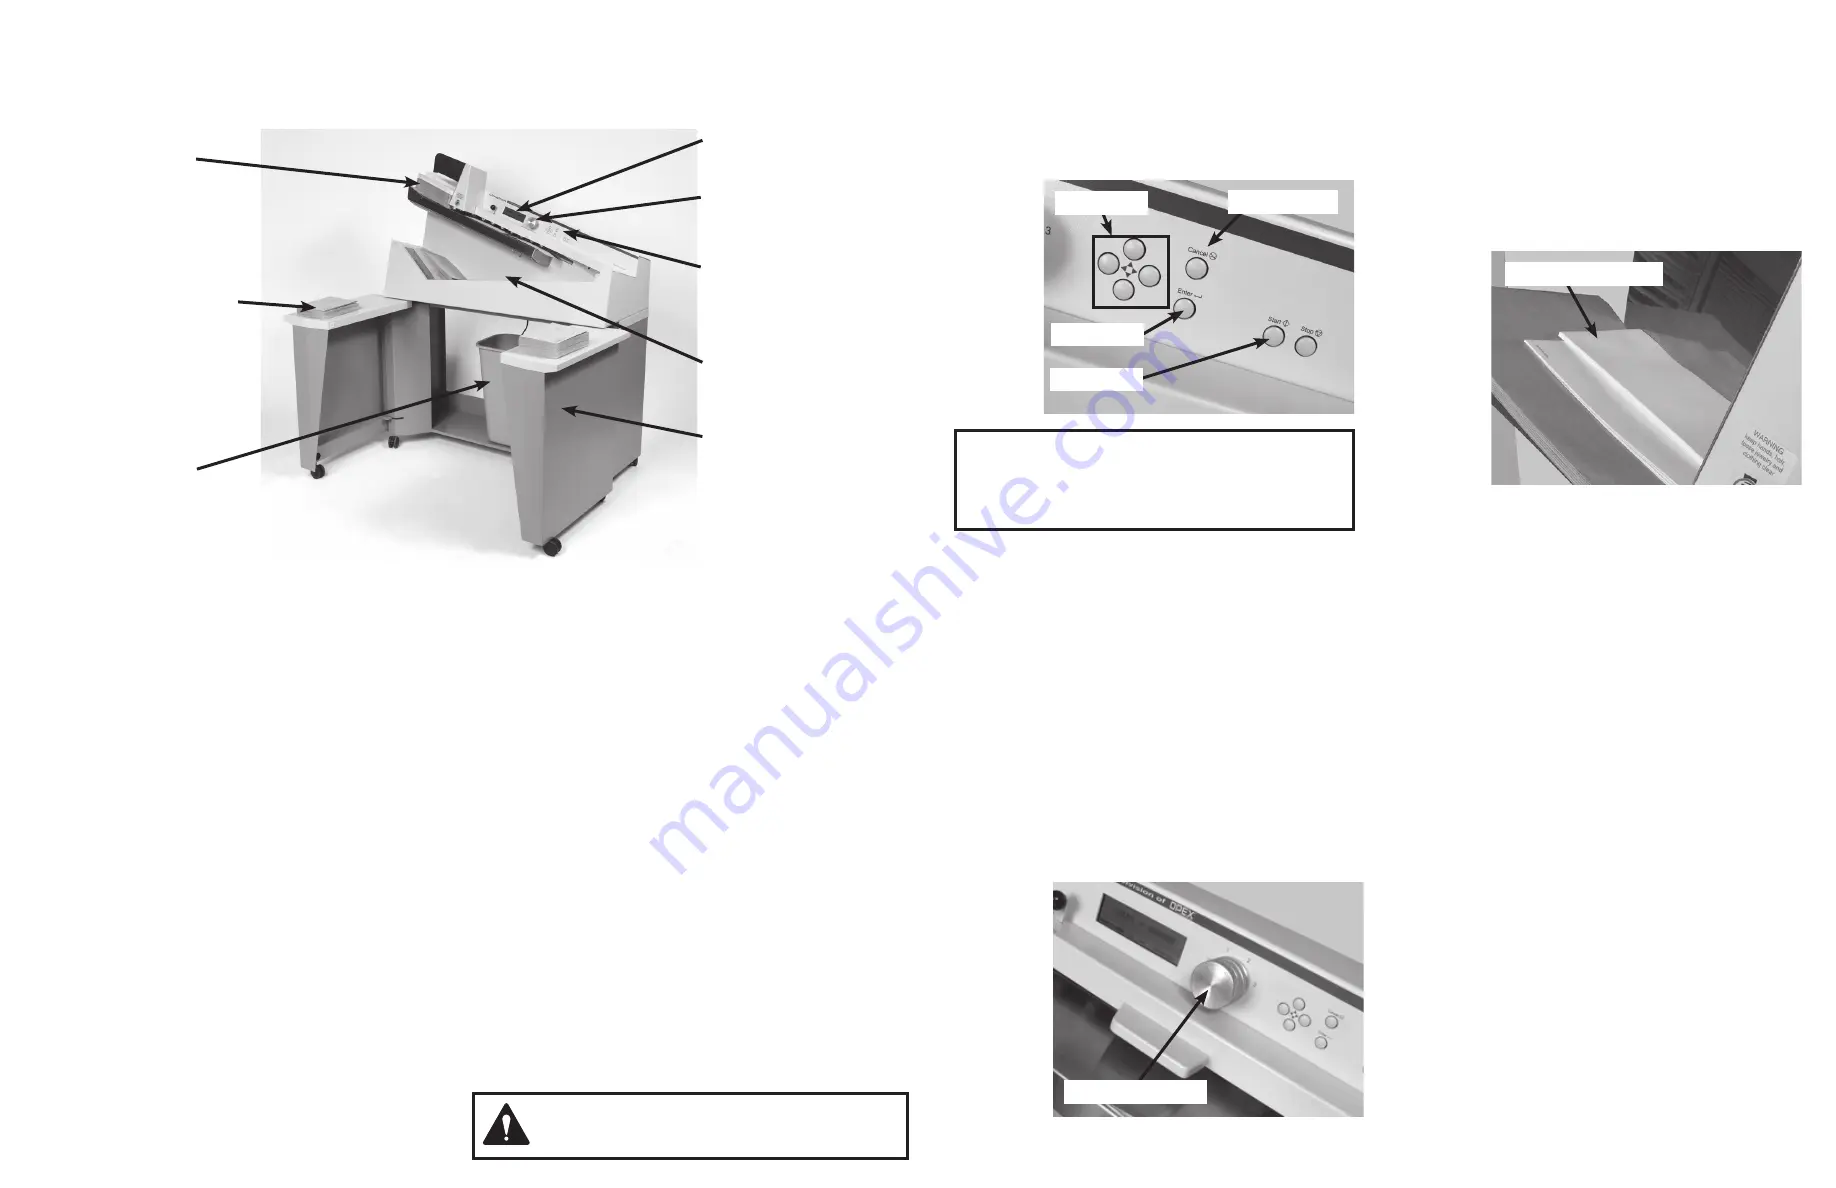
Envelope Feed
Hopper
206 Letter Opener
Identification
Safety
Follow the normal safety precautions for all office equipment:
• Use only Pitney Bowes approved supplies, in particular
aerosol dusters. Improper storage and use of aerosol
dusters or flammable aerosol dusters can cause an
explosive-like condition that could result in personal injury
and/or property damage. Never use aerosol dusters
labeled flammable and always read instructions and safety
precautions on the duster label.
• To obtain supplies, please contact our Supply Line™ to
place orders. Material Safety Data Sheets can be obtained
on the web or from our Supply Line™. Refer to the Contact
Information List for more information.
• Use the power cord supplied with the machine and plug
it into a properly grounded wall outlet located near the
machine and easily accessible. Failure to properly ground
the machine can result in severe personal injury and/or
fire.
• Avoid touching moving parts or materials while the
machine is in use. Keep hands, loose clothing, jewellery
and long hair away from all moving parts.
• Do not remove covers or defeat safety interlock switches.
Covers enclose hazardous parts that should only
be accessed by properly trained service personnel.
Immediately report to service any damaged or non-
functioning components that renders the unit unsafe.
• Place the unit in an accessible location to allow for proper
venting of the equipment and to facilitate servicing.
• The power cord wall plug is the primary means of
disconnecting the machine from the AC supply.
• Do not use an adapter plug on the line cord or wall outlet.
• Do not remove the ground pin from the line cord.
• Avoid using wall outlets that are controlled by wall
switches, or shared with other equipment.
• Do not route the power cord over sharp edges or trap
between furniture.
• Ensure there is no strain on the power cord and that it
does not become jammed between the equipment, walls
or furniture.
• Be certain the area in front of the wall receptacle into
which the machine is plugged is free from obstruction.
• Before clearing a stoppage, be sure machine mechanisms
come to a stop.
• When removing stalled material, avoid using too much
force to protect against minor personal injury and
damaging equipment.
• To prevent overheating, do not cover any vent openings.
• Operation of this equipment without periodic maintenance
will inhibit optimum operating performance and could
cause the equipment to malfunction. Contact your machine
supplier for required service schedule.
• Read all instructions before attempting to operate the
equipment.
• Use this equipment only for its intended purpose.
• Always follow the specific occupational safety and health
standards for your workplace.
WARNING: THIS EQUIPMENT MUST BE EARTHED
The socket outlet should be near to the equipment and
should be easily accessible.
Operation
Setting up the 206
1.
Press the Start Button- See Pic Below.
The control
centre will automatically boot up presenting the run
screen. The run screen will have selectable informa-
tion such as count, machine parameters and normal
run modes.
2.
Preparing to Run.
Re-set count if necessary by us-
ing the left and right arrow keys to move the high
lighted menu to Reset Count. Press Enter. After
re-setting the count, use the arrow keys to return to
the Run menu (See Pic Above).
3.
Depth of Cut.
Choose the appropriate settings for
depth of cut. there are four selectable pre-set posi-
tions available (See Pic Below).
•
0
is a no cut option- This setting can be used
for count only.
•
1
is the minimum cut. Use for normal thick-
ness.
•
2
is the 1.6mm (1/16th”) setting- Use for
slightly thicker mail and overnight type flat.
•
3
is 3mm (1/8th”)- Recommended for very
deep cuts only.
Mail Tray
Support Open
Position
Chip Bin
Back Lit
Display
Depth of Cut
Adjustment
Key Pad Enter,
Cancel, Arrow
Keys
Envelope
Conyevor
Mail Tray
Support Open
Position
All operator choices are made using the four arrow keys:
UP( ) DOWN( ) LEFT( ) RIGHT( )
Choices are entered by pressing ENTER.
Return to previous screen by pressing CANCEL.
<
<
<
<
Starting the Machine
After setting up the machine and with the feed hopper empty.
Press the Enter Button- See Pic Below.
The 206 will turn
on. You may now begin loading mail into the envelope feeder
hopper. Normally the operator can load a comfortable handful
of mail directly from the post office mail trays.
Auto start.
See Machine Settings to set up the 206 to start
automatically when mail is loaded into the feed hopper.
Stopping the Machine and Stoppages
Press the Cancel Button.
The 206 will turn off. From time to
time the machine may experience a stoppage. If a stoppage
occurs an error message will appear on the main run screen.
Simply clear the visable stoppage and press Enter to re-start
the machine.
Start Button
Enter Button
Arrow Keys
Depth of Cut Wheel
5.
Preparing the Mail.
Very little preparation of the mail
is required. Handfuls of mail can quickly be loaded
into the feed area. A simple tap to align the top or
leading edge may be necessary in some cases.
Envelopes of different sizes and thicknesses can be
run at the same time. See Pic Below.
Feed Hopper Loaded
Cancel Button
4.
Staging the Mail.
The convenient mail tray supports
may be used to hold mail trays etc. The doors to the
206’s integrated stand can be opened or closed de-
pending on your needs.


