Calibration, Maintenance, and Troubleshooting
StarBright User Manual
114
14.7
Maintenance
14.7.1
Maintenance of Thermopile Sensors
To trace the signal from the Thermopile Sensor to StarBright:
1.
With the instrument on, apply an approximately known amount of power to the sensor. This
test can be performed using either a laser or an electrical power supply and the calibration
resistor.
2.
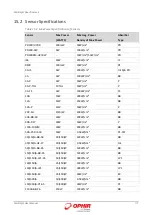
Estimate the approximate signal current that should be developed by the sensor by
multiplying the input power by the sensor-sensitivity shown in
3.
Using a multimeter set to current, unplug the sensor from the StarBright and check that this
current appears between pin 1 and 9 of the D type plug.
14.7.2
Battery Replacement
If the StarBright battery is defective and does not hold a charge, a replacement can be ordered
from your agent (Ophir part number 7E14008). The new battery is installed as follows:
1.
Ensure the StarBright is switched OFF. Turn the StarBright meter upside down and unscrew
the 5 Phillips screws on the bottom panel of the StarBright.
2.
Remove the bottom panel and disconnect the battery connector (red and black leads) from
the circuit, by holding the two wires firmly and tugging them firmly in a direction away from
the circuit board.
3.
Insert the new battery into the same location in place of the old battery. Reconnect the
battery connector into its terminal on the circuit board. The RED and BLK (black) symbols on
the circuit board indicate the correct direction to insert the connector into its terminal. It can
only be inserted in one direction.
4.
Replace the bottom panel of the StarBright and close the 5 screws.
5.
Switch on the StarBright with NO SENSOR DETECTOR attached and set the date and time of
the instrument correctly.
.)


