background image

101.141

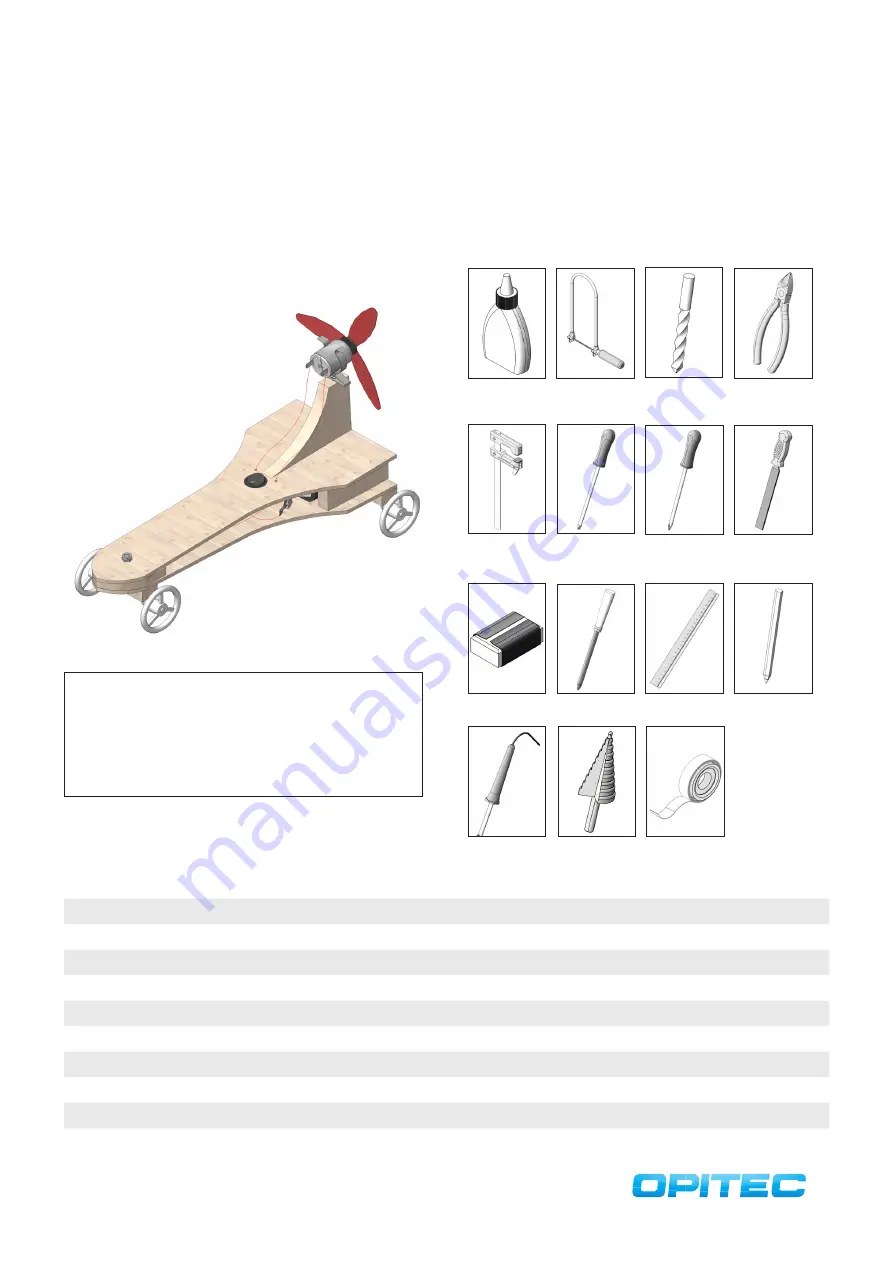
LT-Racer with Propeller Drive

Contents List:

Qty:

Size (mm):

Designation:

 Part No.:

Plywood

2

250x100x3

Base and Cover Plate

1

Plywood

1

80x50x10

Motor Mount

2

Wooden Strip

1

150x15x10

Bearing Spider

3

Wooden Strip

1

150x25x10

Battery Compartment

4

Plywood

1

60x45x6

Intermediate Piece

5

Impeller

4

ø37

Wheels

6

Spacers

4

ø5

Spacer for Wheels

7

Eye Bolt

4

12

Shaft Spider

8

Metal Axis

1

 120x3

Rear Axle 

9

Metal Axis

1

70x3

Front Axle

10

Required Tools:

Fretsaw

Wood Glue,

Drill

Side Cutter,

Locking Clamp Slot Screwdriver

Ruler

Pencil

Sandpaper

Round File

Phillips Screwdri-

ver

Engineer´s File

Soldering Iron

ø 2

ø 4

ø 8

Step Dril

ø 15

Adhesive Tape

Please Note

The OPITEC range of projects is not intended as play toys for young child-

ren.They are teaching aids for young people learning the skills of Craft, 

Design and Technology.These projects should only be undertaken and te-

sted with the guidance of a fully qualified adult.

The finished projects are not suitable to give to children under 3 years 

old. Some parts can be swallowed. Danger of suffocation! 

Summary of Contents for 101.141

Page 1: ...Front Axle 10 Required Tools Fretsaw Wood Glue Drill Side Cutter Locking Clamp SlotScrewdriver Ruler Pencil Sandpaper Round File PhillipsScrewdri ver Engineer s File Soldering Iron 2 4 8 Step Dril 15...

Page 2: ...onnection Front 16 Washer 2 9 4 3 Washer 17 Jumper Wire Red 1 500 Cabling 18 Blade Receptacle 2 Battery Connection 19 Propeller Blade 3 Propeller 20 Cylinder Head Screw 3 6x2 Propeller 21 Propeller Hu...

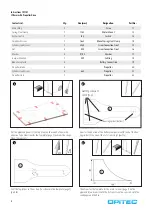
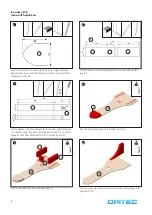
Page 3: ...rding to the instructions and clen the saw cuts Cut the wooden strip 3 according to the instructions and clen the saw cuts Take the 45mm long piece and drill a 4mm big hole in it as shown Moreover dri...

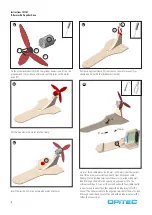
Page 4: ...er part and connect it to the external switch port Connect the second end with the middle switch connector and connect the other end with a blade receptacle 19 Connect the 200mm cable to the negative...

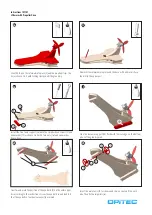
Page 5: ...al axis 10 as shown and clip on spacers 7 on each side Then fix the impellers 6 6 7 20 Transfer and mark the position oft he eye bolts 8 on the axle suppor ters according to the instructions Screw the...

Page 6: ...22 Instructions 101 141 LT Racer with Propeller Drive Insert battery and get on the road Insert the metal axis 9 as shown and clip on spacers 7 on each side Then fix the impellers 6 9 6 6 7 7...

Page 7: ...Instructions 101 141 LT Racer with Propeller Drive Front Position Rear Axle Position Battery Compartment Battery Compartment Battery Compartment Connecting Piece Motor Bracket...

Reviews: