2
E114033#1
Instructions
Step 1:
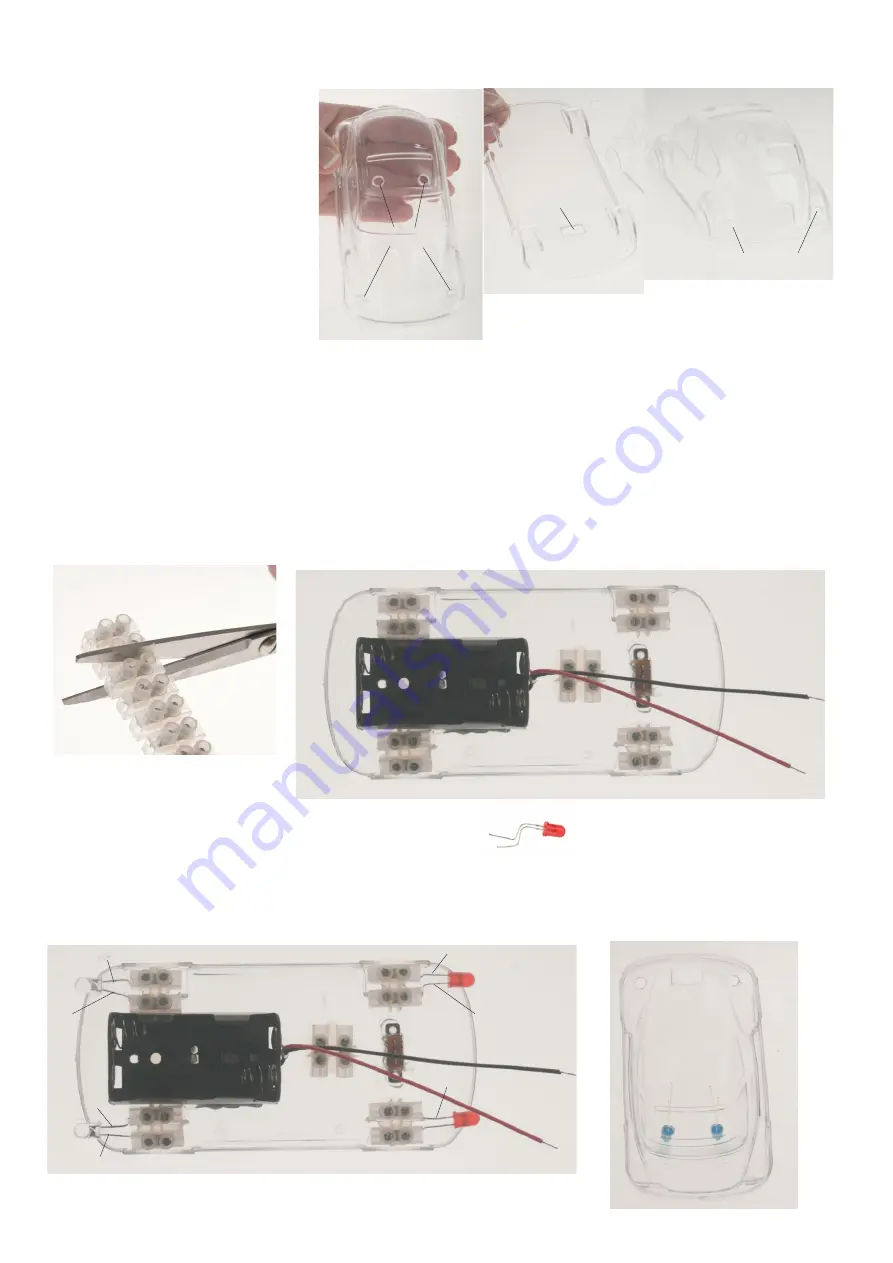
Take hold of the acrylic car (1) and drill
the two holes 5mm dia. in ( front lights ) !
Turn the car over and drill the two rear
lights 5mm dia.
The drill the two 5mm holes in the roof
5mm dai. 25 mm apart
Take the base make the the slot for the
switch (9) 12 x 6mm and file to shape.
Hole ø 5mm
Cut out for
switch
12x6 mm
Hole ø 5mm
Note:
Drill the acrylic slowly, otherwise the acrylic will split! We recommend drilling the holes in steps, first a ø2, then ø4 and finally
use a ø5mm drill bit
Step 2:
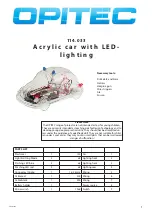
Cut off from the connector block(6)
five lots of 2 pole sections.
Step 3:
Glue the connector blocks (in twos -2-pole) with hot glue into the base of the car as
shown. Glue the micro switch (10) in the slot (12x6) , so that the connections are on the
inside. Glue the battery holder (8) between the two connector blocks at the front.
Note: If you want to paint the car, do it before adding the wiring!
Anode
Cathode
(side with flat)
Cathode
(side with flat)
Anode
Cathode
(side with flat)
Anode
Anode
Cathode
(side with flat)
Step 4:
The two white light diodes (2) are inserted in the front connector block (Battery hol-
der end) as shown and screwed in place. Note the position of the Anode and Catho-
de. Mount the two red LEDs (4) in the rear connector block (Switch side) and screw
them in place as shown. Note the position of the Anode and Cathode- see diagram )
Step 5:
The blue LEDs (3) are glued in the
top holes as shown
Insert the red and white LEDS in position as shown and bend the
legs.


