background image

3

6

7

+

+

-

-

+

-

+

-

+

+

-

+

-

-

8

9

6

3

9

10

8

10

7

10

11

Instructions 116.415 Hologram

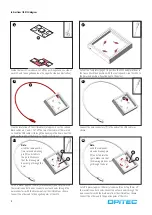
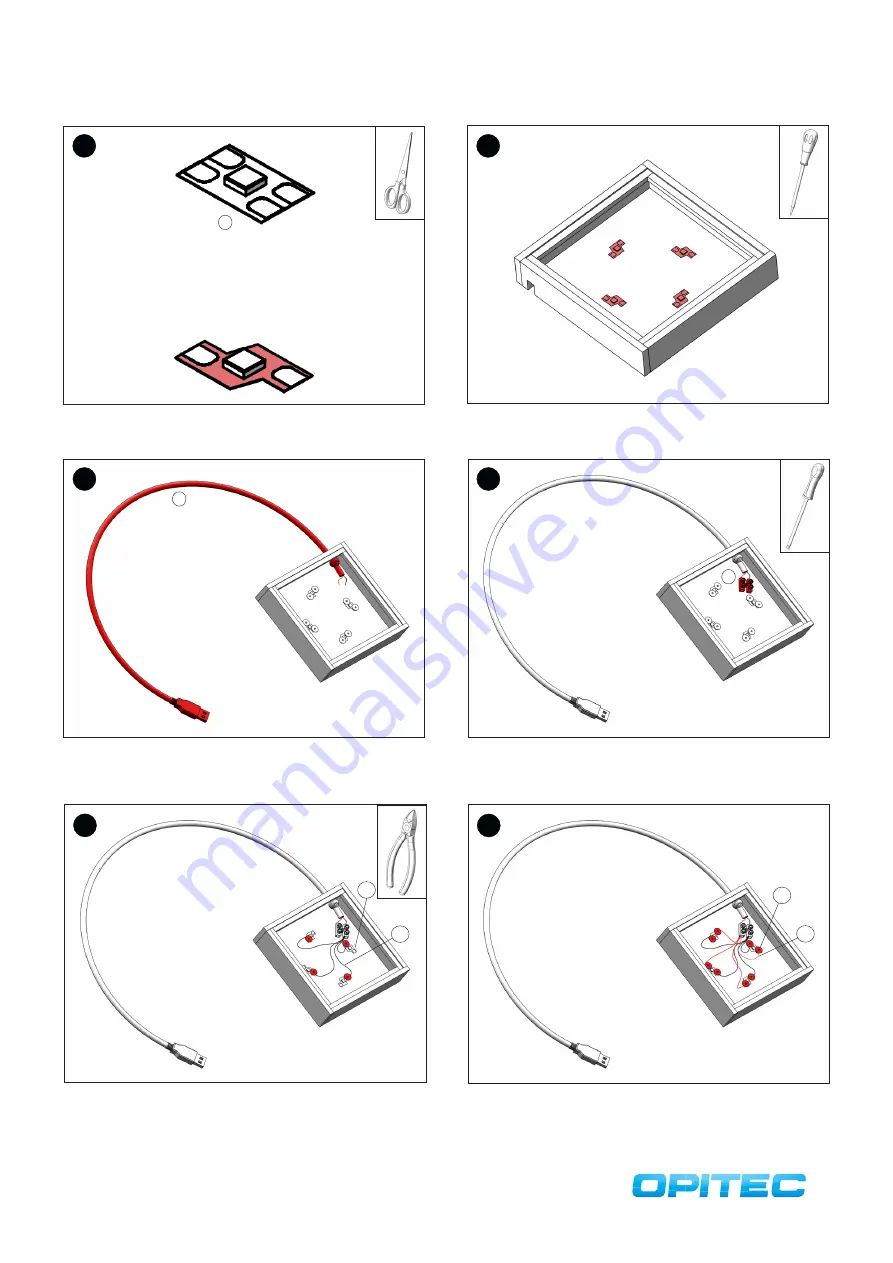
Divide the four LEDs as shown. Cut off the positive pole on one side of 

each LED and the negative pole on the opposite side (see illustration).

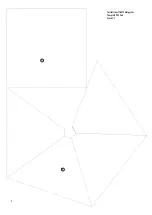
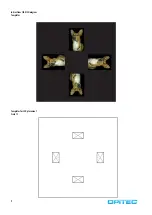
Cut out the templates (page 9) to position the LEDs and place them in 

the frame. Mark their position with the centre punch. Glue the LEDs to 

the 4 marked position. Pay attention to the poles!

Strip the insulation off the USB cable (3) at approx. 4 cm. The red and 

black cables are ‘+’ and ‘-‘. Cut off the two other cables at the insulati-

on. Feed the USB cable (3) through the opening in the frame. Knot the 

cable on the inside of the frame, so that it can’t slip out.

Connect the wire connectors (9) to the ends of the USB cables as 

shown.

Cut off 4 pieces (approx. 100mm) of red wire (8) and strip 10mm off 

the insulation on both ends. Connect one of each ends through the 

wire connectors with the black wire from the USB cable as shown. 

Connect the other end to the positive poles of the LEDs.

Note: 

wind the cable ends 

around a drawing pin 

(10) and stick into the 

+pole. Make sure that 

the drawing pin does not 

go through the base!

Cut off 4 pieces (approx. 100mm) of black wire (7) and strip 10mm off 

the insulation on both ends. Connect one of each ends through the 

wire connectors with the black wire from the USB cable as shown. 

Connect the other end to the negative poles of the LEDs.

Note: 

wind the cable ends 4-5 

times around a drawing 

pin (10) and stick into 

the -pole. Make sure 

that the drawing pin 

does not go through the 

base!

Summary of Contents for 116415

Page 1: ...Wiring 10 Tools required Please Note The OPITEC range of projects is not intended as play toys for young child ren They are teaching aids for young people learning the skills of Craft Design and Technology These projects should only be undertaken and operated with the guidance of a fully qualified adult The finished projects are not suitable to give to children under 3 years old Some parts can be ...

Page 2: ...Tidy up the ends Cut a recess 10x5mm from one of the strips Transfer dimensions on to wooden strip 2 Cut two pieces 105x5mm from each length of wood Tidy up the ends 1 2x 2 Glue a wooden strip 2 to each of the wooden strips 1 using the measurements shown Glue the four sides to the base 4 as shown to create a frame Let the glue dry thoroughly 2 1 ...

Page 3: ...ut Connect the wire connectors 9 to the ends of the USB cables as shown Cut off 4 pieces approx 100mm of red wire 8 and strip 10mm off the insulation on both ends Connect one of each ends through the wire connectors with the black wire from the USB cable as shown Connect the other end to the positive poles of the LEDs Note wind the cable ends around a drawing pin 10 and stick into the pole Make su...

Page 4: ...sen picture on a black background and reduce the size Copy the picture four times The pictures have to be identical and of identical size Place at the same distance but rotate by 90 Fix the template to the rest of the foil with sticking tape and cut out Building the prism Score the lines of the three segments with a craft knife or a pair of scissors as shown in the template Fold all four sides to ...

Page 5: ...A B 5 Instructions 116 415 Hologram Template PVC Foil Scale 1 1 ...

Page 6: ...6 ...

Page 7: ...7 Instructions 116 415 Hologram Templates ...

Page 8: ...8 ...

Page 9: ...9 Instructions 116 415 Hologram Templates Templates for LED placement Scale 1 1 ...

Reviews: