background image

Page  

5

Unpacking

The microscope is housed in a moulded Styrofoam container. Remove the tape from the edge of the container 

and lift the top half of the container. Take some care to avoid that the optical items (objectives and eyepieces) 

fall out and get damaged. Using both hands (one around the arm and one around the base), lift the microscope 

from the container and put it on a stable desk.

Using the microscope

Fig.1

Fig.2

Fig.

3

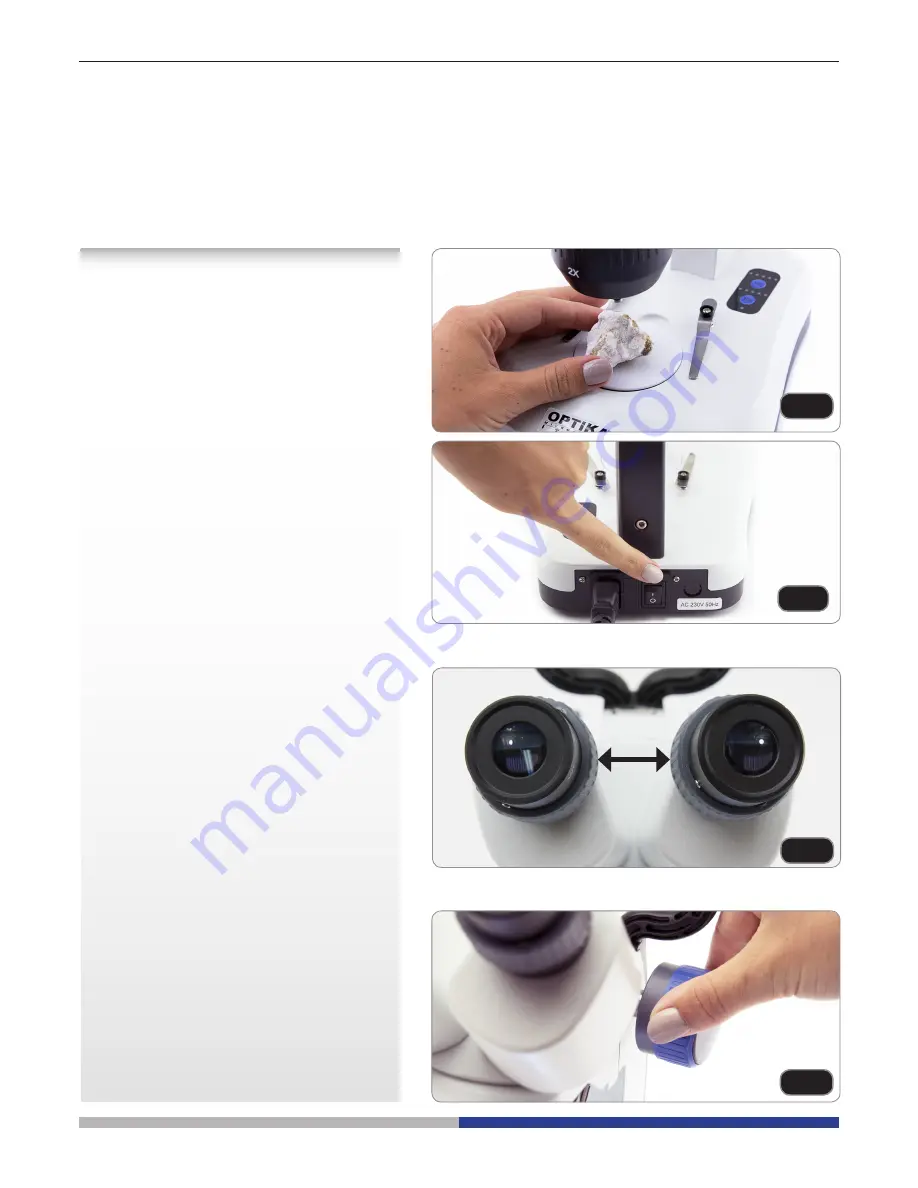
1. Place the specimen on the stage

Place  the  specimen  on  the  microscope

stage  and  lock  the  specimen  using  the

slide-clamp if it is necessary. Ensure that

the specimen is centred over the stage

opening. (Fig.1)

2. Turn on the light

The  microscope  comes  with  an  electrical


illuminator. Insert the plug of the cable into


the power socket, turn on the switch on the


main  body  and  select  your  light  source.

(Fig.2)

3. Adjust interpupillary distance

Hold  the  right  and  left  parts  of  the


observation  head  by  both  hands  and


adjust  the  interpupillary  distance  by


turning  the  two  parts  until  one  circle  of


light  can  be  seen.  If  two  circles  appear,


the interpupillary  distance  is too big, and


if  two  overlapped  circles  appear,  the


interpupillary distance is too small. (Fig.

3

)

4. Focus

Rotate  the  focusing  knob  to  bring  the


sample  into  focus  with  the  highest


magnification. (Fig.

4

)

Fig.

4

Summary of Contents for ST-50Led

Page 1: ...v 1 3 2017 Model ST 50Led SFX STEREO Series INSTRUCTION MANUAL...

Page 2: ...Page 2...

Page 3: ...in this manual CAUTION This symbol indicates a potential risk and alerts you to proceed with caution ELECTRICAL SHOCK This symbol indicates a risk of electrical shock Safety Information Avoiding Elec...

Page 4: ...Page 4 Overview ST 50Led OBJECTIVE EYEPIECES DIOPTRIC COMPENSATION STAND ON OFF SWITCH FLEXIBLE ARM LED ILLUMINATOR FOCUS KNOB...

Page 5: ...clamp if it is necessary Ensure that the specimen is centred over the stage opening Fig 1 2 Turn on the light The microscope comes with an electrical illuminator Insert the plug of the cable into the...

Page 6: ...for people with glasses to adjust the microscope to their eyes and use the microscope without glasses Adjust the diopter compensation ring of the right eyepiece tube until the image of the right eyep...

Page 7: ...e equipment and that the lamp switch is in off position Users should observe all safety regulations of the region The equipment has acquired the CE safety label However users do have full responsibili...

Page 8: ...ther waste The separate collection of this equipment at the end of its lifetime is organized and managed by the producer The user will have to contact the manufacturer and follow the rules that he ado...

Page 9: ...x 39 035 571 435 info optikamicroscopes com www optikamicroscopes com OPTIKA Spain spain optikamicroscopes com OPTIKA USA usa optikamicroscopes com OPTIKA China china optikamicroscopes com OPTIKA Hung...

Reviews: