background image

14

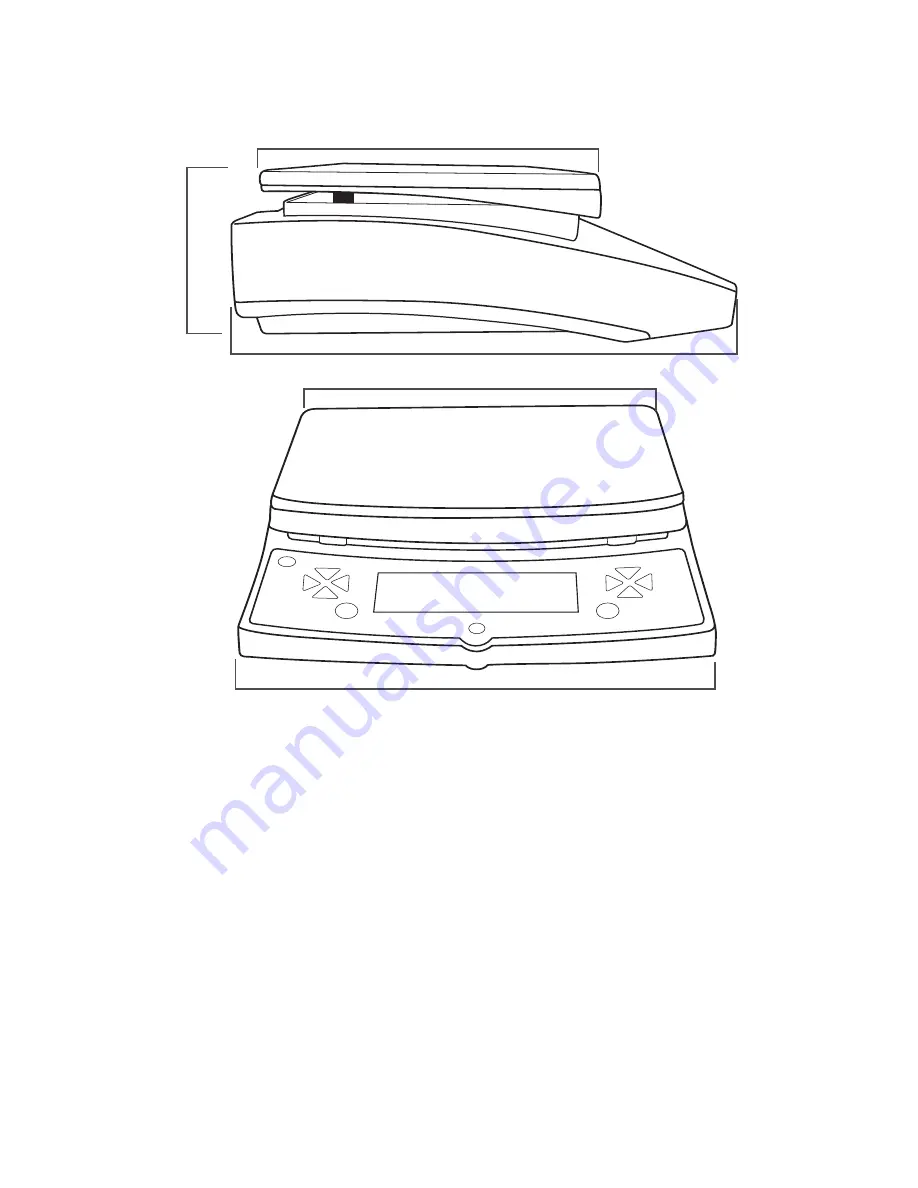
DIMENSIONS

CONTACT US

Please e-mail sales@optimascale.com for any sales related question

Please e-mail support@optimascale.com for any support related questions

Don’t forget to visit our website at:

optimascale.com

12”

12”

4.5”

11.5”

8.5”

Summary of Contents for OPH-Z

Page 1: ...OPH Z WEIGHING SCALE USER S MANUAL optimascale com ...

Page 2: ...ABLE OF CONTENTS Safety Precautions 1 Preparations and Set Up 2 Key Explination 3 Display Explination 4 Calibration 5 Operating Instructions 6 Settings 7 11 Sepecifications 12 Dimensions 13 Contact Us 13 ...

Page 3: ...ight is not over the Max capacity as it could damage the load cell inside Do not spill liquids on the balance as it is not water resistant Liquids may damage the case and any liquid inside may cause damage to the electronics Material that has a static electric charge could influence the weighing Dis charge the static electricity of the samples if possible Another solution to the problem is to wipe...

Page 4: ...ndow Do not expose machine to extreme heat or cold Keep scale in a clean dry lo cation because dust dirt and moisture can accumulate on the weighing sensor Plug into a wall outlet to avoid interference with other wirings Turn on the balance while there is no load on the pan Allow scale to warm up for 1 minute before use Calibration may be required before weighing when the balance is initially in s...

Page 5: ...last menu pressing CAL will confirm the present status and return to either the previous menu or enter into a weighing function such as density dynamic Unit Move Key To switch between measuring units Move the cursor flashing digit to the left When all digits flash press UNIT to change to a single digit flash Print Cycle Key When manual printing mode press PRINT to send weighing data to the printer...

Page 6: ...r Display Divider Line Unit Price Time Number Item Menu Item and Weighing Result Battery Symbol Zeroing Symbol Minus Symbol Tare Symbol Peak Holding Symbol Gross Net Tare Weight High Low Limit Symbol Unit Symbol Filter Symbol Sensitivity Symbol Density Symbol Dynamic Symbol Temperature Symbol ...

Page 7: ... Place your calibration weight on the scale If the scale reads the same value the calibration has succeeded If not please repeat calibration process How to Linear Calibrate Linear calibration Verify the pan is empty Press the CAL calibration key for about 5 seconds to enter into calibration mode When display shows CAL release the CAL key Press and hold the MODE key for about 5 seconds and the blin...

Page 8: ... taking away from the sample to count the number of objects on the scale This function can calculate the quantity with total weight divided by signal weight Press and hold MENU until the screen reads Mode Press CAL to enter and the screen will read COUNT Press CAL again and the screen will read SAMPLE Press CAL again to display the sample quantity ex 0000020 pcs Press PRINT to cycle through sample...

Page 9: ...plays the time Main window displays the unit status 6 Display Unit ct and flash OFF Turn off 7 Cycle to another unit oz and flash ON 8 Display Unit oz and flash OFF Repeat Step 7 8 can change unit on off one by one as follow ct oz ozt dwt GN lb N dr tlT tls tlH T T A R A R ms bat mom lb kg The default setting is all units was turn on 9 Confirm turning on or off the units 10 Setting is finished and...

Page 10: ...d select number 7 Display Day Operator can set day by Press UNIT key to move cursor and press PRINT to cycle and select number 8 Confirm the date and return to previous menu 9 Finish Setting and return to Standby Press and Hold MENU Key Short Press MENU Key Short Press CAL Key Short Press MENU Key Two Times Short Press CAL Key Short Press MENU Key Short Press MENU Key Short Press CAL Key Short Pre...

Page 11: ...r and press PRINT to cycle and select number 7 Display Second Operator can set second by Press UNIT key to move cursor and press PRINT to cycle and select number 8 Display Time Mode Operator can press PRINT key to select 24 hours or 12 hours 9 Confirm the Time and return 10 Setting finished and return to standby Press and Hold MENU Key Short Press MENU Key Short Press CAL Key Short Press MENU Key ...

Page 12: ...g and return to standby Instance Key Order Step Explanation LCD Screen Display Press and Hole MENU Key Short Press MENU Key Short Press CAL Key Short Press MENU Key Five Times Short Press PRINT Key Short Press CAL Key Short Press TARE Key 1 Display Menu 2 Enter Into Setting Menu 3 Display weighing range and precision menu 4 Enter into buzzer setting and flash ON 5 Turn off buzzer and flash OFF 6 C...

Page 13: ...y SOFT communicate with software Txxx communicate every XX seconds Can set time manually 4 Print Way Setting Press PRINT key can select NON turn off print KEY print only press PRINT key SOFT print by software order Txxx print every XX seconds Can set time manually 4 Peripheral Equipment Setting Press PRINT key can select KEY PRT KEY COM KEY ALL KEY NON Short Press CAL key to select KEY PRT and ret...

Page 14: ... 02666666000 0 02645544638 0 02671725000 0 08573532418 0 01 2 23 0 01 0 23 0 21700000000 0 06578947437 0 26670000000 1 12876677120 0 00100000000 Gram Carat Ounce Troy Ounce Pennyweight Grains Pound Newton Dram Taiwan Tael Singapore Tael Hong Kong Tael Tola tola anna rati T A R tola Mna rati T M R Mesghal Baht momme Parts per pound Kilogram Unit Signal Unit Unit Exchange Rate ...

Page 15: ...ion w peripheral data collection and printing Multiple weighing units Allows for flexibility of weighing Model OPH Z10 OPH Z20 OPH Z30 Capacity 10 kg 22 lb 20 kg 44 lb 30 kg 66 lb Resolution 0 1 g Repeatability 0 2 g Linearity Error 0 2 g Response Time 2 sec Calibration Calibration with External Weight Weighing Units g lb kg oz ct ozt pcs tIs tIT tIH dwt GN grain dr ms bat mom T A R Construction C...

Page 16: ...TACT US Please e mail sales optimascale com for any sales related question Please e mail support optimascale com for any support related questions Don t forget to visit our website at optimascale com 12 12 4 5 11 5 8 5 ...

Reviews: