Access and Play Back Your Recorded Programs Anytime
1. Press
DVR
.
2. Use the arrow keys to choose the
program you want to play back.
3. Press
SEL
to display your option.
4. After reviewing your selection, press DVR
to select another recorded program, or press
any channel to return to watching TV.
MANAGING RECORDING SPACE
How Much Recording Space Do I Have?
1. Press
DVR
.
2. Press to display the Preferences
screen, which displays the percentage of
space used.
Automatically Erasing Oldest
Recordings if Space is Needed
Turning Auto Erase on will automatically erase
your oldest recordings one by one until there is
enough space to record your new programs.
Note
: Any recordings that have a Save Time of
“Until I Erase” will not be automatically erased.
1. Press
DVR
.
2. Press to display the Preferences screen.
3. Choose
Turn ON Auto Erase
.
4. Press
SEL
.
How to Erase a Single Title
Press
DVR
to see your recordings.
Note
:
LIST
may appear on screen.
LIST
and
DVR
function in the
same way.
Using the
directional keys
( ), highlight the title you want to erase.
Press
SEL
for Options/Play. Using the
directional keys
(
), highlight
Erase
and press
SEL
. Press to erase or to cancel.
11
WATCHING YOUR RECORDINGS
10
"Design On A Dime"
Save: Until I erase
Recorded Programs
Options/Play
Scheduled Recordings
Preferences
Date
Time
Recorded List
Length
World Soccer
Extreme Homes
Design On A Dime
Home Matters
Thirteen Days
Wed 11/10
Wed 11/10
Mon 11/15
Sun 11/14
Mon 11/8
4:10am
8:10pm
12:00pm
12:30pm
8:00pm
30min
50min
30min
30min
1hr 30min
Recording Space Used:
Options
Scheduled Recordings
Preferences
Sort Recorded List by time recorded
Turn ON Auto Erase
Recording space used
Change Save Time for future recordings
Schedule a new Manual Recording
Recorded List
You currently have 10 recordings.
19%
Auto Erase is OFF.
Press if you want your oldest
recordings automatically erased to
make space for new ones.
Options
Scheduled Recordings
Preferences
Schedule a new Manual Recording
Sort Recorded List by time recorded
Turn ON Auto Erase
Recording space used
Change Save Time for future recordings
Recorded List
B
B
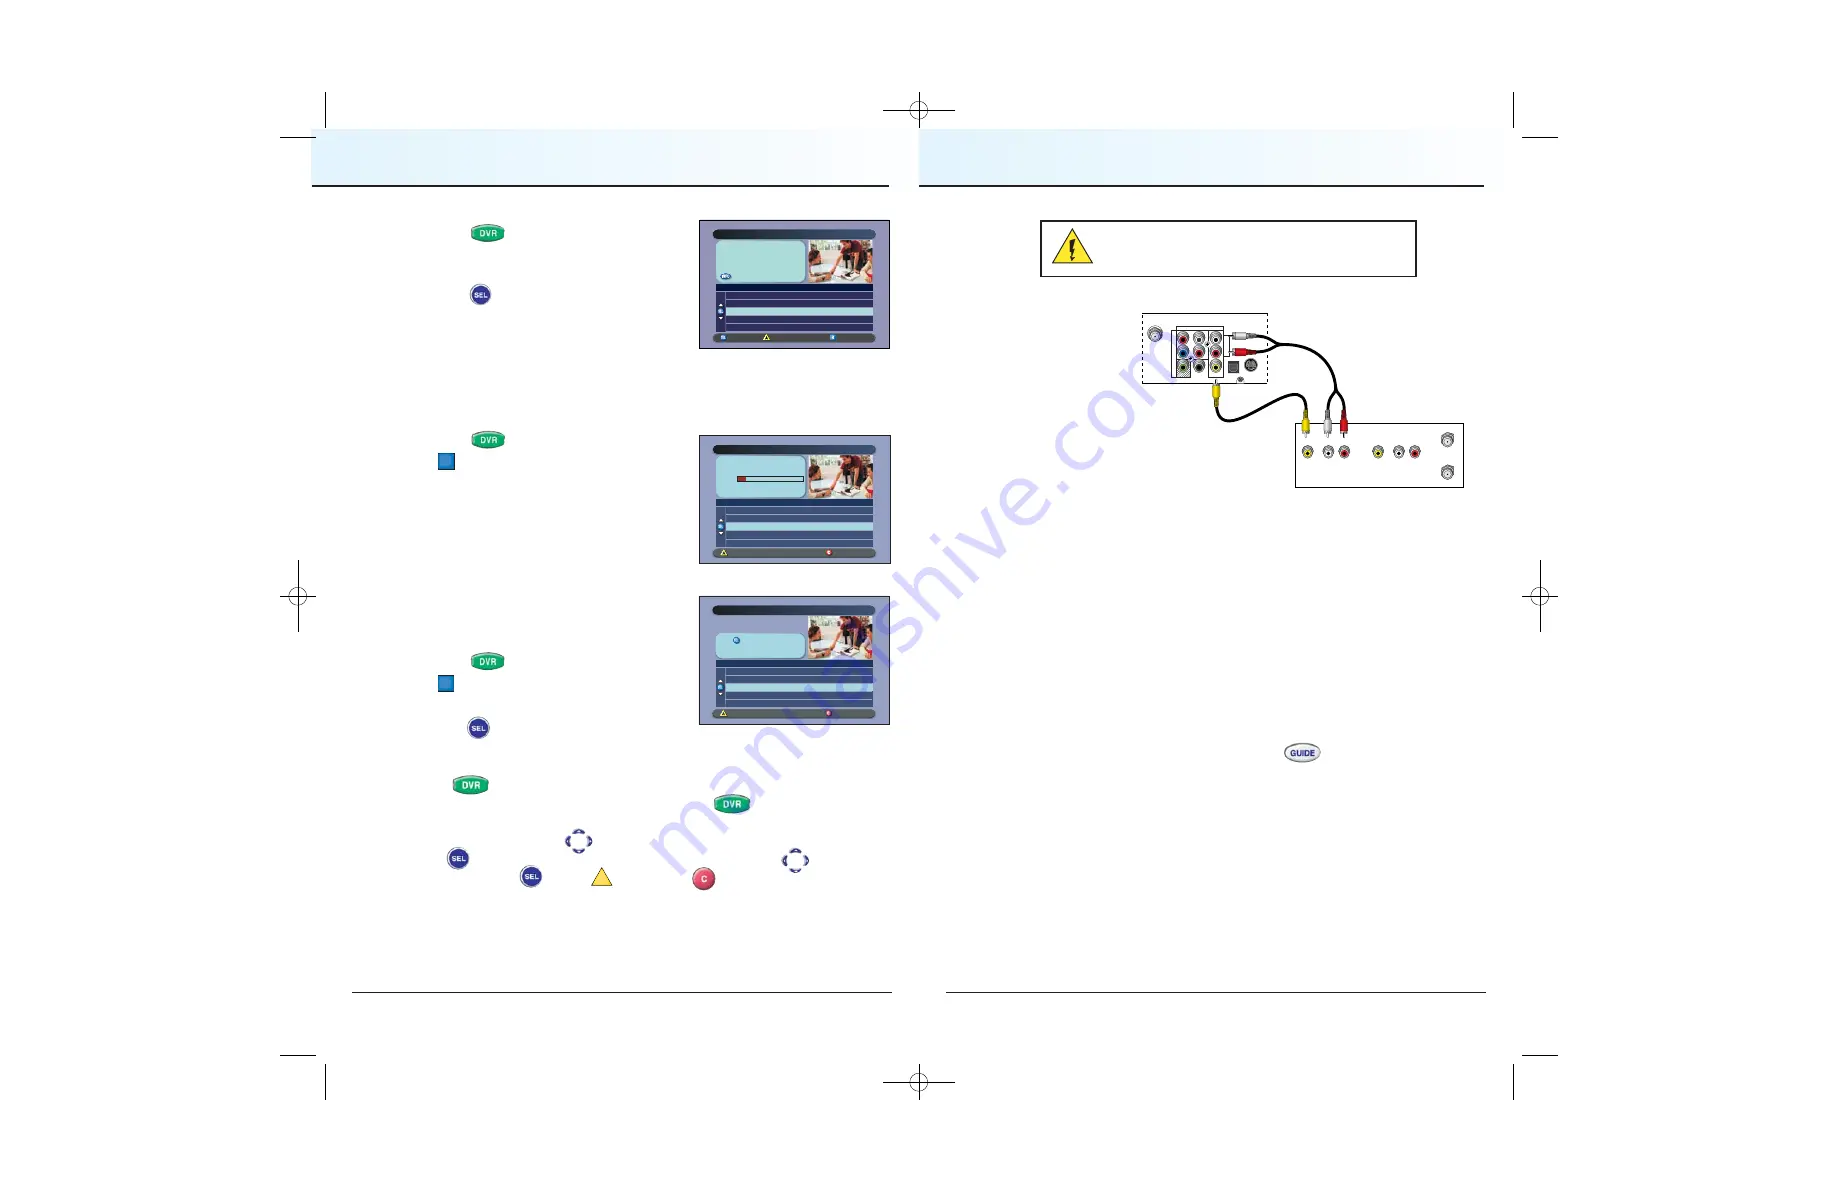
The Copy to VCR feature lets you copy recordings from your DVR for iO TV to a
VCR tape.
Warning: Avoid electric shock. Unplug all electronic
devices before connecting or disconnecting any
device cables to the DVR for iO TV.
Verify that the
OUT 2
outputs are connected
to your VCR inputs.
Note
: This graphic
shows the HD-DVR for
iO TV back panel layout.
The DVR for iO TV back
panel is slightly
different.
The program that you
are copying appears in
the PIP window. Connecting to your VCR using the
OUT 2
outputs allows you
to watch or record another program or even change channels in the Main
screen, without affecting the copy in progress.
Notes
:
•
You can turn the PIP feature off and on without affecting the copy in
progress. A “Copying to VCR” banner will be displayed for 3 seconds when
you turn the PIP feature on.
•
You can still record live TV directly to a VCR tape (instead of your
DVR for iO TV) by connecting the DVR for iO TV
OUT 2
outputs directly to
the VCR inputs and not using the
Copy a Recording to a VCR Tape
instructions on page 12. Recording live TV directly to your VCR causes the
VCR to record all remote control activities, including information banners
and on-screen displays such as when
Guide
is pressed.
COPY RECORDINGS FROM YOUR DVR FOR iO TV
TO A VCR TAPE
CABLE
OUT
S - VIDEO
OUT
AUDIO OUT
OPTICAL
VIDEO
OUT 1
OUT 2
A
U
D
I
O
DIGITAL
AUDIO OUT
L
R
Y/V
Pr
Pb
T11304
VCR
RF IN
R
L
AUDIO
IN
VIDEO
IN
RF OUT
R
L
AUDIO
OUT
VIDEO
OUT
A
CV2008-878 DVR V3.0:08-878 DVR V3.0 10/3/08 4:49 PM Page 10


