AVR-A-OPT-02
Rev. 01 de 31/05/2016
OPTIMUS TECHNOLOGY
Página 20 de 35
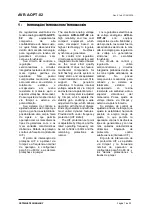
conforme
a
classe
de
realimentação e o nível de
tensão de alimentação do
regulador,
conforme
as
características técnicas.
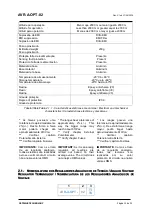
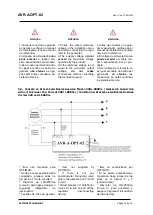
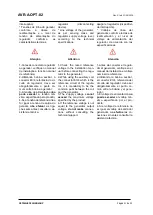
Atenção
1-Antes de conectar o regulador
ao gerador, verifique no manual
de instalação a tensão nominal
de referência;
2-A tensão de alimentação
não
pode exceder
a tensão má-
xima especificada pelo produto;
3-Se a tensão de referência não
for igual à tensão de saída do
gerador,
não efetuar
as liga-
ções sem antes consultar a as-
sistência técnica.
* Line voltage of the generator,
as per sensing class and
regulator supply voltage level,
according to the technical
specifications.
Attention
1-Check the rated reference
voltage in the installation man-
ual before connecting the regu-
lator to the generator;
2-The supply voltage
cannot
exceed
the maximum voltage
specified by the product;
3-If the reference voltage is not
equal to the generator output
voltage,
do
not
make
connections without consulting
the technical support.
* Voltajes de línea del
generador, conforme la clase de
realimentación y el nivel de
voltaje de alimentación del
regulador, de acuerdo con las
especificaciones.
Atención
1-Antes de conectar el regula-
dor al generador, verifique en el
manual de instalación el voltaje
nominal de referencia.
2-El voltaje de alimentación
no
puede exceder
al voltaje má-
ximo especificado por el pro-
ducto;
3-Si el voltaje de referencia no
es igual al voltaje de salida del
generador,
no efectúe
las
conexiones sin antes consultar
la asistencia técnica.
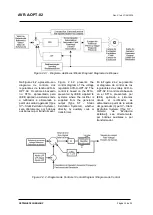
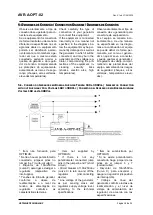
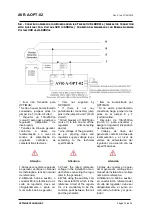
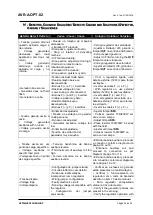
5.3-
C
ONEXÃO DO
G
ERADOR COM
B
OBINA
A
UXILIAR
T
ENSÃO
160
A
300V
CA
/
G
ENERATOR
C
ONNECTION
WITH
A
UXILIARY
C
OIL
V
OLTAGE
160
TO
300V
CA
/
C
ONEXIÓN DEL
G
ENERADOR CON
B
OBINA
A
UXILIAR
V
OLTAJE
160
HASTA
300V
CA
1
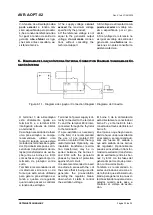
Item não fornecido pela
OPTIMUS;
2
Se não houver potenciômetro
conectado, jumpear pinos no
jumper 6 e 7 (curto-circuitar);
3
Disjuntor de 10A/250Vca
(curva C) para ligar e desligar o
regulador
(dispositivo
de
1
Item
not
supplied
by
OPTIMUS;
2
If
there
is
not
any
potentiometer connected, jump
pins in the jumper 6 and 7 (short
circuit);
3
Circuit breaker of 10A/250Vac
(curve C) to turn on and off the
1
Ítem no suministrado por
OPTIMUS;
2
Si no existe potenciómetro
conectado, haga jumper de los
pines en el jumper 6 y 7
(cortocircuitar);
3
Disyuntor de 10A/250Vca
(Curva C) para encender y

