background image

3

Connecting Power

You can power your amplifier with the
supplied AC and DC power cords.

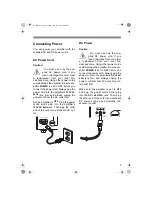
AC Power Cord

Caution:

 You must use only the sup-
plied AC power cord. If you
lose or damage this cord, order

a replacement from your local Ra-
dioshack store. Using other power cords
could damage the amplifier. Be sure am-
plifier 

POWER

 is set to 

OFF

 before you

connect the power cord. Always plug the
power cord into the amplifier’s 

120V AC

60Hz 

jack first, and always unplug the

power cord from the AC outlet first.

Set the amplifier to 

OFF

. Plug the power

cord’s small plug into the amplifier’s

120V AC 60Hz 

jack. Then plug the other

end of the cord into a standard AC out-
let.

DC Power

Caution:

 You must use only the sup-
plied DC power cord. If you
lose or damage this cord, order

a replacement from your local Ra-
dioshack store. Using other power cords
could damage the amplifier. Be sure am-
plifier 

POWER

 is set to 

OFF

 before you

connect the power cord. Always plug the
power cord into the amplifier’s 

DC 14.4V/

2.5A 

jack first, and always unplug the

power cord from the12V accessory out-
let outlet first.

Make sure the amplifier is set to 

OFF

and plug the power cord’s barrel plug
into the 

DC 14.4V/2.5A

 jack. Then plug

the other end of the cord into a standard
DC source such as an automobile 12V
accessory outlet.

!

!

32-1240.fm  Page 3  Monday, July 26, 1999  12:09 PM

Summary of Contents for Single Channel 170 MHz Wireless FM PA Amplifier System

Page 1: ...ises Internal Helical Antenna receives microphone signals up to 150 feet away Wired and Wireless Microphone Use Simultaneously lets you use wired and wireless microphones at the same time Your amplifi...

Page 2: ...r there is no guarantee that in terference will not occur in a particular installation If this equipment does cause harmful interference to radio or television reception which can be deter mined by tu...

Page 3: ...ifier s 120V AC 60Hz jack Then plug the other end of the cord into a standard AC out let DC Power Caution You must use only the sup plied DC power cord If you lose or damage this cord order a replacem...

Page 4: ...t the wired microphone to the amplifier s MIC jack located on the back of the amplifier 6 Set the microphone switch to ON 7 Adjust your amplifier s wired micro phone volume control to the desired leve...

Page 5: ...urned on Check the fuse and replace it if needed No sound wireless microphone Make sure your transmitter and amplifier are operating on the same frequency Adjust the wireless microphone volume control...

Page 6: ...5A 125V fuse 5 Insert the fuse holder s cap back into the socket on the back of the amplifier 6 Carefully tighten the fuse holder s cap by rotating it clockwise Care To enjoy your Optimus Single Chan...

Page 7: ...V Fuse 1 5A 125V Audio Output 10 THD 13 W Distortion of Wired Microphone at Maximum Output 3 Sensitivity of Wired Microphone 5mV Wired Microphone S N Ratio 50dB Frequency Response of Wireless Micropho...

Page 8: ...ct during the warranty period take the product and the RadioShack sales receipt as proof of purchase date to any RadioShack store RadioShack will at its option un less otherwise provided by law a corr...

Reviews: