5
Steps:
A
. Put PAL/Inspection Top lens on the upper window. The direction mark is aligned with U-shaped groove.
B. Put PAL BOTTOM lens on the lower window. The direction mark is aligned with U-shaped groove.
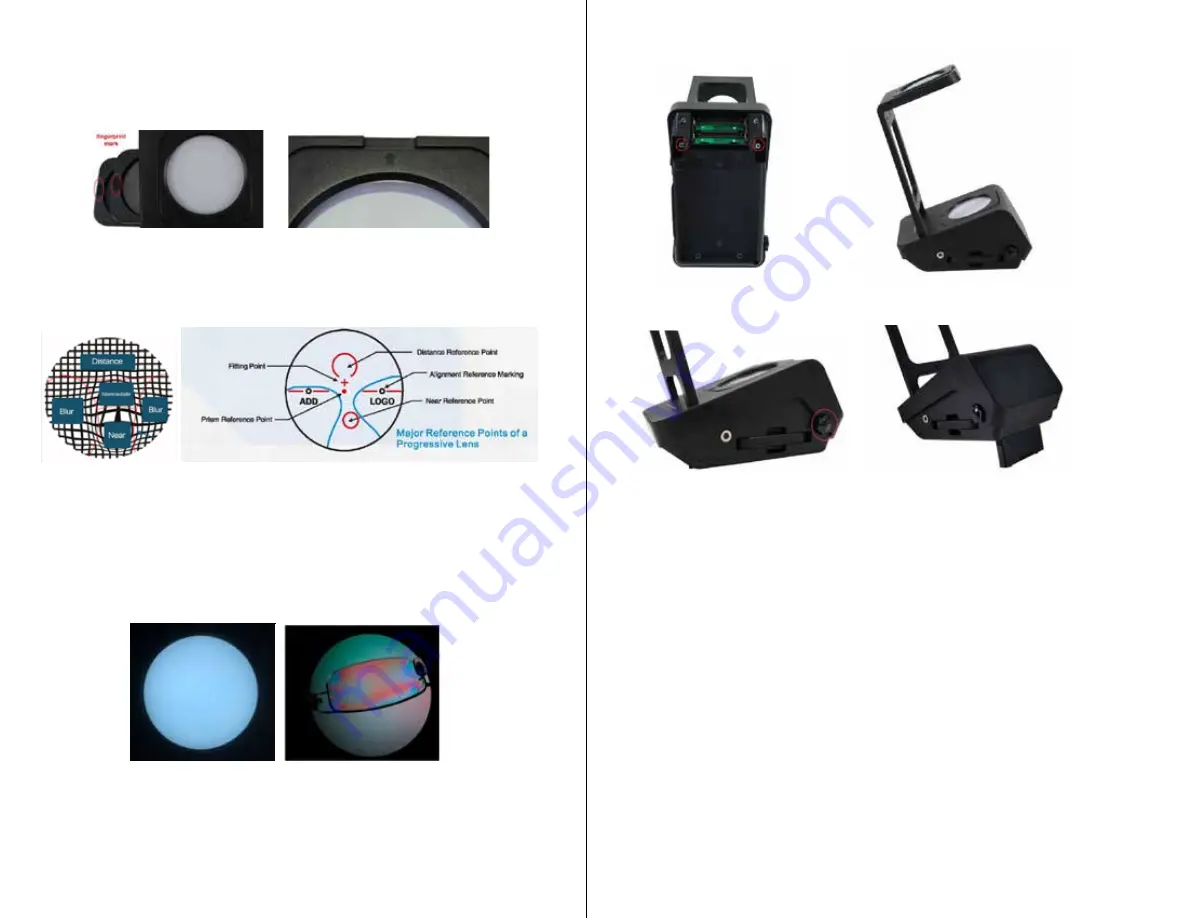
C. Power on. Put the progressive lens above the parallel light grid and observe the four areas of the lens.
D. After confirming the four areas, keep the distant area and near area in a horizontal line and find out the
invisible marks on both sides.
E. ADD value is usually on one side and the brand marks would be on the other side.
4) Function II
–
Polariscope
Steps:
A. Put Polariscope TOP lens on the upper window. The direction mark is aligned with U-shaped groove.
B. Put Polariscope BOTTOM lens on the lower window. The direction mark is aligned with U-shaped groove.
C. Put the assembled lens between two polarized lenses.
D. If it shows the same as below picture, the lens stress is not in a balance. The imbalance is proportional to the
darkness of the color. The lens stress can be reduced by edging the darkest part of the lens.
- 3 -
4
4) Rotate the angle adjustment knob, the inclination of the base can be adjusted.
3. Operation Procedures
1) Connect Power
Insert the power adapter and turn on the machine.
Rechargeable batteries and DC power supply are both available. With the rechargeable batteries inside, after
connecting power, DC power supply mode will be enabled first.
2) Select the inspection lenses
On each lens, there are fingerprint mark and direction ma
rk, as below picture. It’s much easier to take out the
lenses with the fingerprint mark. When you put the lens back, the direction mark must be aligned with the slot,
then insert the lens.
3) Function I - PAL Identifier
With black grid, LED backlight and high magnification lens, you could inspect the progressive lenses (multifocal
lenses) easily and efficiently.
Manufacturers’ marks
Lens type ID
Invisible Marks
ADD power
- 4 -


