10
EX31 Series
3-8
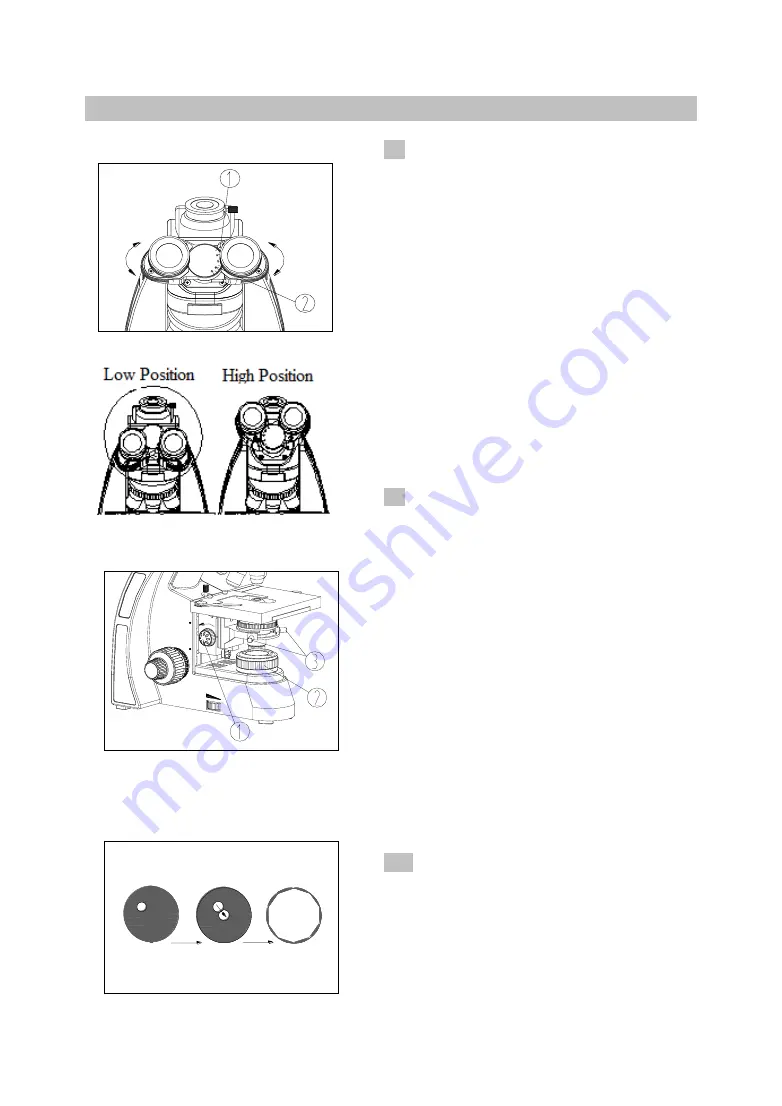
Adjust the Interpupillary Distance
When observe with two eyes, hold the base of
the prism and rotate them around the axis until
there is only one field of view.
“
。
”
①
on the eyepiece base points to the scale
②
of interpupillary indication, which means the
value of interpupillary distance (see Fig. 17).
Adjustable range
:
50
~
75mm.
★
Remember your interpupillary distance for
further operation.
★
This gemel eyepiece tube can be rotated for
360º. User can select corresponding eyepoint
height according to his own height. For
example, when the interpupillary distance is
65mm, rotate front part of eyepiece tube for
180° can increase eyepoint for 34mm (see Fig.
18).
3-9
Center the Condenser
(1) Rotate the condenser up-down knob
①
to
raise it to the highest position (see Fig. 19).
(2) Rotate the objective 10X to the light path and
focus the specimen.
(3) Rotate the field diaphragm adjustment ring
②
to put the field diaphragm to the smallest
position. At the moment, the image of field
diaphragm will be observed in the eyepiece.
(4) Adjust the center adjustment screw
③
and
put the image to the center of the field of view
(see Fig.20).
(5) Open the field diaphragm gradually. If the
image is in the center all the time, it shows the
condenser has been centered correctly.
(6) In fact, you can enlarge the field diaphragm a
bit and make the image circumscribed to the field
of view.
3-10
Adjust the Field Diaphragm
By limiting the diameter of the beam entering the
condenser, the field diaphragm can prevent other
light and strengthen the image contrast. When the
image is just on the edge of the field of view, the
objective can show the best performance and
obtain the clearest image.
Fig.
18
图
14
Fig.17
Fig.
19
Fig.
20


