


Optoma BX-AL133B User Manual and Installation Guide, Version 1.0, copyright Nov, 2008, all rights reserved, Panamorph Inc.
Page 4
H
1
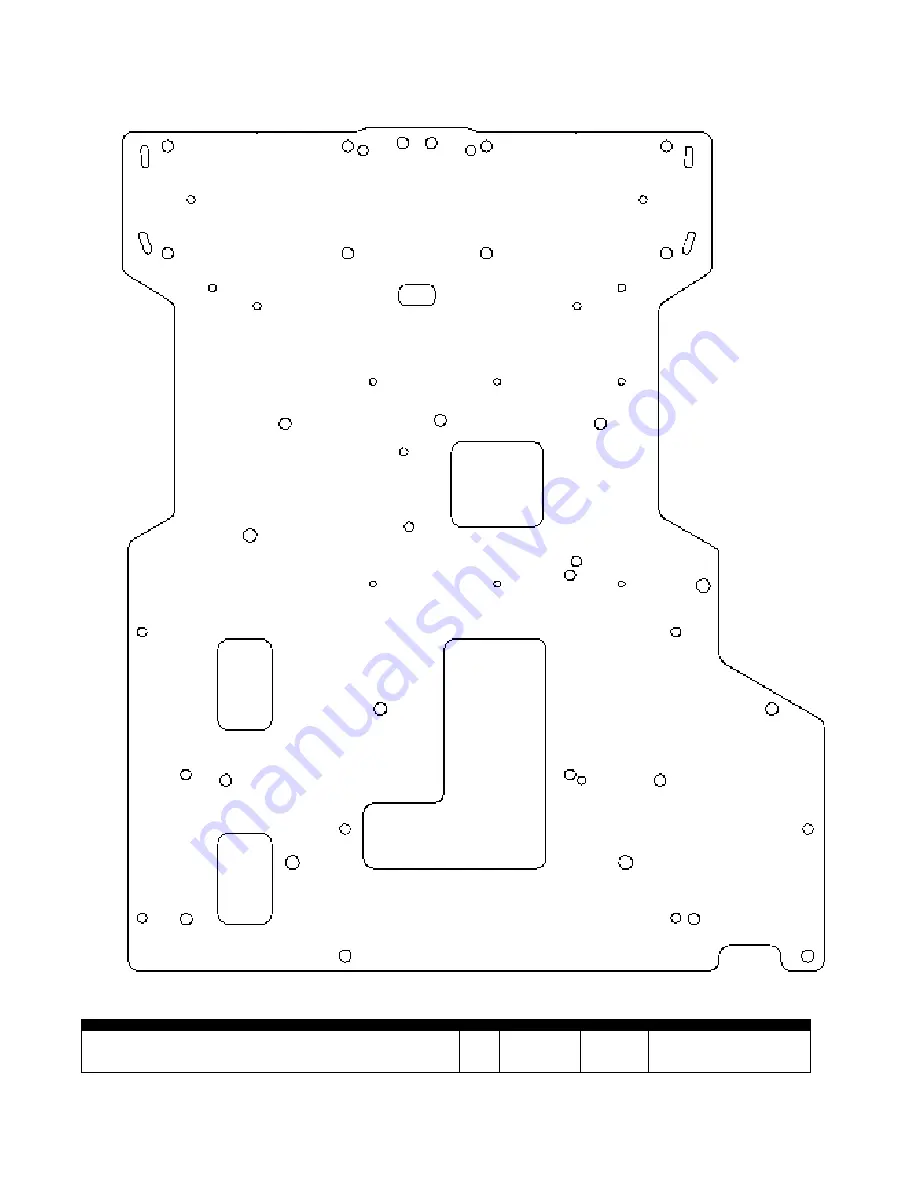
Ceiling side
of
Attachment Plate
3
11
6
6
7
11
13
13
16
15
H
H
A
C
B
B
A
A
C
C
B
B
AKPro Compatible Optoma Projector Models
Holes
Screws
Spacers
Notes
HD80, HD81, HD81-LV, HD803, HD930, HD980, HD7200, HD8000,
HT1080, HD806, HC815, HT1200, TX1080, HD80-LV, HD8000-LV,
HD806-ISF
A
M4x30
5/8” (3)


