11
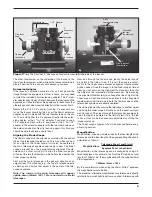
the expanding disk should be a perfect circle (
Figure 20).
If the image is unsymmetrical, the scope is out of collimation.
The dark shadow cast by the secondary mirror should appear
in the very center of the out-of-focus circle, like the hole in a
donut. If the “hole” appears off-center, the telescope is out of
collimation.
If you try the star test and the bright star you have selected is
not accurately centered in the eyepiece, the optics will always
appear out of collimation, even though they may be perfectly
aligned. It is critical to keep the star centered, so over time you
will need to make slight corrections to the telescope’s position
in order to account for the sky’s apparent motion.
5. cooling the Optics
All optical instruments need time to reach “thermal equilibrium”
with the ambient air to achieve maximum stability of the lenses
and mirrors, which is essential for peak performance. When
moved from a warm indoor location to cooler air outside (or
vice-versa), a telescope needs time to equilibrate to the out-
door temperature. The bigger the instrument and the larger the
temperature change, the more time will be needed.
Allow at least 30 minutes for your SkyLine Dobsonian to equili-
brate. If the scope experiences more than a 40° temperature
change, allow an hour or more. In the winter, storing the tele-
scope in a shed or garage greatly reduces the amount of time
needed for the optics to stabilize. It also is a good idea to keep
the scope covered until the Sun sets so the tube does not heat
greatly above the temperature of the outside air.
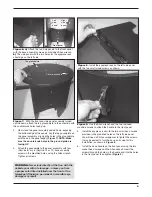
Your SkyLine Dobsonian includes a 12-volt DC cooling fan
pre-installed on the rear mirror support (see
Figure 19b). This
small, vibration-free fan quietly blows air onto the back side of
the primary mirror, which accelerates the cooling time. It can
be kept powered on while observing or turned off once the
initial temperature equilibration has been achieved, to save
battery life. The fan is powered by eight AA alkaline batteries,
sold separately, which you place in the included battery holder.
Plug the cable from the battery holder into the fan’s input jack
on the end ring.
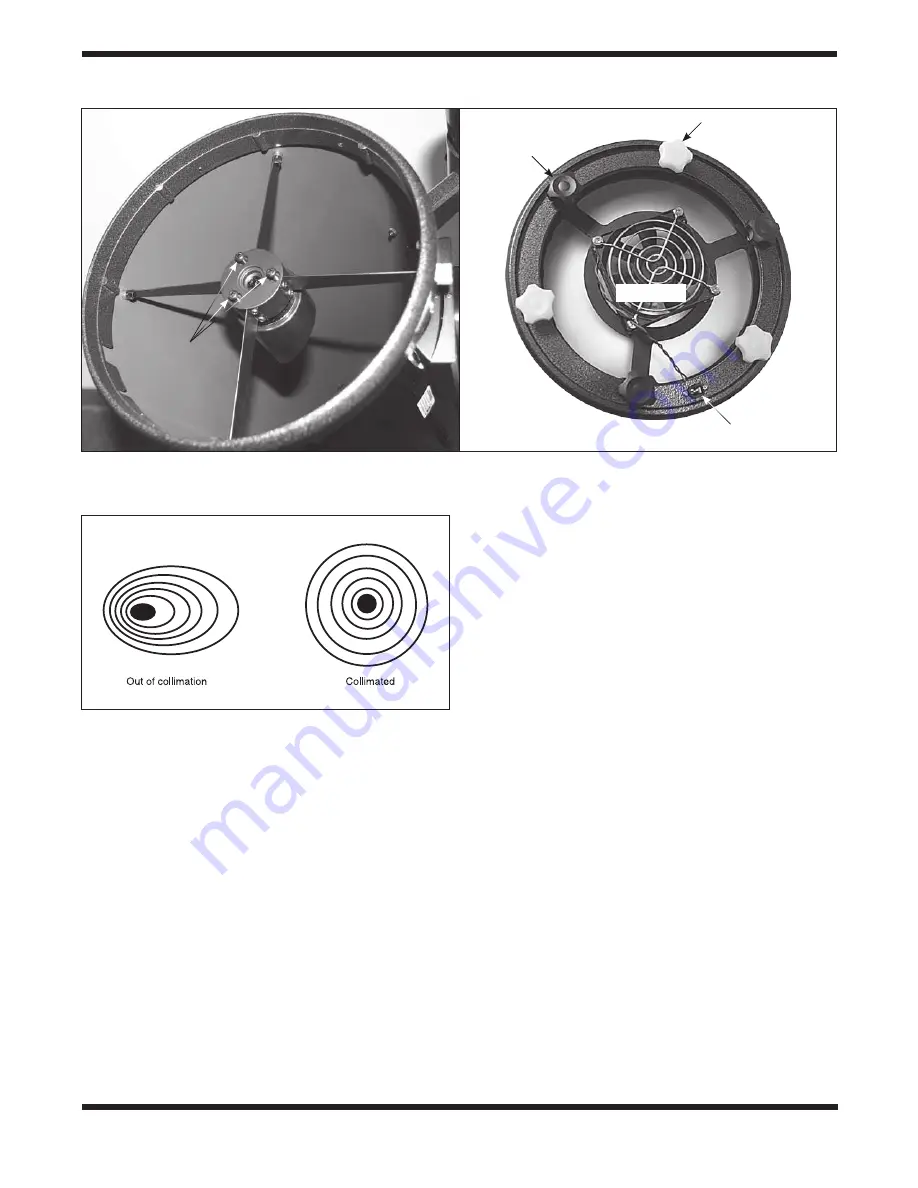
Figure 19. a)
The tilt of the secondary mirror is adjusted using the three Philips screws shown here.
b)
The primary
mirror’s tilt is adjusted with the three black knobs on the rear cell. The three white lock knobs should be loosened a couple of
turns first, and then lightly re-tightened once the adjustment has been made.
b)
Figure 20.
A star test will determine if a telescope’s optics
are properly collimated. An unfocused view of a bright star
through the eyepiece should appear as illustrated on the
right if the optics are perfectly collimated. If the circle is
unsymmetrical, as in the illustration on the left, the scope
needs collimation.
a)
Secondary
mirror
collimation
screws
Collimation
knobs (black)
Mirror lock
knobs (white)
Cooling fan
Power
input jack


