ASSEMBLEING AND PREPARATION TO WORK
No tools are required to assemble. After taking the device out of the packing box, start
assembling the equipment. Screw the handle to the arm(1). Install extended back support
(6) on the top at the back with the thumb screw supplied. The equipment is now ready for
work.
4
1. Use the channel selecting graph with indentions (4) or chats below to choose the channel
size.
H = hard cover.
p = pages.
T = transparent cover. S = soft cover. O = no cover.
Example: H/p/H =(H) hard cover/ (p)pages / (H) hard cover
5
Channel size
H/p/H
H/p/T
S/p/S
O/p/O
1,5
-
-
1 - 15
1 - 15
3
-
-
16 - 32
15 - 30
5
18 - 31
18 - 33
33 - 45
18 - 38
7
32 - 60
34 - 63
46 - 62
39 - 67
10
61 - 89
64 - 92
63 - 94
68 - 97
13
90 - 120
93 - 120
95 - 120
98 - 120
BINDING WITH METALBIND
2. Pull the bind handle up (1) to the open position, vertical.
3. Move the clamp lever (2) completely out to the left.
4. Prepare the documentation for binding:
A Method:
• Take the pile of documents insure they are even, put them between the covers, check
the pages are cantered between the edges of covers.
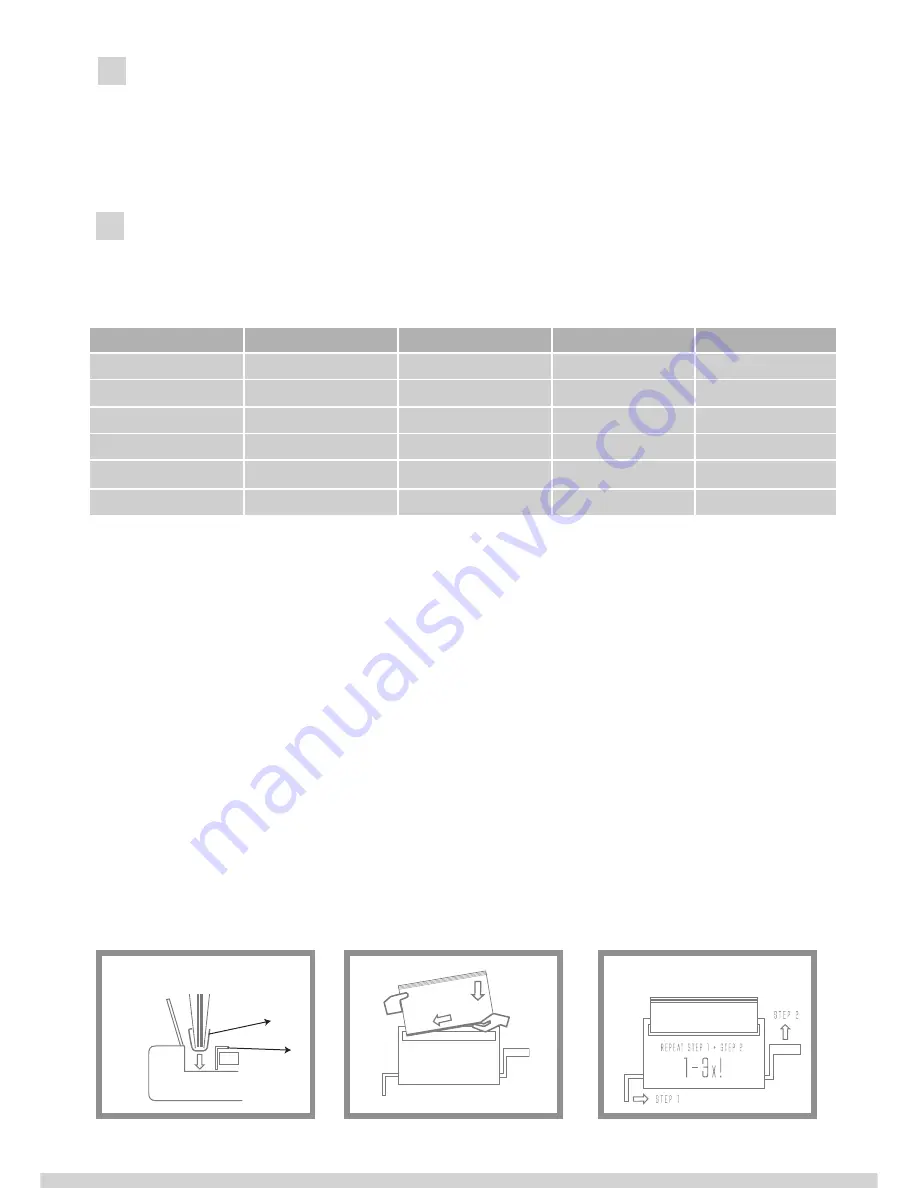
• Now take the documents and covers and push carefully into the channel, start with one
end.
• Put the channel (7) with documents start with one end at an angle, into the binding
slot as shown bellow. Ensure that all sizes of channels are in the centre of the binding
slot.
• Slid the clamp lever in (2) to the right until you can feel resistant’s on the lever.
7
5


