Remove a SAS Drive
7.
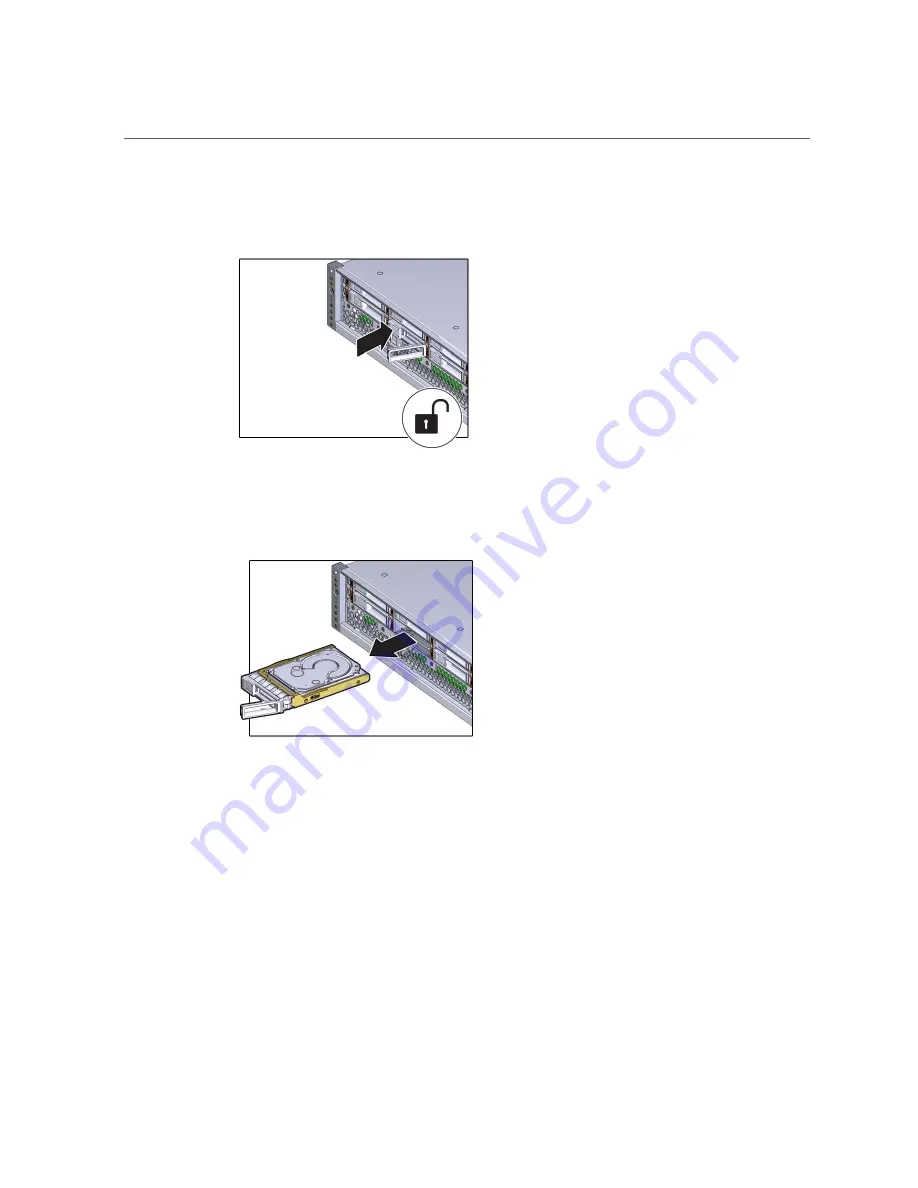
Press the release button and pivot the release lever open to the right.
8.
Grasp the release lever and pull the drive out of the chassis.
9.
Set the drive aside.
10.
Repeat from
for any additional drives to be removed.
11.
Consider your next step.
■
If you removed a drive as part of a replacement operation, install a new drive. See
.
■
If you removed a drive as part of another component's removal or installation procedure,
return to that procedure. See
“Component Service Task Reference” on page 65
for
assistance.
■
If you are not replacing the drive, install a drive filler panel in its place. See
.
98
Netra Server X5-2 Service Manual • October 2016
Summary of Contents for netra X5-2
Page 1: ...Netra Server X5 2 Service Manual Part No E53601 03 October 2016 ...
Page 2: ......
Page 12: ...12 Netra Server X5 2 Service Manual October 2016 ...
Page 20: ...20 Netra Server X5 2 Service Manual October 2016 ...
Page 59: ...Using the Server Fault Remind Button Detecting and Managing Faults 59 ...
Page 60: ...60 Netra Server X5 2 Service Manual October 2016 ...
Page 128: ...128 Netra Server X5 2 Service Manual October 2016 ...
Page 144: ...144 Netra Server X5 2 Service Manual October 2016 ...
Page 148: ...148 Netra Server X5 2 Service Manual October 2016 ...
Page 154: ...154 Netra Server X5 2 Service Manual October 2016 ...
Page 180: ...180 Netra Server X5 2 Service Manual October 2016 ...
Page 210: ...210 Netra Server X5 2 Service Manual October 2016 ...
Page 226: ...226 Netra Server X5 2 Service Manual October 2016 ...
Page 266: ...266 Netra Server X5 2 Service Manual October 2016 ...
Page 274: ...274 Netra Server X5 2 Service Manual October 2016 ...


