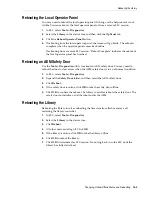
Manually Mounting and Dismounting a Cartridge
Servicing the Library
18-3
1.
Insert the library access door key in the Deadbolt Override lock and unlock the
door. The key cannot be removed from the lock while it is in the unlocked
position.
2.
Lift the AEM access door latch and open the door. DO NOT force the AEM access
door to open or close.
Power is cut to the robots, all in-process jobs stop, and the library takes the robots
and AEM offline.
3.
To close the AEM door, close and latch it. DO NOT force the AEM access door to
open or close.
4.
Lock the door and retain the key.
Once the door shuts, the library re-initializes, the robots initialize, the library does
a full audit, and the library brings the AEMs online.
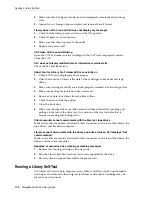
Manually Cleaning a Drive
Normally, either the library auto clean feature or the host tape management software
manages drive cleaning. However, there may be occasions when you need to perform
a manual clean. Refer to the drive manufacturer's documentation for information on
whether manual cleaning is allowed.
1.
Verify that the drive needs cleaning (see
"Viewing Device Status and Properties"
2.
Display a list of cleaning cartridges (see
"Viewing Cleaning Cartridge Status"
page 11-5). Verify there is a compatible cleaning cartridge for the drive.
3.
Move a compatible cleaning cartridge from a system slot to the drive that needs
cleaning (see
"Moving Cartridges (Recovery Moves)"
4.
When the cleaning operation is complete, move the cleaning cartridge from the
drive back to a system slot.
Manually Mounting and Dismounting a Cartridge
Refer to the drive documentation before manually mounting a cartridge.
1.
Record the vol-id, cartridge location, and the drive slot location provided by the
library management software.
2.
Locate the drive (see
"Viewing Library and Device Reports with the Reports
3.
4.
Enter the library (see
Caution:
Cleaning a drive before it is due is not recommended.
Excessive drive cleaning can wear out a drive head prematurely.
Caution:
Keep your hands clear of the drive's mechanical and
electronic load components.
Summary of Contents for StorageTek SL3000
Page 1: ...1 StorageTek SL3000 Library Guide E20875 15 December 2018...
Page 16: ...xvi...
Page 50: ...Ordering 1 32 StorageTek SL3000 Library Guide...
Page 62: ...Installation Tools 2 12 StorageTek SL3000 Library Guide...
Page 66: ...Installing Web launched SLC 3 4 StorageTek SL3000 Library Guide...
Page 74: ...Resolving Orphaned Cartridges Caused by Capacity Changes 6 4 StorageTek SL3000 Library Guide...
Page 88: ...Configuring Dual TCP IP 8 8 StorageTek SL3000 Library Guide...
Page 112: ...Stopping a Validation 12 4 StorageTek SL3000 Library Guide...
Page 124: ...Monitoring Library Events 15 6 StorageTek SL3000 Library Guide...
Page 128: ...Rebooting the Library 16 4 StorageTek SL3000 Library Guide...
Page 166: ...Downgrading Firmware D 4 StorageTek SL3000 Library Guide...
Page 183: ...Wall Diagrams Library Addressing Reference E 17 Figure E 14 Base Module Rear Wall...
Page 185: ...Wall Diagrams Library Addressing Reference E 19 Figure E 16 DEM Front Wall...
Page 186: ...Wall Diagrams E 20 StorageTek SL3000 Library Guide Figure E 17 DEM Front Wall continued...
Page 187: ...Wall Diagrams Library Addressing Reference E 21 Figure E 18 DEM Rear Wall...
Page 188: ...Wall Diagrams E 22 StorageTek SL3000 Library Guide Figure E 19 DEM Rear Wall continued...
Page 190: ...Wall Diagrams E 24 StorageTek SL3000 Library Guide Figure E 21 Cartridge Expansion Module Rear...
Page 191: ...Wall Diagrams Library Addressing Reference E 25 Figure E 22 Parking Expansion Module Left...
Page 192: ...Wall Diagrams E 26 StorageTek SL3000 Library Guide Figure E 23 Parking Expansion Module Right...
Page 193: ...Wall Diagrams Library Addressing Reference E 27 Figure E 24 Access Expansion Module Left...
Page 194: ...Wall Diagrams E 28 StorageTek SL3000 Library Guide Figure E 25 Access Expansion Module Right...
Page 202: ...Label Care F 8 StorageTek SL3000 Library Guide...


