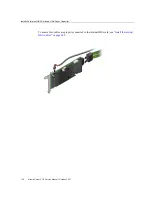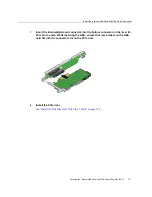
Remove the NVMe Cable Assembly
a.
Power off the server and disconnect the power cords from the power
supplies.
See
“Powering Down the Server” on page 53
.
b.
Extend the server to the maintenance position.
See
“Extend the Server to the Maintenance Position” on page 59
.
c.
Attach an antistatic wrist strap to your wrist, and then to a metal area on the
chassis.
See
“Take Antistatic Measures” on page 61
.
d.
Remove the server top cover.
See
“Remove the Server Top Cover” on page 62
2.
Remove all the server fan modules.
See
“Remove a Fan Module” on page 81
.
3.
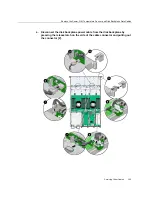
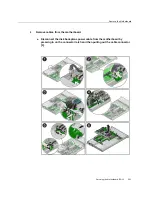
Remove the mid-wall from the server chassis [1, 2].
a.
Using a Torx T10 screwdriver, loosen the four green captive screws that
secure the mid-wall to the server chassis.
186
Oracle Server X7-2 Service Manual • October 2017
Summary of Contents for X7-2
Page 1: ...Oracle Server X7 2 Service Manual Part No E72445 03 October 2017 ...
Page 2: ......
Page 14: ...14 Oracle Server X7 2 Service Manual October 2017 ...
Page 86: ...86 Oracle Server X7 2 Service Manual October 2017 ...
Page 96: ...96 Oracle Server X7 2 Service Manual October 2017 ...
Page 110: ...110 Oracle Server X7 2 Service Manual October 2017 ...
Page 136: ...136 Oracle Server X7 2 Service Manual October 2017 ...
Page 150: ...150 Oracle Server X7 2 Service Manual October 2017 ...
Page 162: ...162 Oracle Server X7 2 Service Manual October 2017 ...
Page 168: ...168 Oracle Server X7 2 Service Manual October 2017 ...
Page 178: ...178 Oracle Server X7 2 Service Manual October 2017 ...
Page 184: ...184 Oracle Server X7 2 Service Manual October 2017 ...
Page 192: ...192 Oracle Server X7 2 Service Manual October 2017 ...
Page 216: ...216 Oracle Server X7 2 Service Manual October 2017 ...
Page 252: ...252 Oracle Server X7 2 Service Manual October 2017 ...
Page 282: ...282 Oracle Server X7 2 Service Manual October 2017 ...
Page 306: ...306 Oracle Server X7 2 Service Manual October 2017 ...

