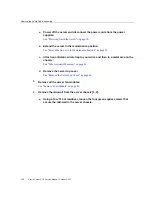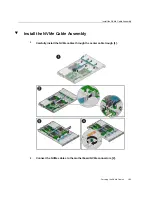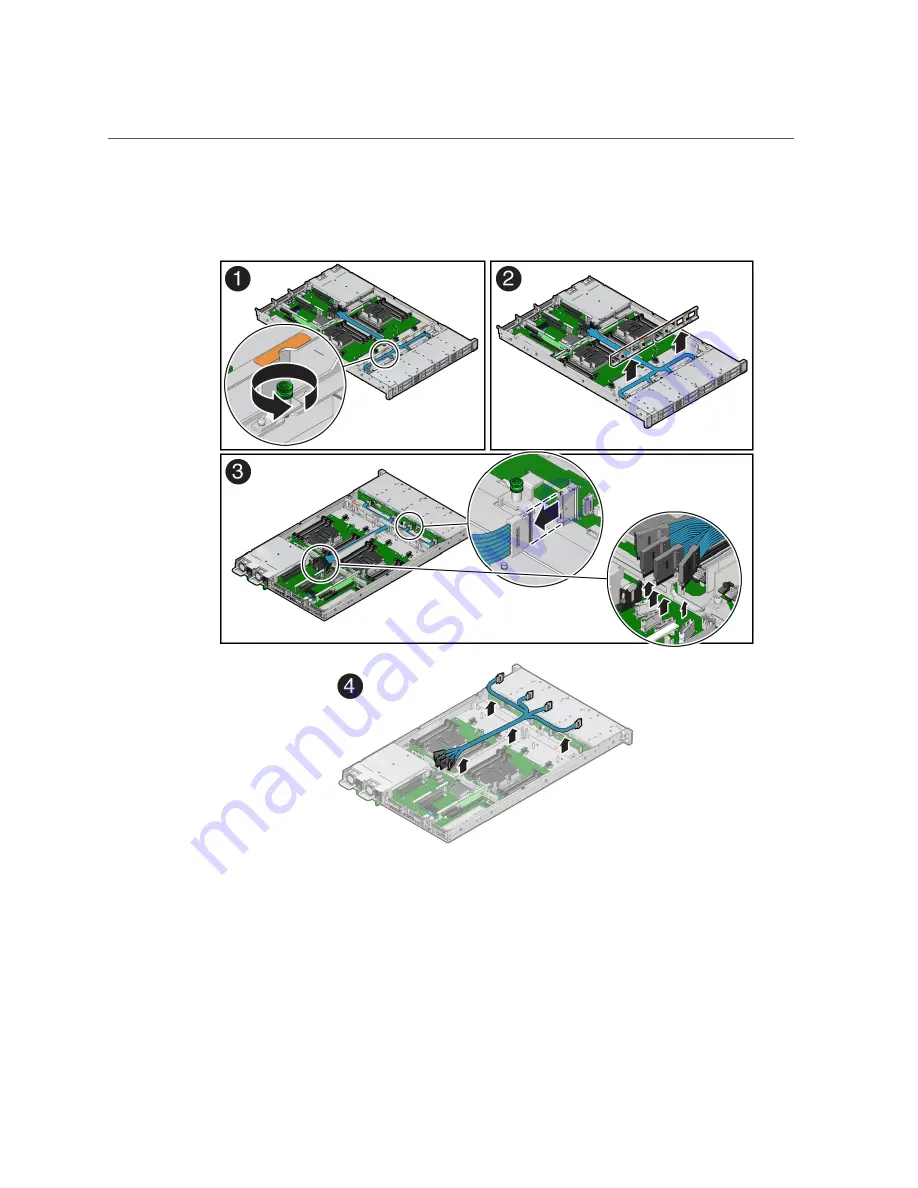
Remove the NVMe Cable Assembly
b.
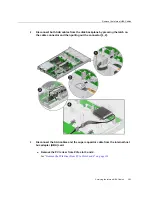
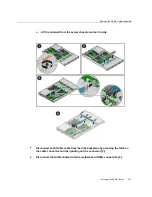
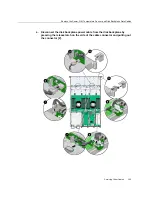
Lift the mid-wall from the server chassis and set it aside.
4.
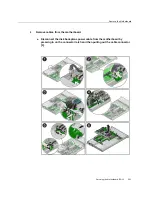
Disconnect each NVMe cable from the disk backplane by pressing the latch on
the cable connector and then pulling out the connector [3].
5.
Disconnect the NVMe cables from the motherboard NVMe connectors [3].
Servicing the NVMe Cables
187
Summary of Contents for X7-2
Page 1: ...Oracle Server X7 2 Service Manual Part No E72445 03 October 2017 ...
Page 2: ......
Page 14: ...14 Oracle Server X7 2 Service Manual October 2017 ...
Page 86: ...86 Oracle Server X7 2 Service Manual October 2017 ...
Page 96: ...96 Oracle Server X7 2 Service Manual October 2017 ...
Page 110: ...110 Oracle Server X7 2 Service Manual October 2017 ...
Page 136: ...136 Oracle Server X7 2 Service Manual October 2017 ...
Page 150: ...150 Oracle Server X7 2 Service Manual October 2017 ...
Page 162: ...162 Oracle Server X7 2 Service Manual October 2017 ...
Page 168: ...168 Oracle Server X7 2 Service Manual October 2017 ...
Page 178: ...178 Oracle Server X7 2 Service Manual October 2017 ...
Page 184: ...184 Oracle Server X7 2 Service Manual October 2017 ...
Page 192: ...192 Oracle Server X7 2 Service Manual October 2017 ...
Page 216: ...216 Oracle Server X7 2 Service Manual October 2017 ...
Page 252: ...252 Oracle Server X7 2 Service Manual October 2017 ...
Page 282: ...282 Oracle Server X7 2 Service Manual October 2017 ...
Page 306: ...306 Oracle Server X7 2 Service Manual October 2017 ...

