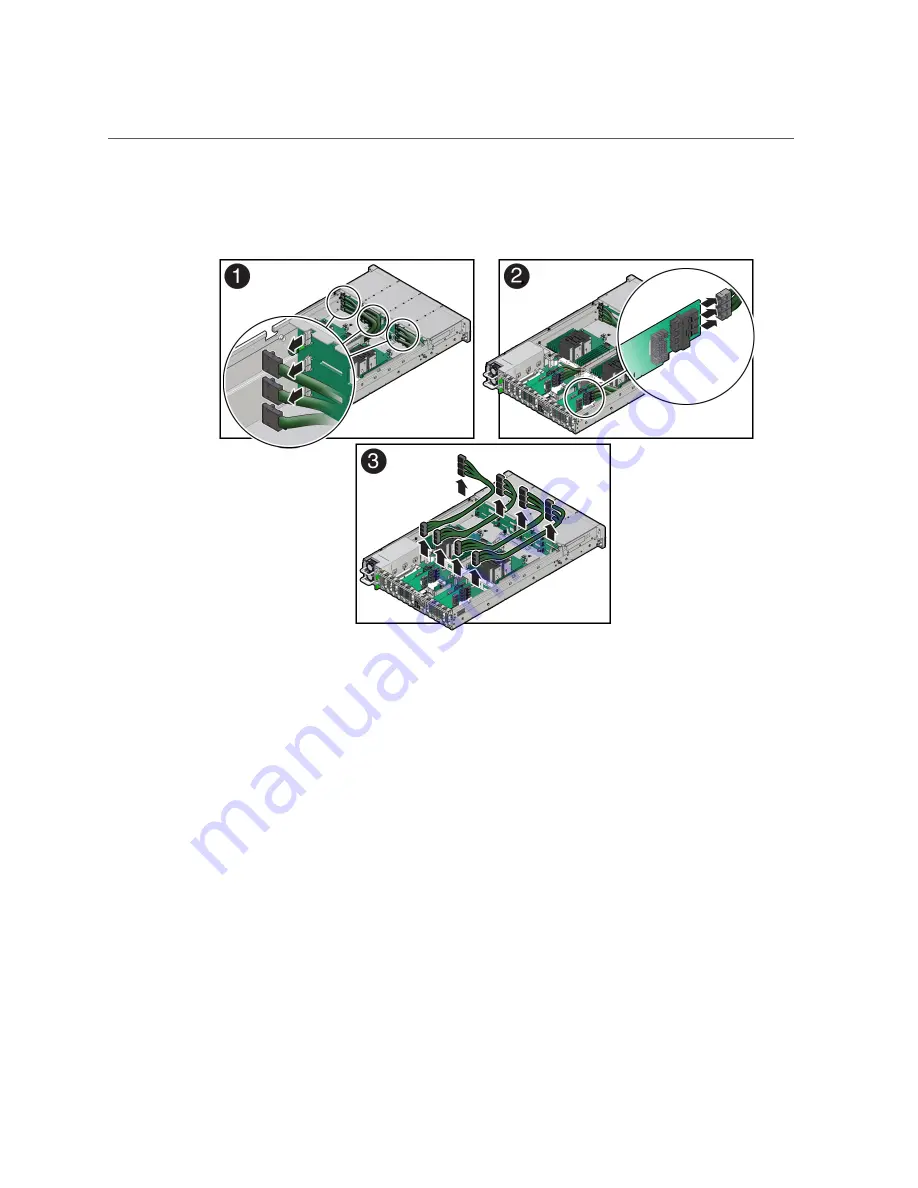
Remove NVMe Cables
Press each latch, and then pull out the cables to disengage them from the backplane connectors.
3.
Disconnect the NVMe cables from the Oracle PCIe NVMe switch cards in PCIe
slots 3, 4, 8, and 9 [2].
Press each latch, and then pull out the cables to disengage them from the HBA connectors. See
also
“Remove a PCIe Card” on page 133
.
4.
Remove the NVMe cables from the server [3].
Carefully remove the NVMe cable bundle from the chassis mid-wall. Be careful not to snag the
cables on the server components.
Related Information
■
“Install NVMe Cables” on page 196
Servicing NVMe Cables (FRU)
195
Summary of Contents for X7-2L
Page 1: ...Oracle Server X7 2L Service Manual Part No E72474 02 October 2017 ...
Page 2: ......
Page 12: ...12 Oracle Server X7 2L Service Manual October 2017 ...
Page 14: ...14 Oracle Server X7 2L Service Manual October 2017 ...
Page 48: ...48 Oracle Server X7 2L Service Manual October 2017 ...
Page 66: ...66 Oracle Server X7 2L Service Manual October 2017 ...
Page 84: ...84 Oracle Server X7 2L Service Manual October 2017 ...
Page 92: ...92 Oracle Server X7 2L Service Manual October 2017 ...
Page 110: ...110 Oracle Server X7 2L Service Manual October 2017 ...
Page 130: ...130 Oracle Server X7 2L Service Manual October 2017 ...
Page 138: ...138 Oracle Server X7 2L Service Manual October 2017 ...
Page 142: ...142 Oracle Server X7 2L Service Manual October 2017 ...
Page 156: ...156 Oracle Server X7 2L Service Manual October 2017 ...
Page 164: ...164 Oracle Server X7 2L Service Manual October 2017 ...
Page 172: ...172 Oracle Server X7 2L Service Manual October 2017 ...
Page 178: ...178 Oracle Server X7 2L Service Manual October 2017 ...
Page 218: ...218 Oracle Server X7 2L Service Manual October 2017 ...
Page 254: ...254 Oracle Server X7 2L Service Manual October 2017 ...


