


CL 02105 M - CL 04105 B - CL 06132 M
CL 08132 B - CP 20132 M - CP 25132 B
13
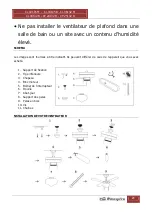
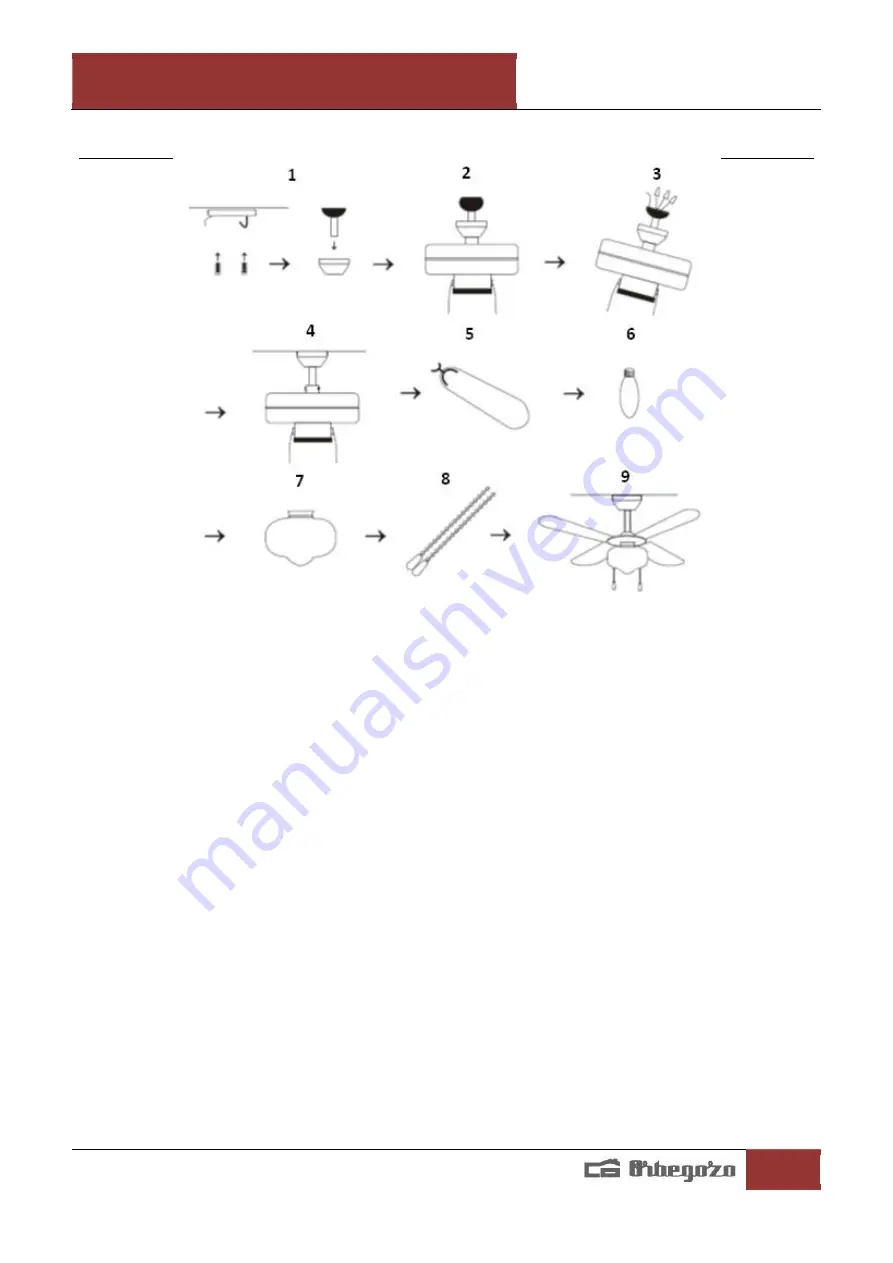
FAN INSTALLATION
Choose a suitable location to mount your fan. The place should be free from any obstruction
and with, at least, 230 cm clearance from the trailing edge of blades to floor. The outlet box
must be able to support a hanging weight of 50 kilo and must be secured firmly with wood
screw to prevent coming loose to the building structure.
1.
Mounting Bracket assembly: Fasten mounting bracket to ceiling outlet box with screws. Be
very careful not to damage wiring. Insert the down road and ball through the canopy’s
whole.
2.
Pass the motor wires through the down rod and tight it to the fan with the correspondent
rivet.
3.
Make the wiring connections as shown in “Wiring instructions” section.
4.
Attach the mounting bracket to the outlet box using screws and washers.
5.
Install the blades:
a.
Assemble blades into blade holders with screws and washers and nuts.
b.
Fasten the assembled blades onto the motor with screws and lock washers provided.
c.
Make sure the blades are firmly secured and your fan is ready in use.
6.
Install a bulb (E27 60W max, not included)
7.
Place the glass without applying much force (it could get broken)
8.
Install the chains.
9.
Check that the unit is completely installed.


