ST 07160 D BL/ST 07260 D BL/IN
11
3.
With the isolated low voltage circuit board control, 12vDC input, the lights are therefore safer.
4.
Special wind tunnel construction and oil collector design, free dirt will be absorbed in a second.
(4). INSTALLATION
Method A
1.
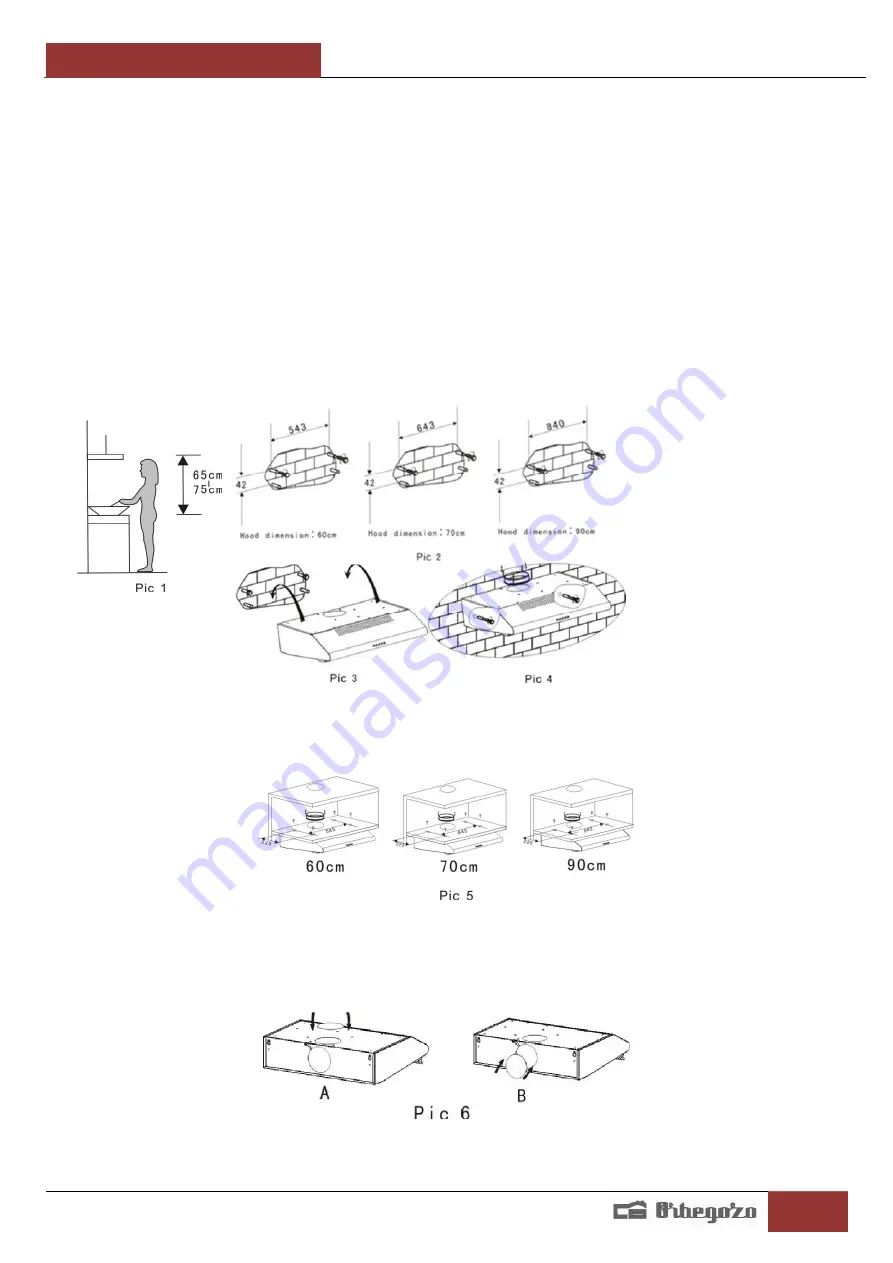
For best results, the hood should be installed at a distance of 65-75cm cooking surface for better
performance. Look pic 1.
2.
For wall mounting, drill 4 holes of 8 mm diameter in a suitable place according to the distance between
the center of the holes in the back of the hood. Look pic 2.
3.
Insert wall plugs into the holes.
4.
Insert the screws into the wall plugs and tighten.
5.
Hang the hood onto the screws. Look pic 3.
6.
Then insert the locking screws in the rest of anchors and tighten them to secure the hood to the right
wall. Look pic 4.
7.
Turn the valve on top of the hood.
Method B Look pic 5:
1.
Drill 4 holes of 6mm diameter at the bottom of the cabinet where it will hang.
2.
Turn the valve on the air outlet of the hood, then install the hood to the cabinet bottom, fitting with the 4
screws, flat gasket and nuts provided. Pass the screw with a flat gasket, put another flat gasket on the
other end and tighten the nut.
Noise: There are 2 modes of ventilation, horizontal fan and vertical ventilation. Please pay attention to the
ventilation mode when installing.
Horizontal ventilation Look 6A drawing, please use the lid to cover the top exit, so air can be vented by the
back.
Vertical Ventilation: Look 6B drawing, please use the lid to cover the rear exit, so air can be vented from the
top.
Adjusting the air absorption
Ventilation air to the outside Turn the outside position selector (Dib 7A), install the outlet, turn on the fan,
then the air will be expelled for external output.


