background image

IOM MANUAL


SA ALUMINUM STOP LOG


www.orbinox.com


EDITION 12/2017 

IOM-SA 


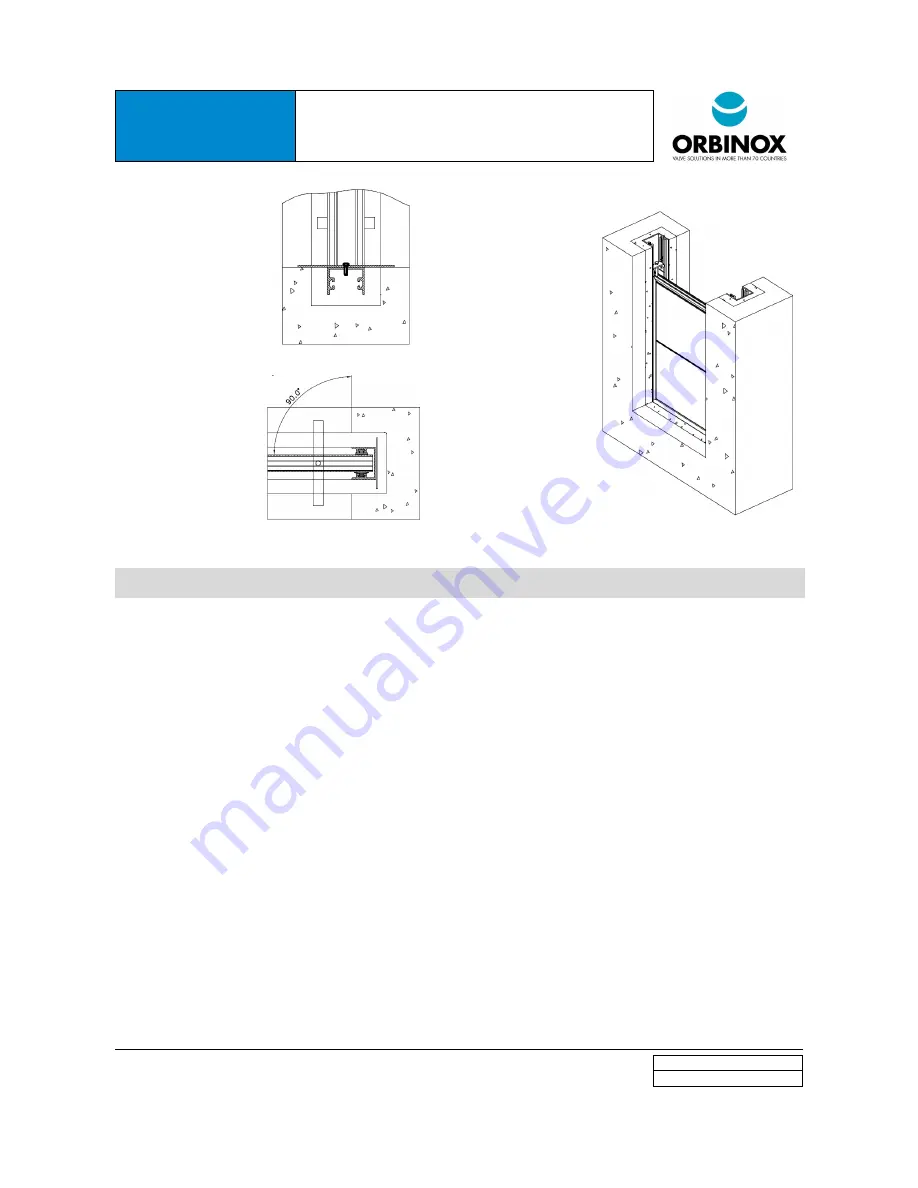
Figure 3


Figure 4


Figure 5


4.2.


FACE MOUNTED (IN EXISTING CHANNEL WITHOUT RECCESSES)


Step 1: Initial assessment 


Check that the concrete wall meets the requirements described in Section 4. 


Verify that all installation materials specified on the GAD are available. Anchor bolts and grout are used for this 

type of installation. 


If the frame is made of aluminum, it is coated a special coating (PoliuretaneAP-3102-E distributed by Polifluor o 

equivalent). If the frame is made of stainless steel, bolts that secure the vertical guides and seals must be greased 
(on the outside) to avoid getting bonded to the concrete. 
 
Step 2: Anchor the gate to the side of the channel 


Position the unit in the existing channel. Make sure that the gate is perfectly aligned and centered in the channel 

(see 

Figure 6

).


Install the bottom anchor bolts, and then the lateral anchor bolts (see 

Figure  7

). All Face Mounted Channel Gates 

include lateral mounting


Step 3: Grout fill 
Grout-fill the remaining voids (See 

Figure  9

), both at the bottom (See 

Figure  8

) and laterals of the gate (See 

Figure 

7

). Remember that the objective of the grout fill is twofold: 

o


Fill the voids between the frame, frame invert and the channel. 

o


Make a smooth transition for water flow.  

Summary of Contents for ALUMINUM STOP LOG SA

Page 1: ...INSTALLATION OPERATION AND MAINTENANCE MANUAL ALUMINUM STOP LOG SA...

Page 2: ...K TOLERANCES 16 1 INTRODUCTION This manual describes the recommended procedures for installation operation maintenance and safety precautions for the following Orbinox equipment o SA Aluminum Stop Log...

Page 3: ...orbinox com EDITION 12 2017 IOM SA 2 EQUIPMENT MAIN COMPONENTS ITEM DESCRIPTION 1 FRAME 2 LOG 3 VERTICAL SEAL 4 BOTTOM SEAL 5 LATERAL GUIDE 6 LOG LOCKING SYSTEM 7 SEAL AND GUIDE LOCKING SYSTEM 8 INTE...

Page 4: ...eck the equipment on delivery and report back to Orbinox any missing components within 3 days from receipt of the equipment Orbinox will not accept responsibility for loss or damage to any equipment w...

Page 5: ...NEL RECESS Step 1 Initial assessment Check that the concrete wall meets the requirements described in Section 4 Verify that all installation materials specified on the GAD are available Wooden wedges...

Page 6: ...inless steel bolts that secure the vertical guides and seals must be greased on the outside to avoid getting bonded to the concrete Step 2 Anchor the gate to the side of the channel Position the unit...

Page 7: ...www orbinox com EDITION 12 2017 IOM SA CAUTION Make sure not to get grout or any other foreign material on the gate s seals guides or stem as this may cause leakage or damage Figure 6 Figure 7 Figure...

Page 8: ...bolt and prior to drilling the hole on the other side make sure the frame is perfectly leveled Step 3 Construction sealant application Remove the unit from the wall first remove the nuts of the anchor...

Page 9: ...IOM MANUAL SA ALUMINUM STOP LOG www orbinox com EDITION 12 2017 IOM SA Figure 12 Figure 13 Figure 14...

Page 10: ...eter The maximum deviation should be width 1000 o Verify that the frame invert has been embedded in concrete Wall mounted at the end of the channel installation Verify that there are no voids between...

Page 11: ...lide Please refer to section 7 1 for detailed information about the required grease type The following equipment can be used to lift up the gate or logs o Hand pull the slide or logs are equipped with...

Page 12: ...seals and make sure they are not damaged Seals shall be replaced if damaged see section 7 2 Check tightness of all unit assembly bolts and anchor bolts Spare parts Orbinox does not recommend stocking...

Page 13: ...replacement o Step 1 Remove the log from the frame See Figure 15 part 2 o Step 2 Remove the damaged seals and replace it by the new ones See Figure 16 part 1 Add general purspose Loctite to secure the...

Page 14: ...ogs from the frame Remove the Seal and guide Locking System Remove the vertical seals and replace by the new ones For stainless steel frames the seals are secured with stainless steel retainers Secure...

Page 15: ...stall unit repair the concrete wall and re install the unit Insufficient construction sealant refer to the GAD Uninstall the unit clean the concrete wall and apply new construction sealant refer to th...

Page 16: ...mension Deviations shall be within the tolerances defined in DIN 18202 Deviation Maximun deviation Linear deviation DLx DLy DLyy DIN 18202 table 1 group 2 for DLx and DLy DIN 18202 table 1 group 5 for...

Reviews: