background image


ORBINOX reserves the right to change specifications without notice. 

ORBINOX CANADA, ORBINOX USA, ORBINOX SPAIN, ORBINOX UK, ORBINOX FRANCE, ORBINOX GERMANY, ORBINOX INDIA, ORBINOX CHINA 

WWW.ORBINOX.COM 

OBXC 02-2010 

02-2010 Edition 

Rev.C 

MODEL 

CC

 CHANNEL GATES 


INSTALLATION, OPERATION AND MAINTENANCE MANUAL 


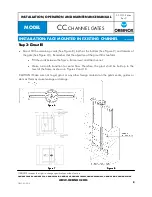
INSTALLATION: FACE MOUNTED IN EXISTING CHANNEL 

Required Materials:

Required Materials:

Required Materials:

Required Materials:    

For the Face Mounted In Existing Channel (FM) mounting option, the CC channel gate is installed by 
means of mechanical anchor bolts (Hilti Kwilt 3 or equivalent). All the gaps shall be grout filled after-
wards and shaped in order to get a smooth transition. 

For detailed information about the type, size and quantity of the required anchor bolts or any other 
specific installation notes or materials, please refer to the notes on the “General Arrangement Draw-
ing”. 


INSTALLATION PROCEDURE

INSTALLATION PROCEDURE

INSTALLATION PROCEDURE

INSTALLATION PROCEDURE    

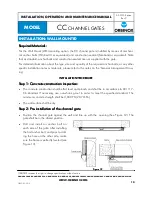
Step 1: Concrete construction inspection:

Step 1: Concrete construction inspection:

Step 1: Concrete construction inspection:

Step 1: Concrete construction inspection:    

• 

The concrete construction shall be flat, level and plumb, and shall be in accordance to ACI 117-
06  standard.  If  necessary,  use  non-shrink  grout  in  order  to  meet  the  specified  standard.  The 
minimum concrete strength shall be 3,000 PSI (20.7 MPa).  

Step 2: Anchor the gate to the channel

Step 2: Anchor the gate to the channel

Step 2: Anchor the gate to the channel

Step 2: Anchor the gate to the channel    

• 

Position the channel gate in the existing channel. Make sure that the gate is perfectly aligned and   
centered in the channel (see Figure 6). 

• 

Install  the  bottom  anchor  bolts,  and  then  the  lateral  anchor  bolts  (see  Figure  8).  All  Face 
Mounted  Channel  Gates  incorporate  bottom  and  lateral  mounting  brackets.  For  smaller  sizes 
(typically under 60”), the channel gate includes lateral flexible brackets (as seen in Figure 8) that 
require no field adjustment. For bigger sizes (typically over 64”), the channel gate includes “Field 
Adjustment  Brackets”.  In  order  to  adjust  the  bracket,  the  following  steps  shall  be  followed  (see  
Figure 7): 

• 

Untighten nut 

• 

Adjust the bracket until it is completely leaning against the wall 

• 

Tight the nut 

• 

Install the anchor bolt 

Summary of Contents for CC Channel Gate

Page 1: ...Installation Operation and Maintenance Manual CC Channel Gate...

Page 2: ...WWW ORBINOX COM OBXC 02 2010 2 02 2010 Edition Rev C MODEL CC CHANNEL GATES INSTALLATION OPERATION AND MAINTENANCE MANUAL INDEX Introduction Handling and Storage Installation Embedded in Concrete Face...

Page 3: ...installed operated and maintained sumes no responsibility or liability if the CC channel gate is not installed operated and maintained sumes no responsibility or liability if the CC channel gate is n...

Page 4: ...o meet the specified standard The minimum concrete strength shall be 3 000 PSI 20 7 MPa Step 2 Align the channel gate in the wall recess Step 2 Align the channel gate in the wall recess Step 2 Align t...

Page 5: ...FRANCE ORBINOX GERMANY ORBINOX INDIA ORBINOX CHINA WWW ORBINOX COM OBXC 02 2010 5 02 2010 Edition Rev C MODEL CC CHANNEL GATES INSTALLATION OPERATION AND MAINTENANCE MANUAL INSTALLATION EMBEDDED IN C...

Page 6: ...p 2B Align the gate vertically without the Bottom Balancing Brackets Smaller CC Channel Gates do not come with Bottom Balancing Brackets Therefore the following procedure shall be followed to align th...

Page 7: ...te construction inspection Step 1 Concrete construction inspection Step 1 Concrete construction inspection The concrete construction shall be flat level and plumb and shall be in accordance to ACI 117...

Page 8: ...Figure 8 Figure 7 Figure 7 Figure 7 Figure 7 Step 3 Grout fill Step 3 Grout fill Step 3 Grout fill Step 3 Grout fill Grout fill the remaining voids See Figure 8 both at the bottom See Figure 9 and lat...

Page 9: ...BINOX GERMANY ORBINOX INDIA ORBINOX CHINA WWW ORBINOX COM OBXC 02 2010 9 02 2010 Edition Rev C MODEL CC CHANNEL GATES INSTALLATION OPERATION AND MAINTENANCE MANUAL INSTALLATION FACE MOUNTED IN EXISTIN...

Page 10: ...raw ing INSTALLATION PROCEDURE INSTALLATION PROCEDURE INSTALLATION PROCEDURE INSTALLATION PROCEDURE Step 1 Concrete construction inspection Step 1 Concrete construction inspection Step 1 Concrete cons...

Page 11: ...pplication Sikabond or equivalent Step 3 Construction sealant application Sikabond or equivalent In order to avoid leakage between the frame and the wall construction sealant shall be applied on the b...

Page 12: ...ten the tighten the anchor bolts Over tightening may bend or distort the frame If the wall flatness and levelness is ac anchor bolts Over tightening may bend or distort the frame If the wall flatness...

Page 13: ...roximately 5 before the initial electric motor operation Check the motor rotation to assure proper direction of the slide travel according to the motor operation switch open close Special attention sh...

Page 14: ...wet while operating Seals shall be wet while operating Seals shall be wet while operating Seals shall be wet while operating If the slide gate has not been used for a long period of time under dry con...

Page 15: ...secured Remove the stem item 5 yoke item 8 and the operator item 11 as one item Step 4 Step 4 Step 4 Step 4 Remove bolts and nuts items 6 and 7 in order to be able to remove the slide Step 5 Step 5 S...

Page 16: ...ORBINOX FRANCE ORBINOX GERMANY ORBINOX INDIA ORBINOX CHINA WWW ORBINOX COM OBXC 02 2010 16 02 2010 Edition Rev C MODEL CC CHANNEL GATES INSTALLATION OPERATION AND MAINTENANCE MANUAL MAINTENANCE SEAL...

Page 17: ...BINOX CHINA WWW ORBINOX COM OBXC 02 2010 17 02 2010 Edition Rev C MODEL CC CHANNEL GATES INSTALLATION OPERATION AND MAINTENANCE MANUAL MAINTENANCE SEAL REPLACEMENT continued Figure 18 Side Seal and Bo...

Page 18: ...have been installed Leakage between channel gate and concrete wall for Wall Mounted Configura tion Concrete wall does not meet the required std Un install the slide gate and fix the wall Not enough co...

Reviews: