background image


3

2. Operating Instruction 

This equipment is used for aerobic exercise, and the capacity of the exercise should be increased step by 

step. 

1). To control the exercise capacity by adjusting the tension control. 

2). When you find some internal parts of the bike are abrasive and loose after using for a long time, please 

open the covers under the guiding of the machinist and adjust the resistance of the belt. The belt should 

not be too loose or too tight, which should be subject to running smoothly and not skidding. 
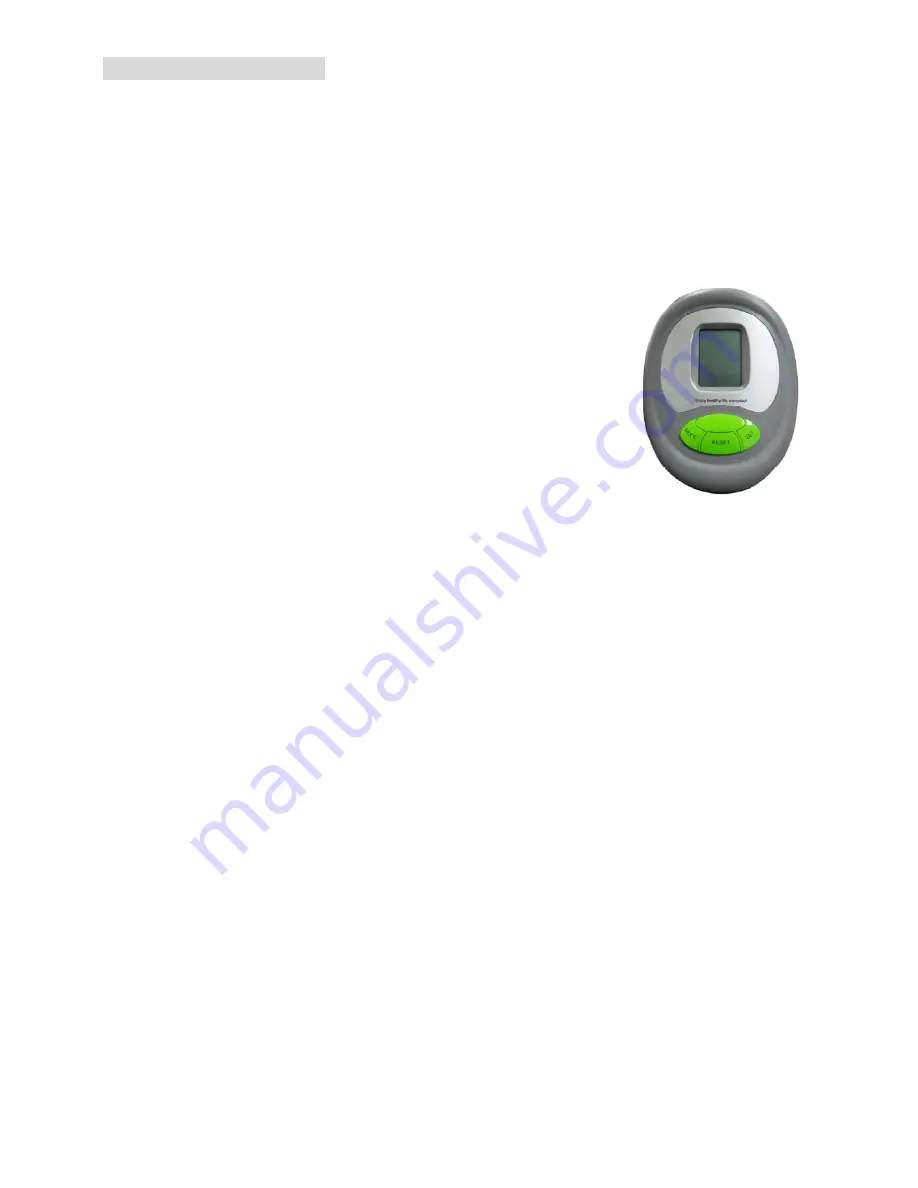
 

KEY FUNCTION


MODE: 

  This key lets you to select and lock on to a particlar 

function you want. According to the above three 
seconds longer, except ODO numerical beyond, time 
and distance and the quantity of heat is cleared. 

PAUSE: 

  Press to start or stop the operation of functions.*(IF 

HAVE) 

SET: 

      The key allows you to choose a target value for 

TIME,DISTANCE,CALORIES

PULSE ,But SPEED and 

ODO cannot set 

RESET:

 RESET KEY to set the target KEY specific cleared, long press RESET for KEY 

specific more than 3 seconds above, electronic watch RESET all numeration 
RESET 

OPERATION PROCEDURES


1.AUTO ON/OFF 


The system turns on when any key is pressed or when it receives an input from the 

      speed sensor. 


The processor turns off automatically when the speed sensor has no signal input or 

            no key is pressed for approximately 4 minutes. 

2.RESET


          The unit can bo roset by changing the batteries or pressing the RESET key for3seconds. 

3.HOW TO PRESET TIME,DISTANCE,ODOMETER PULSE&CALORIES: 

Press the MODE key until the function brand which is going to be preset is flashing. 
Press the MODE key once the function brand stop flashing. 
Next,Choose the value you want to exercise by the SET key. 
When the speed sensor has any signal input,The monitor will begin to count down. 
lt will beep for 4 seconds to indicate the completion of workout which is preset,Press any 
key to stop beeping.lf data is not preset,any function date will count up. 

4.FUNCTIONS: 

TIME

The time of exercise will be dispiayed by pressing MODE key until brand TIME 

appear. 

SPEED

Current speed will be shown by pressing MODE key until brand SP(SPD) appear. 

DISTANCE

The distance of each workout will be displayed by pressing MODE key until 

Summary of Contents for R23500-C

Page 1: ...Magnet Power Recumbent Bike OWNER S MANUAL R23500 C ...

Page 2: ...1 Table of Contents 2 Precautions 3 Operating Instruction 4 Parts List 5 Overview Drawing 6 Hardware Packing List 6 Assembly Instructions 9 Adjustment Maintenance and Treatment 10 Warm Up Exercises ...

Page 3: ...ing a suitable amount of exercise it is also very important to insist on doing exercise every day 5 Before exercise in order to avoid injuring the muscle warm up exercise of every position of the body is necessary Refer to section 9 Warm Up Exercises After exercise relaxation of the body is suggested for cool down 6 Keep children and pets away from the equipment while operating the equipment This ...

Page 4: ... more than 3 seconds above electronic watch RESET all numeration RESET OPERATION PROCEDURES 1 AUTO ON OFF The system turns on when any key is pressed or when it receives an input from the speed sensor The processor turns off automatically when the speed sensor has no signal input or no key is pressed for approximately 4 minutes 2 RESET The unit can bo roset by changing the batteries or pressing th...

Page 5: ...on both of the contact beds and wait for30seconds for the most accurate reading CALORIES The calories burned will be displayed by pressing MODE key until brand CAL appear SCAN Auntomatic display of the followig functions in the order shown TIME SPEED DISTANCE CALORIES ODOMETER if have PULSE if have OR TIME SPEED DISTANCE ODOMETER if have PULSE if have CALORIES BATTERY This monitor uses two batteri...

Page 6: ...4 Crosshead bolt M5 35 1 17 Seat cushion 1 55 Press Wheel 1 18 Back cushion 1 56 Sensor wire 1 19 Seat cushion frame 1 57 Computer 1 20 Right handlebar tube 1 58 Hand pulse wire 1 1 21 M10 70 Bolt 4 59 Hand pulse wire 2 2 22 M8 16 Bolt 4 60 Hand pulse sensor 2 23 Left Right cover 2 61 φ50 end plug 1 24 4V Belt L 31 inch 1 62 Round plug 4 25 Big belt wheel 1 63 Magnetic bracket 1 26 Bearing set 1se...

Page 7: ...6 77 Screwdriver S 5 1 4 Overview Drawing ...

Page 8: ...bilizer 28 to the Seat cushion adjustor 4 with two sets of M10 70 Bolt 21 φ10 Flat washers 48 φ10 Spring washers 71 and M10 Cap nuts 3 See figure 2 3 Install the Front Upright Tube a Pull the Sensor wire 56 hand pulse wire 1 58 out from the bottom hole of Front upright tube 46 b Connect the joint of the tension control 52 with the tension control wire 50 firmly Note at first please turn the tensio...

Page 9: ...ng washer 74 φ8 Arc washer 12 4 Install the Computer a Connect the Sensor wire 56 and the hand pulse wire I 58 to the wires that come from the Computer 57 put the extra wires into the hole of the Front upright tube 46 Attach the Computer 57 to the top of Front upright tube 46 perfectly and tighten with Crosshead bolt M5 10 67 See figure 4 b Attach the Front small handlebar tube 8 to the Front upri...

Page 10: ...pull the Stretching knob 32 and then insert the Seat cushion adjustor 4 into the tube of Main Frame 30 Adjust the Seat cushion adjustor 4 to the desired hole for the appropriate position and tighten the Stretching knob 32 after adjustment See figure 8 Note Do not over the safety guiding line during adjust the Seat cushion tube 9 Install the Left Right Pedals First install the two pieces of Pedal s...

Page 11: ...on Treatment Base is unstable 1 Floor is not flat or there is small object under the front or rear stabilizer 2 The front and rear base feet have not been leveled when assembling 1 Remove the object 2 Adjust the front and rear base feet Right and Left handlebar tubes or seat cushion are shaking The screw loose Tighten the screws Loud noise from the moving parts The interval of the parts has not be...

Page 12: ...cises Inner Thigh Stretch Sit with the soles of your feet together with your knees pointing outward Pull your feet as close into your groin as possible Gently push your knees towards the floor Hold for 15 counts Hamstring Stretch Sit with your right leg extended Rest the sole of your left foot against your right inner thigh Stretch toward your toe as far as possible Hold for 15 counts Relax and th...

Page 13: ...old then repeat on the other side for 15 counts Toe Touch Slowly bend forward from your waist letting your back and shoulders relax as you stretch toward your toes Reach down as far as you can and hold for 15 counts Side Stretch Open your arms to the side and continue lifting them until they are over your head Reach your right arm as far upward toward the ceiling as you can for one count Feel the ...

Reviews: