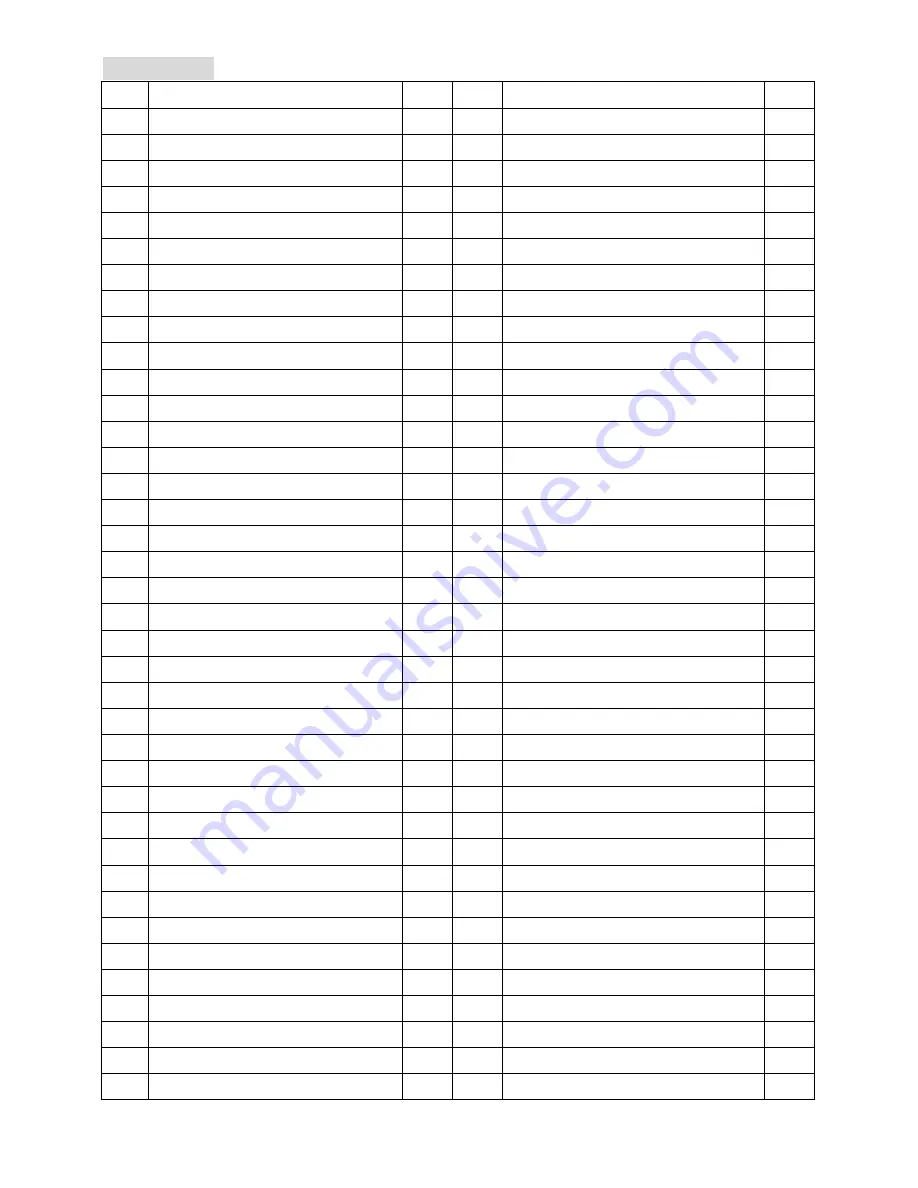
background image


5

3. Parts List 

No. Description Qty

No.

Description  Qty

Rear base foot plastic cover 

39  Crosshead self bolt ST2.9×8 

Locking flat washer 

40  Wire clamp   

M10 Cap nut 

41  M5×40 Bolt 

4  Seat cushion adjustor          

42  M6 Nut 

5 Locator 


1  43 M6×50 

Bolt 

6  Left handlebar tube           

44  Press-Wheel spring 

Foam grip 

45  M8*40 Nut 

Front small handlebar tube 

46  Front upright tube   

φ

25 ball plug 

47  Magnetic spring   

10  Front small handlebar bushing 

48 

φ

10 Flat washer 

11  Decorate cover     

49  Rotating base foot 

12 

φ

8 Arc washer 

10 

50  Tension control wire 

13 

φ

8 Flat washer   

15 

51  Left & Right pedals 

14  M8×20 Bolt 

52  Tension control   

15  M8×40 Bolt 

53  Press-Wheel bracket 

16  M8 Nylon nut 

54  Crosshead bolt M5×35 

17  Seat cushion  

55  Press-Wheel  

18 Back 

cushion 

56 Sensor 

wire 


19  Seat cushion frame            

57  Computer  

20  Right handlebar tube     

58  Hand pulse wire 1 

21  M10*70 Bolt 

59  Hand pulse wire 2 

22  M8*16 Bolt 

60  Hand pulse sensor   

23  Left & Right cover   

61 

φ

50 end plug 

24  4V Belt (L=31 inch) 

62  Round plug 

25  Big belt wheel 

63  Magnetic bracket 

26  Bearing set   

1set

64  Front cover   

27  Front stabilizer   

65  Crank plastic cover 

28  Rear stabilizer 

66  Pedal strip             

29  Crank   

67  Crosshead bolt M5*10 

30 Main 

frame 


68 

φ

4 flat washer 

31  Crosshead bolt ST4*6 

69  Crosshead self bolt ST4.2*20 

32  Stretching knob   

70  Crosshead self bolt ST4*10 

33 Bushing 


71 

φ

10 spring washer 

34 M5 

Nut 

72 

φ

5 flat washer 

35  M10×1×5 Nut 

73  Crosshead self bolt ST4.2*30 

36 M10×1×3 

Nut 

74 

φ

8 spring washer 

10 

37 Flywheel 


75 M8×20 

Bolt 

38  Top spacer   

76  Wrench (135*30*2.5) 

Summary of Contents for R23500-C

Page 1: ...Magnet Power Recumbent Bike OWNER S MANUAL R23500 C ...

Page 2: ...1 Table of Contents 2 Precautions 3 Operating Instruction 4 Parts List 5 Overview Drawing 6 Hardware Packing List 6 Assembly Instructions 9 Adjustment Maintenance and Treatment 10 Warm Up Exercises ...

Page 3: ...ing a suitable amount of exercise it is also very important to insist on doing exercise every day 5 Before exercise in order to avoid injuring the muscle warm up exercise of every position of the body is necessary Refer to section 9 Warm Up Exercises After exercise relaxation of the body is suggested for cool down 6 Keep children and pets away from the equipment while operating the equipment This ...

Page 4: ... more than 3 seconds above electronic watch RESET all numeration RESET OPERATION PROCEDURES 1 AUTO ON OFF The system turns on when any key is pressed or when it receives an input from the speed sensor The processor turns off automatically when the speed sensor has no signal input or no key is pressed for approximately 4 minutes 2 RESET The unit can bo roset by changing the batteries or pressing th...

Page 5: ...on both of the contact beds and wait for30seconds for the most accurate reading CALORIES The calories burned will be displayed by pressing MODE key until brand CAL appear SCAN Auntomatic display of the followig functions in the order shown TIME SPEED DISTANCE CALORIES ODOMETER if have PULSE if have OR TIME SPEED DISTANCE ODOMETER if have PULSE if have CALORIES BATTERY This monitor uses two batteri...

Page 6: ...4 Crosshead bolt M5 35 1 17 Seat cushion 1 55 Press Wheel 1 18 Back cushion 1 56 Sensor wire 1 19 Seat cushion frame 1 57 Computer 1 20 Right handlebar tube 1 58 Hand pulse wire 1 1 21 M10 70 Bolt 4 59 Hand pulse wire 2 2 22 M8 16 Bolt 4 60 Hand pulse sensor 2 23 Left Right cover 2 61 φ50 end plug 1 24 4V Belt L 31 inch 1 62 Round plug 4 25 Big belt wheel 1 63 Magnetic bracket 1 26 Bearing set 1se...

Page 7: ...6 77 Screwdriver S 5 1 4 Overview Drawing ...

Page 8: ...bilizer 28 to the Seat cushion adjustor 4 with two sets of M10 70 Bolt 21 φ10 Flat washers 48 φ10 Spring washers 71 and M10 Cap nuts 3 See figure 2 3 Install the Front Upright Tube a Pull the Sensor wire 56 hand pulse wire 1 58 out from the bottom hole of Front upright tube 46 b Connect the joint of the tension control 52 with the tension control wire 50 firmly Note at first please turn the tensio...

Page 9: ...ng washer 74 φ8 Arc washer 12 4 Install the Computer a Connect the Sensor wire 56 and the hand pulse wire I 58 to the wires that come from the Computer 57 put the extra wires into the hole of the Front upright tube 46 Attach the Computer 57 to the top of Front upright tube 46 perfectly and tighten with Crosshead bolt M5 10 67 See figure 4 b Attach the Front small handlebar tube 8 to the Front upri...

Page 10: ...pull the Stretching knob 32 and then insert the Seat cushion adjustor 4 into the tube of Main Frame 30 Adjust the Seat cushion adjustor 4 to the desired hole for the appropriate position and tighten the Stretching knob 32 after adjustment See figure 8 Note Do not over the safety guiding line during adjust the Seat cushion tube 9 Install the Left Right Pedals First install the two pieces of Pedal s...

Page 11: ...on Treatment Base is unstable 1 Floor is not flat or there is small object under the front or rear stabilizer 2 The front and rear base feet have not been leveled when assembling 1 Remove the object 2 Adjust the front and rear base feet Right and Left handlebar tubes or seat cushion are shaking The screw loose Tighten the screws Loud noise from the moving parts The interval of the parts has not be...

Page 12: ...cises Inner Thigh Stretch Sit with the soles of your feet together with your knees pointing outward Pull your feet as close into your groin as possible Gently push your knees towards the floor Hold for 15 counts Hamstring Stretch Sit with your right leg extended Rest the sole of your left foot against your right inner thigh Stretch toward your toe as far as possible Hold for 15 counts Relax and th...

Page 13: ...old then repeat on the other side for 15 counts Toe Touch Slowly bend forward from your waist letting your back and shoulders relax as you stretch toward your toes Reach down as far as you can and hold for 15 counts Side Stretch Open your arms to the side and continue lifting them until they are over your head Reach your right arm as far upward toward the ceiling as you can for one count Feel the ...

Reviews: