background image

6

E

 N

MANUALLY SET CLOCK

To  set  the  clock  manually,  disable  the  clock  signal 
reception first.

1.  Press and hold 

CLOCK

.

2.  Press 

 /   

to change the settings.

3.  Press 

CLOCK 

to confirm.

The  settings  order  is:  time  zone,  12/24  hr  format, 
hour, minute, year, calendar mode (month – day / day 
– month), month, day and language.

BAR339DP:

  Time  zone  offset  sets  the  clock  +/-  23 

hours from the received clock signal time.

NOTE 

If you enter + 1 in the time offset setting, this will 

give you your local time plus one hour. If you are in the 
US (BAR339DPA only) set the clock to:
0 for Pacific time  

+1 for Mountain time

+2 for Central time  

+3 for Eastern time

NOTE

 The language options are English (E), Spanish (S), 

Italian (I), French (F), German (D), and Russian (R).

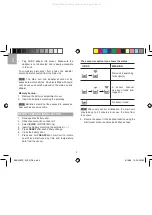
To select clock display mode:

Press 

CLOCK

 to toggle between clock with seconds, 

clock with weekday.

ALARM

To set the alarm:

1.  Press and hold 

ALARM

.

2.  Press 

 /   

to change the settings.

3.  Press 

ALARM 

to confirm.

 indicates alarm is on.

To activate / deactivate alarm:

1.  Press 

ALARM

 to display alarm time.

2.  Press 

ALARM

 again to turn alarm on / off.

To silence the alarm:

• 

Press 

SNOOZE 

to silence it for 8 minutes

OR

• 

Press


any key


to turn the alarm off and activate it 

again after 24 hours.
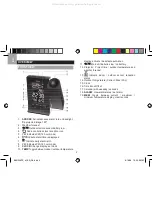
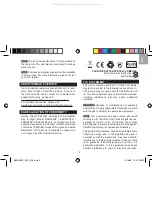
WEATHER FORECAST

This  product  forecasts  the  next  12  to  24  hours  of 
weather within a 30-50 km (19-31 mile) radius with a 
75% accuracy.

Main unit

Projector

Sunny

Partially Cloudy

Cloudy

Rainy

Snowy

BAR339DP_M_EN_R6.indd   6

6/18/08   12:31:20 PM

All manuals and user guides at all-guides.com

Summary of Contents for BAR339DP

Page 1: ...www sotmarket ru Oregon Scientific BAR339DP 8 800 775 98 98 All manuals and user guides at all guides com a l l g u i d e s c o m...

Page 2: ...lock 5 Clock Reception 5 Manually set Clock 6 Alarm 6 Weather Forecast 6 Temperature 7 Projection 7 Backlight 7 Reset 7 Speci cations 8 Main Unit 8 Remote RF Clock Thermo Sensor 8 Precautions 8 About...

Page 3: ...k 10 TEMP Togglebetweenindoor outdoortemperature display activate deactivate auto scan 11 Main unit batteries low no battery 12 Projector Project time outdoor temperature and weather forecast 13 Indic...

Page 4: ...fault settings 8 PROJECTION OFF CLOCK AUTO Select projection display 9 Battery compartment REMOTE SENSOR FRONT VIEW BACK VIEW 1 2 3 4 5 6 1 RESET Reset unit to default settings 2 EU UK Switch RTHN318D...

Page 5: ...open the battery door 2 Slide channel switch to channel 1 3 Select EU UK RTHN318D only 4 Insert the battery matching the polarities 5 Press RESET after each battery change 6 Close the battery door 7...

Page 6: ...Use alkaline batteries for longer usage and consumer grade lithium batteries in temperatures below freezing CLOCK CLOCK RECEPTION This product is designed to synchronize its clock automatically with...

Page 7: ...options are English E Spanish S Italian I French F German D and Russian R To select clock display mode Press CLOCK to toggle between clock with seconds clock with weekday ALARM To set the alarm 1 Pres...

Page 8: ...orecast and time Press SNOOZE when PROJECTION switch is in OFF mode OR Slide PROJECTION switch to CLOCK mode for continuous display To project weather forecast and activate toggling display of time ou...

Page 9: ...ith abrasive or corrosive materials Do not tamper with the unit s internal components This invalidates the warranty Only use fresh batteries Do not mix new and old batteries Images shown in this manua...

Page 10: ...All EU countries Switzerland and Norway CH N FCC STATEMENT This device complies with Part 15 of the FCC Rules Operation is subject to the following two conditions 1 This device may not cause harmful...

Page 11: ...e at www2 oregonscienti c com service for all enquiries We Name Oregon Scienti c Inc Address 19861 SW 95th Ave Tualatin Oregon 97062 USA Telephone No 1 800 853 8883 declare that the product Product No...

Page 12: ...2 Oregon Scientific BAR339DP All manuals and user guides at all guides com...

Reviews: