


NL
3
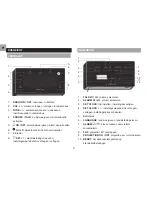
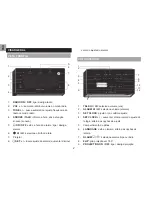
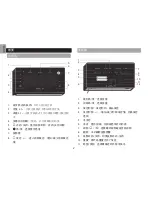
11.
EU / UK
: dichtstbijzijnde radiosignaal selecteren
12.
RCC
: radiokloksignaal zoeken
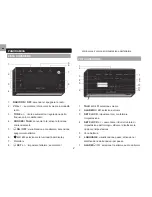
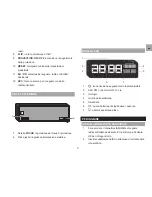
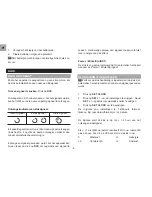
ACHtERKANt
1.
FOCUS
-wiel: projectie scherpstellen
2. Adapteringang
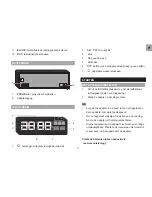
LCD-SCHERM
1. : ontvangst-pictogram radiogestuurde klok
2. AM / PM: 12-uurs klok
3. Klok
4. Dag van de week
5. Kalender
6.
: batterij van het apparaat raakt leeg / geen batterij
7. : dagelijkse wekker staat aan
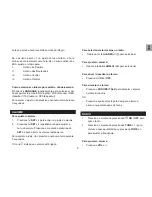
StARtEN
HEt APPARAAt INStELLEN
1. Schuif de
EU / UK
schakelaar op het dichtstbijzijnde
radiosignaal (indien van toepassing).
2. Steek de adapter in het stopcontact.
NB
• Zorg dat de adapter in de buurt is van het apparaat en
dat de adapter niet wordt geblokkeerd.
• Om het apparaat volledig af te sluiten van de voeding,
moet u de adapter uit het stopcontact halen.
• Stel het apparaat en de adapter niet bloot aan vochtige
omstandigheden. Plaats nooit voorwerpen met vloeistof,
zoals vazen, op het apparaat of de adapter.
Plaats de batterijen (alleen bedoeld als
reservevoorziening):
1
2
1
2
3
4
5
6
7
Summary of Contents for EasyPlus EC101
Page 1: ...EasyPlus Talk o Clock Model EC101 USER MANUAL...
Page 66: ...1 FM EC101 2 2 2 3 3 3 3 4 4 4 5 5 5 6 6 6 6 6 Oregon Scientific 7...
Page 67: ...2 1 2 3 4 5 6 7 8 1 2 3 4 5 6 7 8 180 9 10 11 1 2 3 4 5 6 7 8 1 2 3 4 5 6 7 8 9 10 11 12...
Page 68: ...3 12 RCC 1 2 1 2 12 3 4 5 6 7 1 2 1 2 1 2 1 2 3 4 5 6 7...
Page 69: ...4 RCC 2 10 24 RCC DST 1 2 3 12 24 23 1 0 1 2 3 5...
Page 70: ...5 1 2 5 8 24 1 2 180...
Page 71: ...6 x x 200 x 105 x 65 7 9 x 4 1 x 2 6 514 18 1 AC DC 6V 2 UM 4 AAA 1 5 V Oregon Scientific...
Page 80: ...1 FM EC101 2 2 2 3 3 3 3 4 4 4 5 5 5 6 6 6 6 6 Oregon Scientific 7...
Page 82: ...3 1 2 1 2 12 3 4 5 6 7 1 2 1 2 1 2 1 2 3 4 5 6 7...
Page 83: ...4 RCC 2 10 24 RCC DST 1 2 3 12 24 23 1 0 1 2 3 5...
Page 84: ...5 1 2 5 8 24 1 2 180...
Page 85: ...6 x x 200 x 105 x 65 7 9 x 4 1 x 2 6 514 18 1 AC DC 6V 2 UM 4 AAA 1 5 V Oregon Scientific...


