background image

15

GB

SPECIFICATIONS

Dimensions:

Width x Depth x Height

315(w) x 340(d) x 50(h) mm

Weight

1.8kg (excluding batteries)

Weight measurement:

Weighing mechanism

4 load cell Strain-gauge System

Weight units

kilogram (kg) / pounds (lb) / stone pounds (st-lb)

Maximum Weighing Capacity

150kg / 330 lb / 23st-8lb

Graduation

0.1 kg / 0.2 lb

BMI:

BMI measurement range

up to 50 kg/m

2

Body Fat measurement:

Measurement mechanism

6 conductive pads BIA technology

Body fat measurement range

5 – 75%

Body fat Index display resolution

0.1%

Gender

Male / Female

Age

7 to 99 years old

Height input:

Height units

centimeters (cm) / feet (‘) and inches (“)

Min / Max height

80 – 230.0 cm / 2’ 7.5” – 7’ 6.6”

Height resolution

0.1cm or 0.1”

Power:

Power supply

4xLR6 / AA / UM-3 1.5v batteries

Power save

auto-off after 5 – 10 seconds

Operating environment:

Operation temperature

5

°

 C … 45

°

 C (41

°

 F…113

°

 F)

at 

85% relative humidity

Storage temperature

-5

°

 C ….60

°

 C (23

°

 F … 140

°

 F)

at 

85% relative humidity

ADDITIONAL RESOURCES

Visit our website (www.oregonscientific.com) to learn more about your Body Weight Monitor
and other Oregon Scientific™ products such as digital cameras, telephones, hand-held
organizers, alarm clocks, and weather stations. The website also includes contact information
for our customer service department, in case you need to reach us.

Help us protect the environment. Recycle the packaging, batteries, and product after

you no longer need them.

© 2003 Oregon Scientific. All rights reserved.

Summary of Contents for GA101

Page 1: ...ex 6 How to Interpret Body Fat Level Indicator 7 How Body Fat Percentage Fluctuates 7 Safety and Care Instructions 8 Getting Started 9 Unpacking the Body Weight Monitor 9 Selecting a Location for the...

Page 2: ...agnosis purposes The BMI and Body Fat Index measurements done with the Monitor should only be treated as an approximate indication of your health level Consult with your physician for a full and thoro...

Page 3: ...sal regulations Statement of Responsibility Oregon Scientific assumes no responsibility for any incidental losses such as the costs of recording or the loss of income from recording incurred as a resu...

Page 4: ...evel both the BMI and Body Fat Index should be observed Neither the BMI nor the Body Fat Index taken individually gives the complete picture of your health For example bodybuilders often have high BMI...

Page 5: ...20 0 Asian BMI Less than 18 5 20 0 25 0 Asian BMI 18 5 23 0 25 1 29 9 Asian BMI 23 0 29 9 30 0 or greater Asian BMI 30 0 or greater Your body weight is currently lower than average Work toward health...

Page 6: ...effective assessment of your current health level Essential fat is necessary for bodily functions since it helps to maintain body temperature an insulate organs and tissues How Body Fat is Measured T...

Page 7: ...or exercising waking up eating fever and illnesses Body Fat Standard Reason Very High Body Fat Index at this level indicates the person is seriously obese to a degree that this can have adverse health...

Page 8: ...ing your Body Weight Monitor Clean with a damp cloth Do not use abrasive or corrosive cleaning agents Do not attempt to repair the product yourself This will terminate the warranty and may expose you...

Page 9: ...the supplied carpet feet Placing the Monitor on the floor will display on the LCD This indicates that it is calibrating Simply leave the Monitor on the floor for 1 2 seconds to allow self calibration...

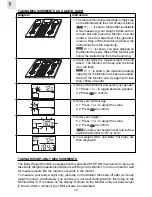
Page 10: ...ram Instructions 1 Each user is represented by the four user setting switches at the edge of the Monitor Press 1 2 3 or 4 to select one of the users Make sure not to store your height and age over som...

Page 11: ...is displayed 3 Step on the Monitor Stand still while the measurement is being taken The Monitor will beep when the measurement is complete The weight BMI and Body Fat Index will display If is shown t...

Page 12: ...measuring your weight Make sure to remain still and place the Monitor on a flat surface Use the carpet feet if the ground is uneven Step off the Monitor and follow the instructions from the beginning...

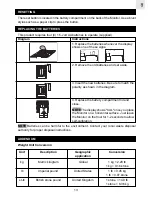
Page 13: ...atch the polarity as shown in the diagram 4 Replace the battery compartment lid and close The display shows CAL once you place the Monitor on a horizontal surface Just leave the Monitor on the floor f...

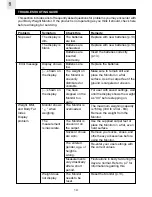
Page 14: ...rrectly p 13 Replace the batteries Make sure to remain still and place the Monitor on a flat surface Use the carpet feet if the ground is carpeted or uneven For user with saved settings wait until the...

Page 15: ...ax height 80 230 0 cm 2 7 5 7 6 6 Height resolution 0 1cm or 0 1 Power Power supply 4xLR6 AA UM 3 1 5v batteries Power save auto off after 5 10 seconds Operating environment Operation temperature 5 C...

Reviews: