


8
EN
to radio signals until you reactivate the
synchronization.
To enable auto-reception, press UP for 2
seconds.
SET OR CHANGE THE CLOCK
Clock auto-synchronization must be deactivated
before you manually set the clock.
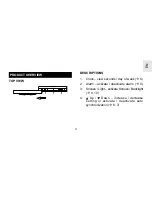
1.
Press and hold CLOCK for 2 seconds to
enter setting mode.
2.
Select the 12/24-hour format, hour, minute,
year, date/month format, month, date, and
display language. Press UP or DOWN
to change the setting. Press CLOCK to
confirm.
NOTE
The language options are (E) English,
(F) French, (D) German, (I) Italian, and (S)
Spanish.
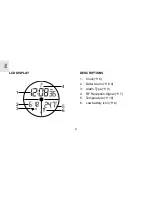
VIEW DAY OF WEEK OR SECONDS
Press CLOCK.


