


5
GB
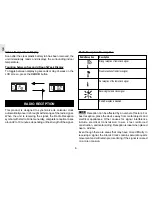
Batteries
When using the product for the first time, please note
that the batteries have already been installed in the unit.
To operate, locate the clear plastic battery tab inside the
battery compartment and remove it.
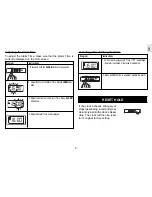
To load the batteries:
Diagram
Instructions
1. Locate the battery compartment.
2. Install the batteries by matching the correct
polarity. Always use the correct battery type
(2 UM-3 AA-sized 1.5V batteries).
Warning: Reversing the polarity may
damage the product.
Replace the batteries whenever the weak battery
mark ( ) is shown, the display is dim, or the display does not
illuminate when the power is on. Replace all the batteries at the
same time - it is dangerous to mix old and new batteries.
Contact your local waste disposal authority for instructions on
how to dispose of used batteries. Used batteries can be
harmful to the environment, and should not be thrown out with
household trash.
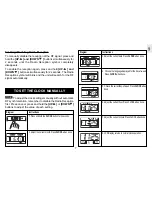
Placement of Unit
You can either mount the main unit on a wall or make it stand
on a flat surface.
Method
Instruction
Diagram
Table
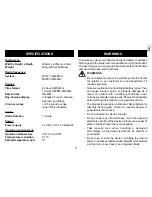
Stand
The unit is already equipped with a Table
Stand. Simply pull out the Table Stand
and rest the main unit on a flat surface.
Wall
Mount
The main unit can be mounted onto a wall
using a No. 6 screw (3.0mm).
a) Position and nail the screw into the
place where you would like to hang
your main unit.
b) Leave ample space between the wall
and the screw head while testing to
make sure the nail is secure.
c) Fit the unit’s Wall-Mount Recess Hole
onto the screw head.
NOTE
NOTE


