


GB
6
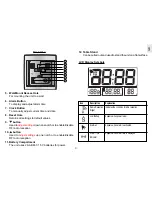
Indoor Temperature Display
Soon after the clear plastic battery tab has been removed, the
unit immediately reads and displays the surrounding indoor
temperature.
Toggling between Seconds/Day-of-Week Display
To toggle between displaying seconds or day-of-week on the
LCD screen, press the CLOCK button.
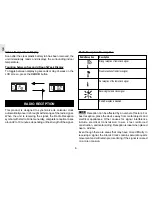
RADIO RECEPTION
This product is designed to synchronize its calendar clock
automatically once it is brought within range of the radio signal.
When the unit is receiving the signal, the Radio Reception
symbol with start to blink. Generally, complete reception takes
around 2 to 10 minutes, depending on the strength of the signal.
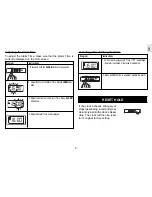
Radio Reception Description
Radio Reception
Description
Reception can be affected by a number of factors. For
best reception, place the device away from metal objects and
electrical appliances. Other causes for signal interference
include electrical transmission tower, steel reinforced
construction, and metal siding. Reception is ideal when placed
near a window.
Even though there are areas that may have more difficulty in
receiving a signal, the Atomic Clock contains accurate quartz
movement and will retain precise timing if the signal is missed
on a rare occasion.
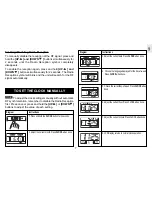
Strong reception of radio clock signal.
Weak reception of radio clock signal.
No reception of the radio clock signal.
Receiving the radio clock signal.
Radio Reception is disabled.
NOTE


