


4
GB
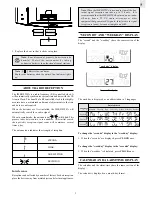
calendar mode
alarm mode
To change the calendar display to the alarm-time display:
2. When the calendar is displayed, press ALARM once.
To change the alarm-time display to the calendar display:
2. When the alarm time is displayed, press CLOCK once.
HOW TO SET THE CALENDAR CLOCK
MANUALLY
Under certain circumstances, the user may wish to set the
JMR838WFA manually. To set the JMR838WFA manually, follow
the procedures below:
Note: The RF controlled mechanism overrides manual
settings. If manual settings are made, the clock will
periodically adjust the time to what is indicated by the
radio signal.
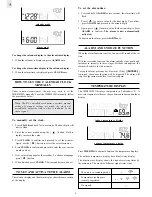
To manually set the clock:
1. Press CLOCK and hold for two seconds. The hour digits will
start to flash.
2. Enter the correct month using the [
] button. Hold to
rapidly increase the value.
3. Press CLOCK to confirm and proceed to set the minutes.
Again, use the [
] button to select the correct minutes.
4. Press CLOCK to confirm and proceed to enter the year, current
month and day.
5. Next, select a language for the weekday. To choose a language
press [
] button.
6. When finished, press CLOCK. The time and date are now set.
TO SET AND ACTIVATE THE ALARM
The calendar display and the alarm display share the same section
of the display.
To set the alarm-time:
1. Press and hold ALARM for two seconds, the alarm time will
flash.
2. Press [
] to enter a value for the hour digits. To confirm,
press ALARM and proceed to the minute digits.
3. Again, press [
] to enter a value for the minute digits. Press
ALARM to confirm. The alarm is now automatically
activated.
To deactivate the alarm, press ALARM once.
ALARM AND SNOOZE FUNCTION
When the alarm function is active, the unit will sound at the set
time.
With the crescendo function, the alarm initially starts gently and
increases in intensity in three stages. Without interruption, the
alarm will activate for two minutes.
To stop the alarm, press any key. However, if the [
(( SNOOZE ))
]
is pressed, the snooze function will be triggered. The alarm will
stop for eight minutes before it activates again.
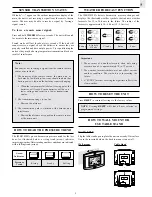
TEMPERATURE DISPLAY
The JMR838WFA displays temperature in Fahrenheit (°F). A
user-select option lets the user choose between indoor and outdoor
display.
indoor temperature display
outdoor temperature display
Press THERMO to alternate between the temperature displays.
The outdoor temperature display has a kinetic-way display.
The kinetic-wave display shows the signal-receiving status by
the main unit. The are three different signal status icons.
The unit is in searching mode.
Temperature readings are
securely registered.
No signals.


