


7
GB
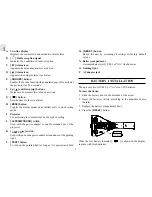
6. To test if the guiding light is working properly, install batteries
into the battery compartment and press the [TEST] button. The
light should be turned on as long as the button is held.
7. If the light does not turn on, check if the lightbulb is broken or
if the lightbulb is well-connected to the unit.
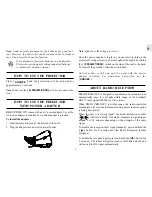
MAINTENANCE
When handled properly, this unit is engineered to give you years
of satisfactory service. Here are a few product care instructions:
1. Do not immerse the unit in water. If the unit comes in contact
with water, dry it immediately with a soft lint-free cloth.
2. Do not clean the unit with abrasive or corrosive materials.
Abrasive cleaning agents may scratch the plastic parts and
corrode the electronic circuit.
3. Do not subject the unit to excessive: force, shock, dust,
temperature, or humidity. Such treatment may result in
malfunction, a shorter electronic life span, damaged batteries,
or distorted parts.
4. Do not tamper with the unit’s internal components. Doing so
will terminate the unit’s warranty and may cause damage. The
unit contains no user-serviceable parts.
5. Only use new batteries as specified in this instruction manual.
6. Read this instruction manual thoroughly before operating the
unit.
PRODUCT SPECIFICATIONS
Operating Temperature : -5°C to 50°C
Radio Controlled
: Auto synchronizes current time and
date by Radio signal generated from
Germany DCF77 (the UK version
from MSF Rugby, England)
Calendar
: Day of week in English / German /
French / Italian / Spanish,
Current date / month format
Clock Time
: 12/24-hour format
Accuracy
: +/- 0.5 second/day
(when RF is disabled)
Hour offset
: +/- 9 hours
Battery Type
: Two (2) UM-3 or “AA” size 1.5V batteries
Unit Dimension
: 90 x 111 x 148 mm ( H x W x D )
Unit Weight
: 200 g (without battery)
Lightbulb Rating
: 3V, 300 mA
Lightbulb Dimension
: T10 x 28 mm
NOTE ON COMPLIANCE
Warning: Changes or modifications to this unit not expressly
approved by the party responsible for compliance could void the
user’s authority to operate the equipment.