background image

EN

12

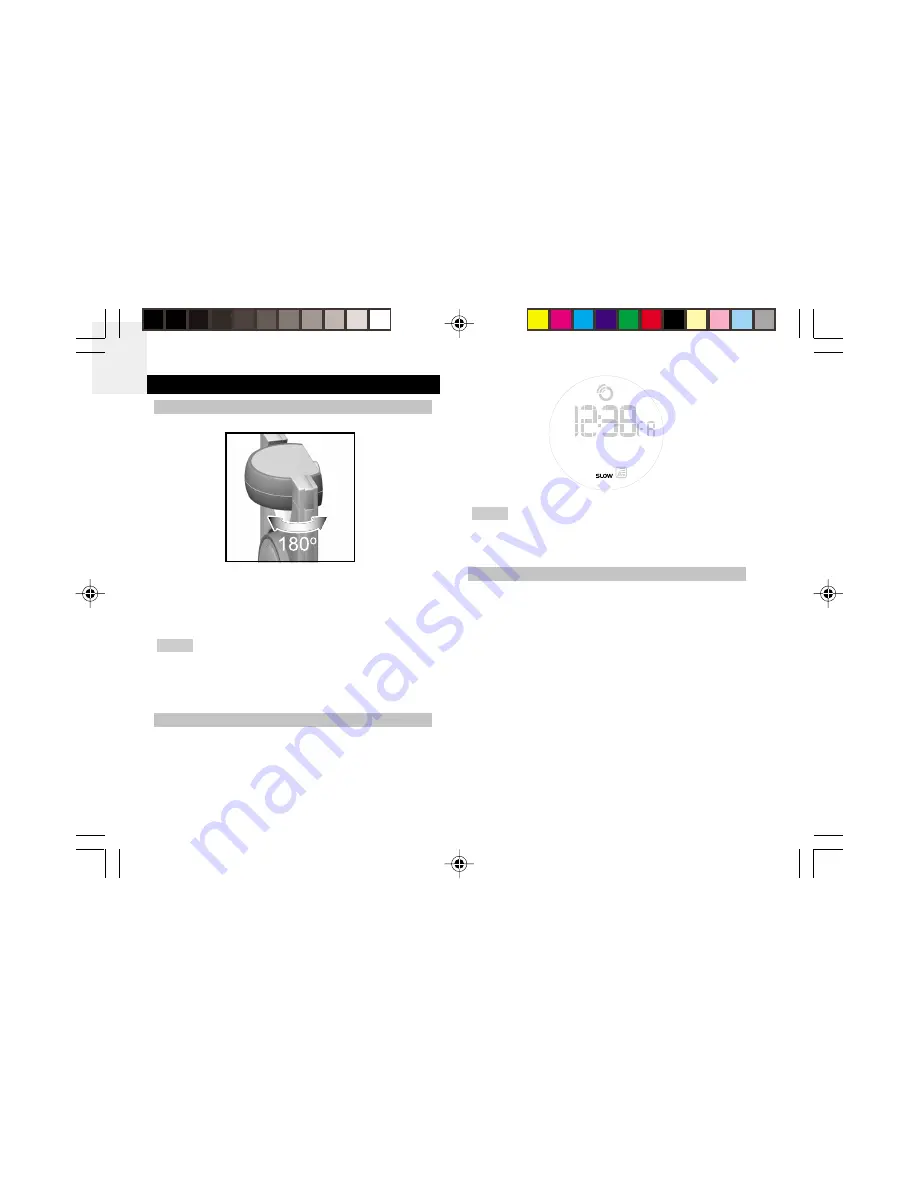
To turn on the projector:

Press  the 

SNOOZE

  button  to  activate  the  projector

for 5 seconds.

If  the AC  /  DC  adaptor  is  plugged,  press  the

PROJECTOR  ON

  and  the  projector  will  stay

continuously  on.  Press  the 

PROJECTOR  ON

  button

again to deactivate the continuous projection-on function.

ANIMATION SPEED SETTING

To enter to the projector setting mode:

1. Press the 

PROJECTOR ON

 button for 2 seconds.

2. Use the 

UP

 and 

DOWN

 buttons to select either fast

or slow animation.

3. Press the 

PROJECTION ON

 button to confirm.

The  order  of  the 

flashing

  items  is  speed

high / slow, alarm animation on / off, exit project setting
mode.

ANIMATION ON / OFF SETTING

To set the animation on:

1. Press  and  hold  the 

PROJECTION  ON

  button  for

2 seconds.

2. Select  the  animation  speed  by  using  the 

UP

  and

DOWN

 buttons.

3. Press the 

PROJECTION ON

 button

4. Use  the 

UP

  and 

DOWN

  buttons  to  select 

"On"  or

"Off".

5. Press the 

PROJECTION ON

 button to confirm.

THE PROJECTOR FUNCTION

ACTIVATING THE PROJECTOR

NOTE

NOTE

RM818PA English R1

9/1/04, 11:20 AM

12

Summary of Contents for RM818PA

Page 1: ...Cool Atomic Projection Clock with Animated Projection Model RM818PA User Manual RM818PA English Cover R1 8 31 04 10 48 PM 1...

Page 2: ...Mode 8 Clock Setting Mode 8 Selecting a Language 9 The Alarm Function 10 Basic Functions 10 Displaying the Alarm Time 10 Setting the Alarm Time 10 Activating Deactivating the Alarm 11 The Snooze Funct...

Page 3: ...ion technical specifications and warnings you should know Read the manual thoroughly and keep it in a safe place in case you need to refer to it KEY FEATURES The desktop dual band radio controlled clo...

Page 4: ...clock signal reception indicator 3 SNOOZE LIGHT button Press to activate projection and backlight for 5 seconds 4 ALARM button Press to toggle between Alarm 1 Alarm 2 and Calendar mode 5 ON OFF butto...

Page 5: ...on when in normal mode Press to increase the flashing item by 1 in Setting mode 5 DOWN button Press and hold for 2 seconds to disable the atomic clock function when in normal mode Press to decrease th...

Page 6: ...ther heat generating products Water and moisture Do not use the product in or near water or in high moisture areas such as a bathroom CARING FOR YOUR PRODUCT To ensure you receive the maximum benefit...

Page 7: ...2 x UM 4 AAA sized 1 5V User manual BATTERIES To load the batteries 1 Locate the battery compartment 2 Install the batteries by matching the correct polarity Always use the correct battery type 2 x UM...

Page 8: ...minutes depending on the strength of the signal ATOMIC CLOCK RECEPTION DESCRIPTION NOTE STRONG SIGNAL WEAK SIGNAL NO SIGNAL ATOMIC CLOCK This product is designed to synchronize its calendar clock auto...

Page 9: ...ignal Press and hold the DOWN button for 2 seconds until the atomic clock reception symbol disappears SETTING THE CLOCK MANUALLY To adjust the clock settings manually without automatic atomic clock sy...

Page 10: ...mat whether 12 hour to 24 hour format 4 Press the ALARM button to exit the set mode NOTE TIME FORMAT SETTING MODE To set the current date 1 Press and hold the CLOCK button for 2 seconds 2 Press CLOCK...

Page 11: ...larm time instead Press the ALARM button DIFFERENT ALARM MODES To choose a language 1 Press and hold the CLOCK button for 2 seconds 2 Press CLOCK eight times 3 Use the UP and DOWN buttons to select th...

Page 12: ...de the date on the lower half of the LCD display The first bell will turn on the alarm for Alarm 1 If you press the ON OFF button a second time you will activate the second alarm as well as shown by t...

Page 13: ...the UP and DOWN buttons to select either fast or slow animation 3 Press the PROJECTION ON button to confirm The order of the flashing items is speed high slow alarm animation on off exit project setti...

Page 14: ...battery level The light on the vibration device will flash in red when the battery is low and the light will flash in green when the battery power is full The switch within the vibrating device can ad...

Page 15: ...es TROUBLESHOOTING GUIDE BASIC FUNCTIONS This section includes a list of frequently asked questions for problems you may encounter If your device is not operating as you think it should check here bef...

Page 16: ...t requires servicing Take precautions when handling all battery types They can cause injuries burns or property damage as a result of contact with conducting materials heat corrosive materials or expl...

Page 17: ...ns 1 This device may not cause harmful interference and 2 This device must accept any interference received including interference that may cause undesired operation Changes or modifications to this u...

Page 18: ...ranty card for this product for all inquiries instead We Name Oregon Scientific Inc Address 19861 SW 95th Place Tualatin Oregon 97062 USA Telephone No 1 800 853 8883 Fax No 1 503 684 8883 declare that...

Page 19: ...2004 Oregon Scientific All rights Reserved P N 086 000000 000 RM818PA English Back R1 8 31 04 10 48 PM 1...

Reviews: