background image

8

GB

SECTION 3

ADDITIONAL INFORMATION

THE RESET BUTTON

The [RESET] button is used to enhance synchronization of signals
after battery replacement or when the unit is operating in an
unfavorable way or malfunctioning. Use a blunt stylus to hold
down the button. All settings will return to their default values.

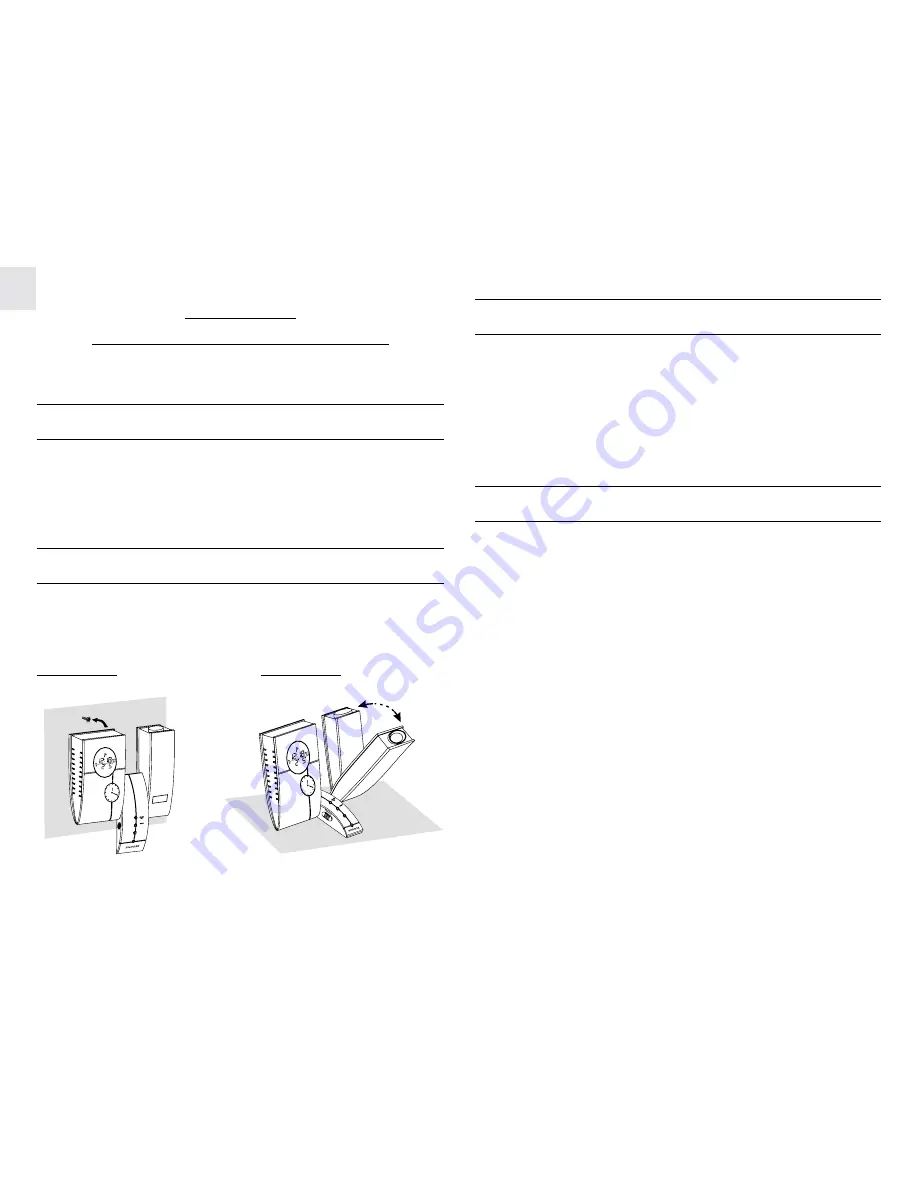
WALL-MOUNT OR TABLE-STANDING

This unit is designed specially so that you can adjust the angles of
the different parts to facilitate table-standing or wall-mounting.

Wall-Mount

Table-Stand

NOTES ON BACKLIGHT

 - The EL panel that provides illumination will lose power after

extensive usage.

 - The unit may emit an audible sound whenever the display is

illuminated by the EL backlight.  This is due to vibration of the
EL panel used for illumination and does not indicate
malfunction of the unit.

PRECAUTIONS

This unit is engineered to give you years of satisfactory service if
handled carefully.

1. Do not immerse the unit in water.

2. Do not clean the unit with abrasive or corrosive materials.

3. Do not subject the unit to snow or excessive force, shock, dust,

temperature or humidity.

4. Do not tamper with the unit’s internal components.

5. Do not mix new and old batteries or batteries of different

specifications.

Summary of Contents for RM868P

Page 1: ...ned to automatically synchronize its current time and date when brought within an approximate 1500km radius of the radio signal generated fromFrankfurt Germany DCF77 TheRM868PU theUKmodel will do the...

Page 2: ...s to default values H PROJECTIONON BUTTON Used with power adapter to enable continuous projection I IMAGEROTATION KNOB 90 left or right image rotation J 180 ROTATION BUTTON Flips the projected image h...

Page 3: ...arm Time Alarm on off Status HOW TO ACTIVATE THE BACK LIGHT Press SNOOZE to turn on the back light for 5 seconds HOW TO USE THE CLOCK PROJECTION The clock projection makes it easier for you to read th...

Page 4: ...image will return to Current time with Alarm on off status automatically after 10 seconds Note that this switch can only be used with the power adapter installed For momentary projection use the SNOOZ...

Page 5: ...he radio reception icon will start to blink A complete reception generally takes about 2 to 10 minutes depending on the strength of the radio signal After that the periodical scanning will only take a...

Page 6: ...hold MODE SET for 2 seconds 2 Enter the 2nd time zone offset hour using You can select between 23 and 23 hours Hold down either button to rapidly increase or decrease the value Press MODE SET 3 Enter...

Page 7: ...enter the hours The hand of hour on the analog display will be adjusted simultaneously 4 Press ALARM 5 Use to enter the minutes The hand of minutes on the analog display will be adjusted simultaneousl...

Page 8: ...BACKLIGHT The EL panel that provides illumination will lose power after extensive usage The unit may emit an audible sound whenever the display is illuminated by the EL backlight This is due to vibra...

Page 9: ...uld void the user s authority to operate the equipment R TTEComplianceNote This device complies with the essential requirements of Article 3 of the R TTE 1999 5 EC Directive if used for its intended u...

Reviews: