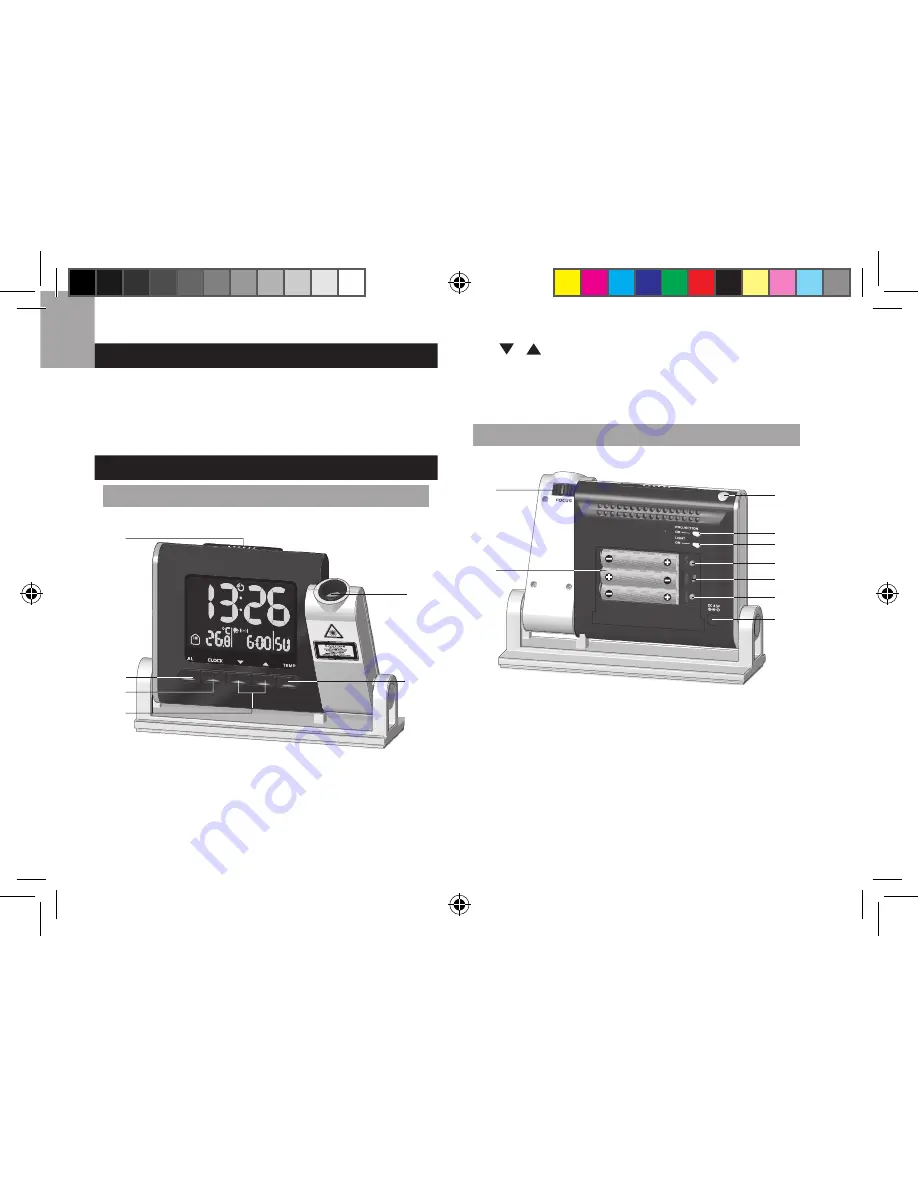
background image

2

EN

4. 

 / 

 : To g g l e s et t i n g o pt i o ns ; ac t i vate  /  


deactivate clock reception

5.  Projector (LED Aperture)
6. 

TEMP

: Toggle in / out temperature settings

BACK VIEW

1

2

4

3

5
6
7
8
9

1.   

FOCUS

: Focus the projected image

2.   Battery compartment
3.  Light sensor
4. 

PROJECTION

: ON / OFF switch

5. 

LIGHT

: Backlight ON / OFF switch

6. 

°C  / °F

: Select temperature unit

7. 

EU / UK

: Radio signal switch

8. 

RESET

: Reset settings to default

9.  Adapter socket

INTRODUCTION

Thank  you  for  selecting  this  Oregon  Scientific


Radio-Controlled Projection Clock with Indoor / Outdoor 
Temperature. Please keep this manual for instructions 
and information you should know about.

CLOCK OVERVIEW

FRONT VIEW

1

5

6

2

3
4

1. 

SNOOZE

: Snooze alarm; activate backlight; rotate 


dual line projection display by 180° 

2. 

ALARM

: View alarm status; set alarm

3. 

CLOCK

: Change display; set clock

RMR329P_M_EN_R1.indd   2

6/21/07   12:45:20 PM

Summary of Contents for RMR329P

Page 1: ...view 2 Back view 2 Remote sensor 3 Getting started 3 Power supply 3 Remote sensor 3 Sensor data transmission 4 Clock 4 Clock reception 4 Manually set clock 4 Alarm 5 Temperature 5 Projector and backl...

Page 2: ...t 7 EU UK Radio signal switch 8 RESET Reset settings to default 9 Adapter socket INTRODUCTION Thank you for selecting this Oregon Scientific Radio Controlled Projection Clock with Indoor Outdoor Tempe...

Page 3: ...ot connected To insert batteries 1 Remove the battery compartment and insert batteries matching polarities 2 Press RESET after each battery change LOCATION MEANING Clock alarm area Main unit batteries...

Page 4: ...e the sensor in a location with a clear view to the sky away from metallic or electronic objects Position the sensor close to the main unit during cold winter months CLOCK CLOCK RECEPTION This product...

Page 5: ...o silence it for 8 minutes OR Press any other key to turn the alarm off and activate it again after 24 hours TEMPERATURE To toggle temperature unit Press C F To toggle between outdoor indoor sensor re...

Page 6: ...s necessary Please note that some units are equipped with a battery safety strip Remove the strip from the battery compartment before rst use NOTE The technical speci cations for this product and the...

Page 7: ...re about Oregon Scienti c products If you re in the US and would like to contact our Customer Care department directly please visit www2 oregonscienti c com service support OR Call 1 800 853 8883 For...

Page 8: ...Radio Controlled Projection Clock with Indoor Outdoor Temperature Model RMR329P USER MANUAL RMR329P_M_EN_R1 indd 8 6 21 07 12 45 29 PM...

Page 9: ...2007 Oregon Scienti c All rights reserved 086L004765 023 RMR329P_M_EN_R1 indd 9 6 21 07 12 45 29 PM...

Reviews: