8
EN
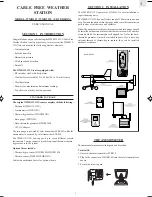
To do so,
1. Press the window containing the weather element you want to
set.
2. Press [ALARM].
3. Press [ ] to deactivate the function.
To turn on the function again, simply follow the same procedure and
press [ ].
DISCONNECTED SIGNALS
If without obvious reason the display for the main unit goes blank or
“
” are displayed, press and hold [CHANNEL] to enforce an
immediate search.
If that fails, check:
- All weather instruments are still in place.
- The batteries of the main unit and individual weather instruments
are still good. Replace them if necessary. Press and hold
[CHANNEL] to enforce an immediate search afterwards.
- The transmission is within range and path is cleared of obstacles
and interference. Shorten the distance if necessary.
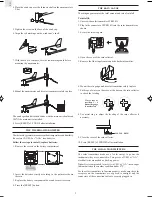
Then press and hold [CHANNEL] again. The main unit will start
searching for all previously locked weather instruments.
If you want to add an new sensor, press the reset button on the new
sensor and then press [CHANNEL] to enforce the main unit to
search.
Note: 1. Do not reset the sensors after the main unit has locked
those sensors, otherwise the main unit will no longer
receive the signal from those sensors.
2. If you have disconnected signals, you cannot clear the
memory.
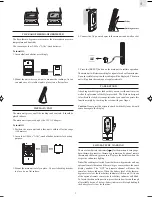
THE RESET BUTTON
This button is only used when the system is operating in an
unfavorable way or malfunctioning. Use a blunt stylus to hold down
the button. The main unit will return to all default settings and start
searching for signals again.
Before resetting the main unit, you should do the same for all
weather instruments to ensure correct transmission and reception of
signals. Then press [RESET] on the main unit.
MAINTENANCE
When handled properly, this unit is engineered to give you years of
satisfactory service. Here are a few product care instructions:
1. Do not immerse the unit in water. If the unit comes in contact
with water, dry it immediately with a soft lint-free cloth.
2. Do not clean the unit with abrasive or corrosive materials.
Abrasive cleaning agents may scratch the plastic parts and
corrode the electronic circuit.
3. Do not subject the unit to excessive: force, shock, dust,
temperature, or humidity. Such treatment may result in
malfunction, a shorter electronic life span, damaged batteries, or
distorted parts.
4. Do not tamper with the unit’s internal components. Doing so
will terminate the unit’s warranty and may cause damage. The
unit contains no user-serviceable parts.
5. Only use new batteries as specified in this instruction manual.
Do not mix new and old batteries as the old batteries may leak.
6. Read this instruction manual thoroughly before operating the unit.
SPECIFICATIONS
Temperature
Proposed Operating Range : Indoor ..... -5
°
C to 50
°
C
( 23
°
F to 122
°
F )
: Outoor ..... -20
°
C to 60
°
C
( -4
°
F to 140
°
F )
Resolution
: 0.1
°
C (0.2
°
F)
(indoor and outdoor)
Relative Humidity
Measuring Range
: 25 to 90% RH
(indoor and outdoor)
Resolution
: 1% RH
(indoor and outdoor)
Dew Point Temperature
Measuring Range
: Indoor ..... -5
°
C to 50
°
C
( 23
°
F to 122
°
F )
: Outoor ..... -10
°
C to 60
°
C
( 14
°
F to 140
°
F )
Resolution
: 1
°
C (2
°
F)
(indoor and outdoor)
Barometric Pressure / Trend
Measuring Range
: 600 to 1050 mb
(17.72 to 31.01 inHg)
Resolution
: 1 mb (0.03 inHg)
Wind Speed
Measuring Range
: 0 to 56 m/s (0 to 125.3 mph)
Resolution
: 0.2 m/s (0.4 mph) (typical)
Wind Direction
Measuring Range
: 0
°
to 359
°
(Degrees)
Digital Resolution
: 1
°
(typical)
Graphical Resolution
: 10
°
Wind Chill Temperature
Measuring Range
: -52
°
C to 60
°
C (-61.6
°
F to 140
°
F)
Resolution
: 1
°
C (2
°
F)
Rainfall
Daily and Cumulative
: 0 to 9999 mm (0 to 393.7 in)
Measuring Range
Rainfall Rate
: 0 to 999 mm/hr (0 to 39.37 in/hr)
Measuring Range
Daily and Cumulative
: 1 mm (0.04 inch)
Resolution
Rainfall Rate Resolution
: 1mm/hr (0.04 m/h) typical
WMR112/112U :
Weight
: 505 g
Dimension
: 36 (L) x 90 (W) x 196 (H)
WMR112_EN_output
9/1/04, 7:04 PM
8

