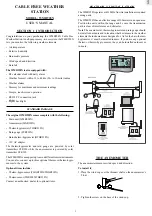
background image

2

 GB

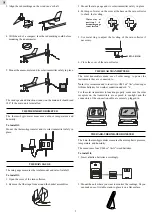
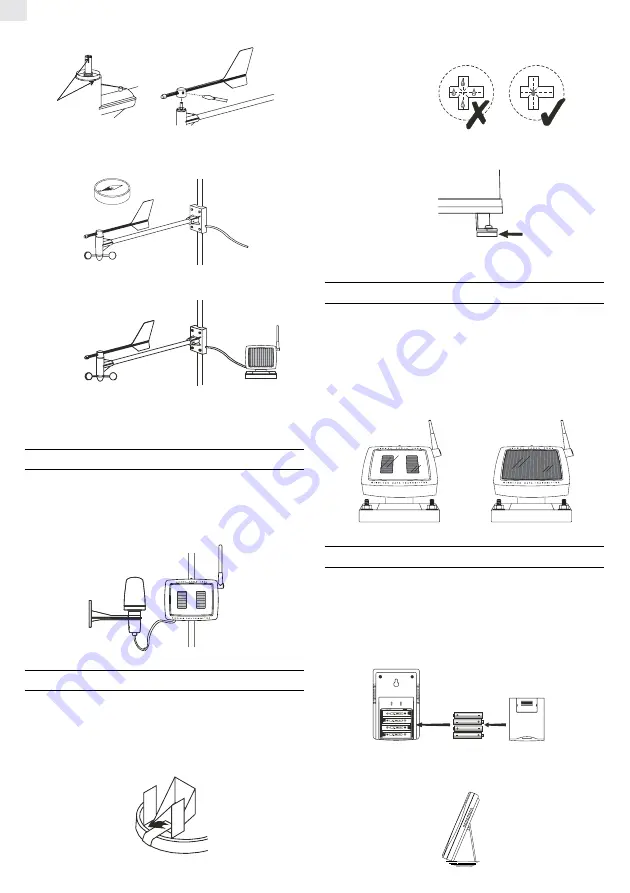
3. Align the red markings on the wind vane’s shaft.

4. With the aid of a compass, face the red marking south before

mounting the anemometer.

5. Mount the anemometer and its solar transmitter safely in place.

The wind speed and direction window on the main unit should read
180° if the main unit is installed.

THE THERMO-HYGROMETER

The thermo-hygrometer measures outdoor temperature and
humidity.

To install it:

Mount the thermo-hygrometer and its solar transmitter safely in
place.

THE RAIN GAUGE

The rain gauge measures the total amount and rate of rainfall.

To install it:

1. Open the cover of the rain collector.

2. Remove the fiber tape from around the bucket assemblies.

3. Mount the rain gauge and its solar transmitter safely in place.

4. Put drops of water on the cross at the base on the rain collector

to check the leveling.

5. Use metal ring to adjust the leveling of the rain collector if

necessary.

6. Close the cover of the rain collector.

THE SOLAR TRANSMITTERS

The solar transmitters make use of solar energy to power the
instruments they  are connected to.

Note: It is recommended to insert two UM3 or “AA”-sized super
lithium batteries for weather condition under 0 °C.

For the solar transmitters to function properly, make sure the solar
receptors on the transmitters are exposed to sunlight and the
connectors of the connection cable are securely plugged in.

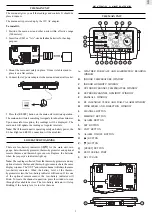
THE BARO-THERMO-HYGROMETER

The baro-thermo-hygrometer measures the atmospheric pressure,
temperature and humidity.

The sensor uses four UM4 or “AAA”-sized batteries.

To install it,

1. Insert alkaline batteries accordingly.

2. Mount the unit where you want to monitor the readings. Or you

can make use of its table stand to place it on a flat surface.

Water stay at
position 1 - 4
means the gauge
is not leveled

METAL  RING

Summary of Contents for WMR928N

Page 1: ...by solar transmitter STR938 TheWMR928Ncansupportuptosevendifferentremoteinstruments You can also connect up to three optional thermo or thermo hygro sensors to the system Optional items include Therm...

Page 2: ...he rain collector to check the leveling 5 Use metal ring to adjust the leveling of the rain collector if necessary 6 Close the cover of the rain collector THE SOLAR TRANSMITTERS The solar transmitters...

Page 3: ...hygrometer and optional remote thermo and thermo hygro sensors Replace the batteries when the respective indicators light up Note The readings collected from the thermo hygrometer and any optional re...

Page 4: ...Use I and J to change to the desired setting 5 Press SET for minutes setting 6 Use I and J to change to the desired setting 7 Press SET to confirm Note the window will show if no alarm is armed Once s...

Page 5: ...eck the memory is clear INDOOR HUMIDITY The current indoor relative humidity taken by the indoor baro thermo hygrometer is displayed on the indoor hygrometer window Todisplaythemaximum minimumandcurre...

Page 6: ...larm setting will be displayed OUTDOOR AND CHANNEL HUMIDITY The relative humidity readings taken by the outdoor thermo hygrometer and separate thermo hygro sensors are displayed on the outdoor channel...

Page 7: ...receive the signal from those sensors 2 If you have disconnected signals you cannot clear the memory THE RESET BUTTON This button is only used when the system is operating in an unfavorable way or ma...

Page 8: ...attery for weather condition under 0 C STR938 Weight 290 g Dimension 115 L x 81 W x 138 H Power back up 2 x UM3 AA size alkaline battery recommend super lithium battery for weather condition under 0 C...

Page 9: ...9 GB COUNTRIES RTTE APPROVAL COMPLIED Austria Belgium Denmark Finland France Germany Greece Italy Luxembourg Netherlands Portugal Spain Sweden UK and Ireland...

Reviews: