background image

8

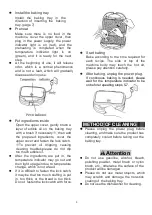
Install the baking tray.

Install the baking tray in the

direction of inserting the baking

tray. (page 7)

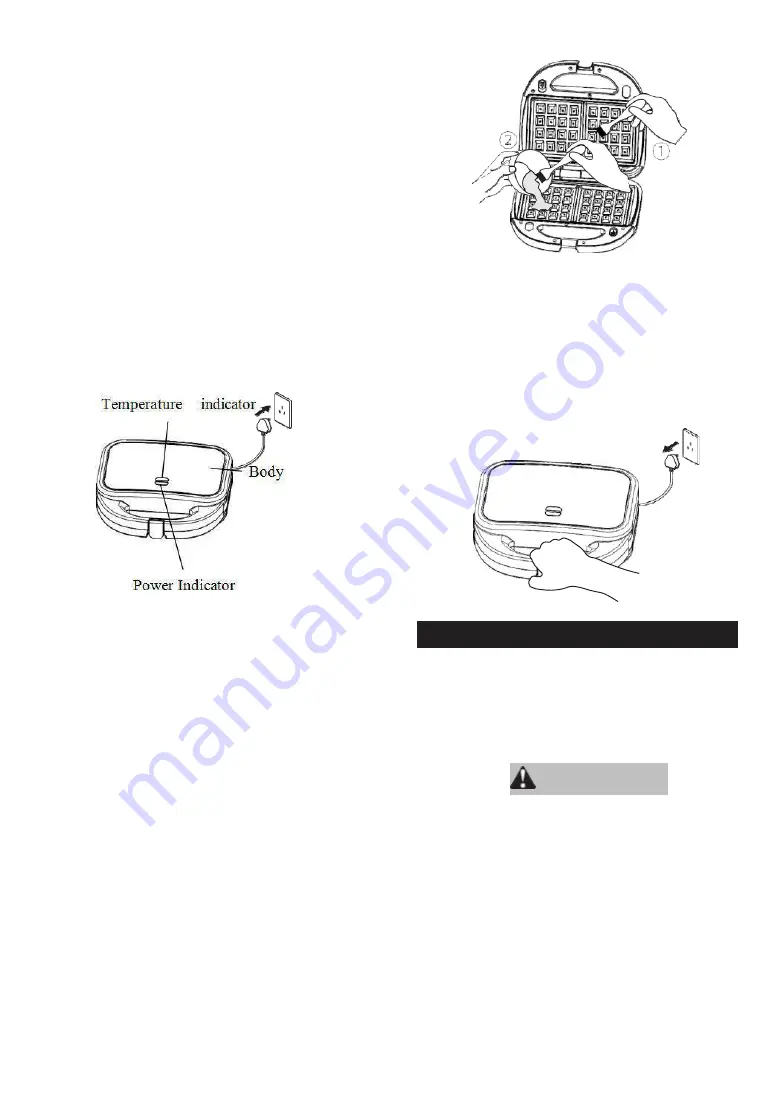
Preheat

Make sure there is no food in the

machine, cover the upper cover, then

plug in the power supply, the power

indicator light is on (red), and the

preheating is completed when the

temperature indicator light is on

(green), and it is ready for the next

step.

At the beginning of use, it will release

odor, which is a normal phenomenon

and is not a fault, which will gradually

disappear during use.

Put ingredients inside

Open the upper cover, gently brush a

layer of edible oil on the baking tray

with a brush if necessary

, then add

the prepared ingredients, cover the

upper cover and fasten the lock catch.

To prevent oil dripping, causing

cleaning troubles,please do not dip

too much edible oil.

After the ingredients are put in, the

temperature indicator may go out and

then light up again due to temperature

change, which is not a fault.

If it is difficult to fasten the lock catch,

it may be that too much stuffing is put

in, too thick, or the bread is too thick.

Do not fasten the lock catch with force.

Start baking

Bake according to the time required for

each recipe. The side or top of the

machine body may touch the hot air,

please pay attention carefully.

After baking, unplug the power plug.

If continuous baking is needed, please

wait for the temperature indicator to be

on before repeating steps 5-7.

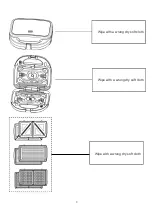
METHOD OF CLEANING

Please unplug the power plug before

cleaning, and make sure the product has

completely cooled before taking out the

baking tray.

Attention

Do not use gasoline, alcohol, bleach,

polishing powder, metal brush or nylon

brush, etc., otherwise the surface of the

product will be damaged.

Please do not use metal objects, which

may scratch and damage the non-stick

coating of the baking tray.

Do not use the dishwasher for cleaning.

Summary of Contents for ST69A

Page 1: ...INSTRUCTION MANUAL Sandwich maker ST69A IMPORTANT Read Before Using support orfeldtech com www orfeldtech com...

Page 2: ...2 CONTENTS SPECIFICATIONS 3 SAFETY PRECAUTIONS 4 IMPORTANT INFORMATION 6 NAME OF EACH PART 6 INSTALLATION AND DISASSEMBLY OF PRODUCT 7 METHOD OF USE 7 METHOD OF CLEANING 8...

Page 3: ...stance in all homogeneous materials of the component is below the limit requirements specified in GB T 26572 X indicates that the content of the harmful substance in at least one homogeneous material...

Page 4: ...h or place it near the heating assembly forcibly bend twist pull hang or pull the power cord from sharp edges place heavy objects on the power cord bundle the power cord and use the power cord to pull...

Page 5: ...l sounds during use 4 There is an unpleasant smell during use 5 Other abnormalities or malfunctions occur Please consult ORFELD Service Center for inspection and repair Attention In order to avoid the...

Page 6: ...ase do not use metal objects to touch the baking tray such as knives and forks or similar utensils so as not to damage the baking tray When storing this product the handle must be placed upward To avo...

Page 7: ...ng trays into the grooves until a click sound is heard DISASSEMBLY After pulling the baking tray release button outward the baking tray can be unlocked and taken out When unloading the upper baking tr...

Page 8: ...put in the temperature indicator may go out and then light up again due to temperature change which is not a fault If it is difficult to fasten the lock catch it may be that too much stuffing is put...

Page 9: ...9 Wipe with a wrung dry soft cloth Wipe with a wrung dry soft cloth Wipe with a wrung dry soft cloth...

Page 10: ...10 Facebook Website Instagram Twitter Shenzhen Xiaosi Technology Co Ltd ADD 5A17 Bldg B WePark Road 1 China South City Pinghu Longgang Shenzhen China MADE IN CHINA...

Reviews: