background image

12

SUBV10 & 12 Manual 

subwoofer by ear, listening for the smoothest bass that is devoid of any significant 

peaks or valleys in its overall response—i.e., without too much or too little bass at 

certain frequencies.

Note:

This control is bypassed when using the LFE input on your subwoofer. 

The switch in between the knobs, labeled PHASE, adjusts the phase of the 

subwoofer’s output waveform in relation to your main speakers. When the 

subwoofer’s PHASE switch is in the 0 position, the cone will have a forward 

excursion in tandem with the sound signal (i.e., it will push out with the positive 

half of the sound wave); when the switch is in the 180 position, the woofer cone 

will have a reverse excursion in the opposite direction of the signal (it will move 

inward). Depending on your room and speaker placement, one switch position 

may be preferable.

The preferred switch position can depend on a variety of factors, such as your 

subwoofer’s proximity to your front speakers, where it is located in your listening 

area, etc. Try flipping the PHASE switch while listening to music with obvious and 

consistent bass content. Determine which position yields the most bass. If this 

setting results in too much bass, adjust the LEVEL control. It is best to evaluate 

this while sitting in your main listening position while someone else is flipping the 

switch. Leave the switch in the position that sounds best. 

Subwoofer Phase Switch

Summary of Contents for SUBV10

Page 1: ...SUBV10 12 Manual l SUBV12 SUBV10 Installation Manual SUBV Collection...

Page 2: ...ructions 5 Power Connection 7 Audio Connection LFE Line Output Speaker Wire 8 Alternative High Level Wire Options 10 Powering on Your Subwoofer 10 Subwoofer Controls Level Crossover Phase Switch 11 Su...

Page 3: ...a simple installation process Thisinstructionbookletcoversthenecessaryinformationforasmoothinstallation including the tools you will need step by step instructions for installation troubleshooting tip...

Page 4: ...refer to the dealer portal for the latest information Woofer 12 Aluminum Frequency Response 27Hz 200Hz Dimensions 15 X 15 X 14 390 x 390 x 365mm Amplifier Power Class D 250 Watts Cabinet Black Ash Vin...

Page 5: ...refer to the dealer portal for the latest information Woofer 10 Aluminum Frequency Response 32Hz 200Hz Dimensions 13 X 13 X 13 330 x 330 x 330mm Amplifier Power Class D 150 Watts Cabinet Black Ash Vin...

Page 6: ...hase Controls Aluminum Cone Rubber Surround Slot Loaded Front Firing Ports Sealed on 8 Magnetically Secured Grille Voltage Switch High low Level Inputs High Level Outputs LFE Input Bypasses Internal C...

Page 7: ...her cross them at 90 degree angles to minimize any potentially adverse effects Do not touch or tap on the aluminum cone while the subwoofer is operating This can permanently mar damage or dent the con...

Page 8: ...tachments accessories specified by the manufacturer Use only with the cart stand tripod bracket or table specified by the manufacturer or sold with the apparatus When a cart is used use caution when m...

Page 9: ...ntenance servicing instructions in the literature accompanying the appliance Due to the weight of our SUB10 and SUB12 subwoofers we recommend having two people perform any unboxing moving or positioni...

Page 10: ...n an amplifier or any other component IMPORTANT Do not plug the power cord into the wall outlet until all subwoofer connections have been made and verified Connecting your subwoofer to a subwoofer out...

Page 11: ...ubwoofer and speakers this way ensures each speaker gets the correct output signals from your receiver or amplifier Note Since your subwoofer operates in mono it does not require a Left and Right desi...

Page 12: ...terminals so that two and two wires come out from your amplifying component FOR EACH CHANNEL with one set of wires running to your main speakers and the other set running to your subwoofer Alternate...

Page 13: ...able bass output thus for an 80Hz setting the subwoofer s operating range extends from this frequency down to its usable low frequency limit Properly setting the crossover ideally results in a smooth...

Page 14: ...ave when the switch is in the 180 position the woofer cone will have a reverse excursion in the opposite direction of the signal it will move inward Depending on your room and speaker placement one sw...

Page 15: ...which makes subwoofers noticeably more placement flexible than full range speakers Following these general guidelines along with some fine tuning and experimentation will maximize your subwoofer s pe...

Page 16: ...al location try fine tuning the sub s placement by moving it in small increments using program material containing even and consistent bass Moving the sub a few feet in any direction can make a profou...

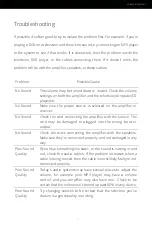
Page 17: ...No Sound Check the cord connecting the amplifier with the source The cord may be damaged or plugged into the wrong input or output No Sound Check the wires connecting the amplifier with the speakers M...

Page 18: ...hnical trouble please include the model number and briefly explain what steps you took to resolve the problem in your email or be prepared to answer these questions over the phone If you are consideri...

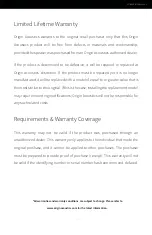
Page 19: ...nal If this is the case installing the replacement model may require mounting modifications Origin Acoustics will not be responsible for any such related costs Limited Lifetime Warranty This warranty...

Page 20: ...ranty Before making any return attempts it is required that you first contact Origin Acoustics Return product to Origin Acoustics or your dealer either in person or by mail It s preferable if the prod...

Page 21: ...19 SUBV10 12 Manual NOTES...

Page 22: ...5 S Decatur BLVD Las Vegas NV 89118 www originacoustics com 844 674 4461 2018 Origin Acoustics All copyrighted trademarked and patented elements mentioned herein are the sole property of Origin Acoust...

Reviews: