Be especially careful when the stylus guard is off, as
many MC cartridges have a strong magnetic field at the
base of the cantilever. This can attract the tip of a steel-
bladed screwdriver with irresistible force and destroy the
stylus! To be safe, use a non-ferrous screwdriver, or keep
the stylus guard on when you’re using the screwdriver
near it.
Fit the Counterweight
Fit the counterweight over the rear stub of the arm.
The tracking force is adjusted by sliding the
counterweight along the rear stub. The friction fit of the
weight on the stub can sometimes be a little tight. The
trick is to rotate the counterweight as you are pulling or
pushing it in the desired direction. This may require
considerable force but the human hand will not damage
Origin Live arm bearings. Tightness may not be
convenient but it increases performance. A spot of
Vaselene can help the weight slide more easily.
Misunderstandings of lift lower
devices.
The lift lower device needs no adjustment but will only
work correctly once the arm-tube is level (see VTA
later).
It's a mistake to think variables such as cartridge body
height affects the setting of the lift / lower device.
Another misunderstanding is that if the platter height
changes with the addition of say a platter mat, that the
lift lower needs adjustment.
These misconceptions can cause a great deal of
frustration. The lift / lower is factory set and works
properly once the arm height is set correctly. Correct
means the arm tube sits parallel to the surface of the
record when the cartridge has been lowered onto the
record.
Correct operation of Lift lower device
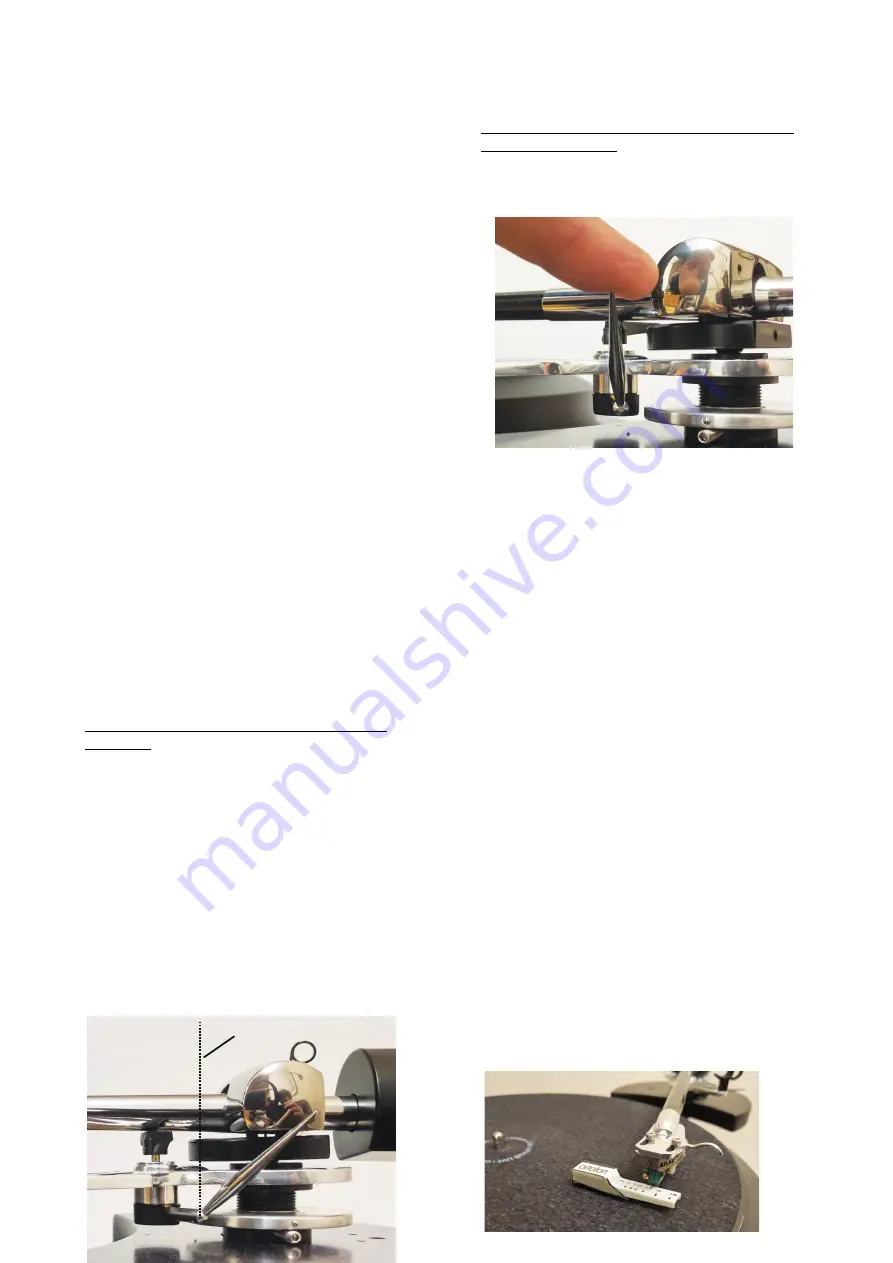
When the lift / lower lever is raised the lever must travel
past vertical to stay up. The arm will remain in this
position with the cartridge lifted above the surface of the
record.
Once you pull the lever back down to just past vertical,
the arm will gently fall till the stylus lands on the record
surface.
Photo showing lift / lower lever raised past vertical
Take care
not
to pull the lever down further once
it's gone past vertical. This can stop the device
functioning properly. Rather, once you've taken the
lever past vertical just let the arm fall under its own
weight.
Photo showing lever at release point, just past vertical.
Descent rates vary on lift lower devices but a quick
rate of descent is not a bad thing. This is similar to
hand queuing records, which offers a very fast rate
of descent. Notably hand queuing results in no
degradation of records even when carried out mid
track, hundreds of times. Slow descent on the other
hand is more likely to “graze” a record and cause
slight degradation.
Set initial tracking force
Set tracking force as specified by manufacturer.
If you find the arm-tube is far from level, it may
render tracking force measurements impossible so
adjust arm height accordingly. Read how to set arm
height in next section.
Measure Tracking Force
To measure tracking force, use a stylus force gauge
under the cartridge stylus as shown below.
Notes on Stylus Force gauges
Most stylus force gauges work on the same
principle as a set of scales. For example with the
Ortofon Stylus Force Gauge, first place the stylus
on the inscribed portion of the scales. Then try the
stylus at different points until you find the point
where the beam “balances” freely in a roughly level
position. You then read the force exerted.
Page 4
Vertical position of
lever


