background image

Page 8

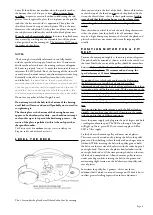
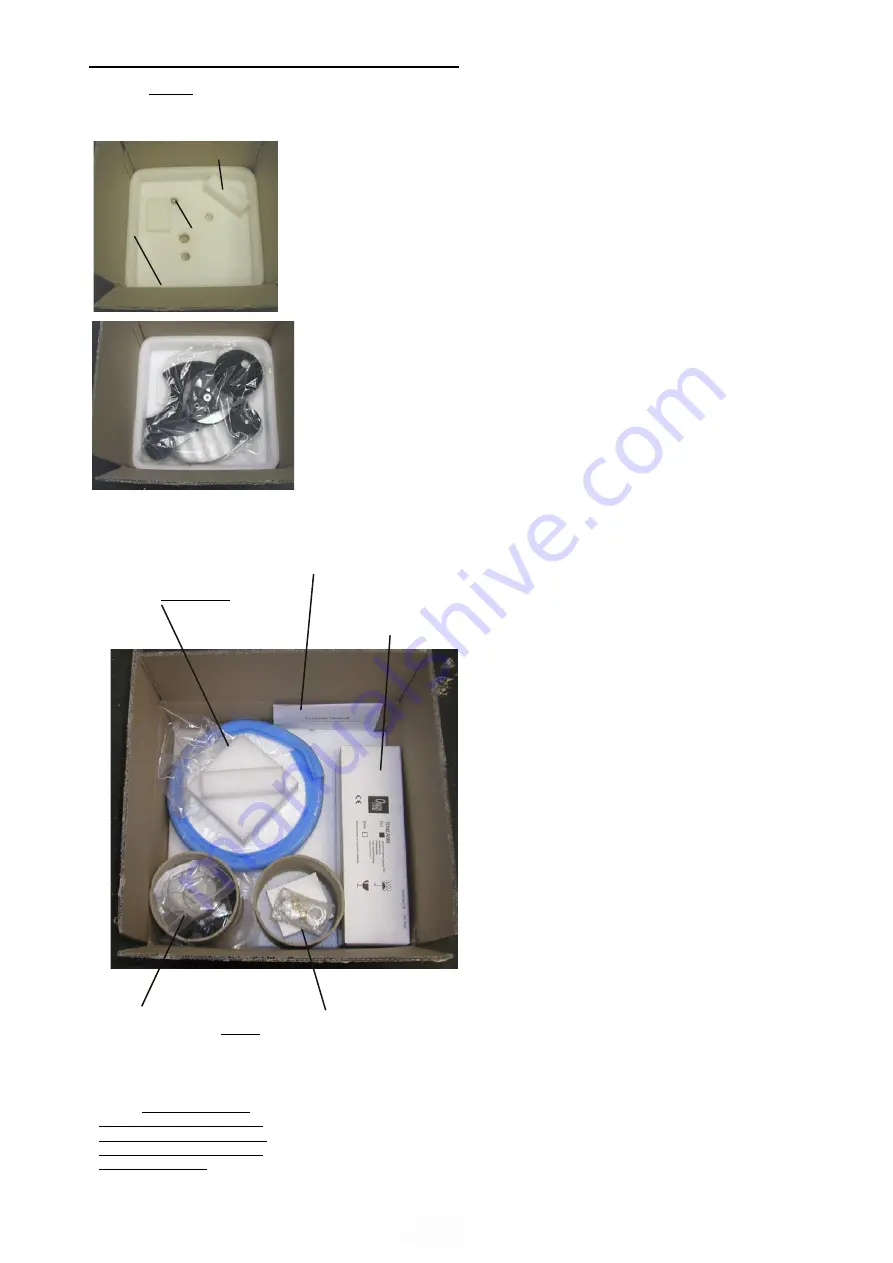
Wrap plith in polythene bag 
and place on bottom layer of 
foam - ensure that feet and 
bearing house all locate in holes 
in foam. The hole for the rear 
foot is marked with an R

Place top layer of foam on top 
of plinth - top foam has no 
holes in it.

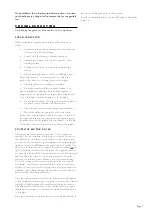
Place components on top layer of foam as show below

Wrap platter in polythene bag then 
tape blue edging foam to protect 
edges - lastly place thick foam square 
over long length of shaft - place in 
corner of box , 

upside down

 as 

shown.

Instruction manual

Arm if included
larger arms will not fit 
- i.e Encounter and above

Wrap motor pod in polythene and 
then tape cardboard tube with slit 
round the pod - the tube sits on top 
of the base plate, not round it. This 
is to provide protection against 
anything that might knock the end 
of the motor shaft as this can cause 
damage. 

Note that the motor 

pod must be positioned in this 
corner of the box where there is 
the greatest depth i.e not over 
the plinth armboard

Place the strobe card and belt in the 
top of the motor pod card tube.

Place the wallwort transformer in 
the remaining cardboard tube as 
shown and then place the bubble bag 
containing the following items on top 
of the transformer

Bag contains - threaded vta adjuster, 
Oil bottle, screw driver, 2.5mm allen 
key

R E P A C K I N G   M E T H O D

Please read carefully and do not deviate, do not cut up foam etc 
or damage will result - see seperate sheet for Sovereign packing 
instructions.

REAR FOOT
POSITION

Ensure base foam is 
in position in box as 
shown

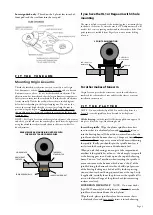
ARMBOARD PAD

EDGE SURROUND FOAM STRIP

Summary of Contents for Aurora Mk2

Page 1: ...Page 1 Mk2 Turntable Manual for Aurora Calypso Resolution Sovereign NOTE Speed must be set accurately after 2 day run in ...

Page 2: ...hen be played and later on the speed can finally be set with absolute accuracy As explained later this is because the electronics initially experience speed drift if they have not been run in and may need at least a day to run in properly We wish you an enjoyable time with your Origin Live turntable P A R T S L I S T Check that all parts are present Plinth Sub chassis including 1 cable clip with nu...

Page 3: ...assis or armboard 3 off bolts or wood screws Spacers For other makes of tonearm Origin Live can provide the correct cut out in the sub chassis or armboard for other makes of arm and after this refer to your arm installation instructions F I T T H E P L A T T E R NOTE On newer decks April 2009 onwards the platter is a loose fit over the spindle and can detatch from the platter Oil the bearing with th...

Page 4: ...ck that the bearing house is at least 1mm clear of touching the surface your deck is standing on Aurora only Note that when you level the deck the only thing that matters is that the platter not the plinth is level Sometimes there may be a slight discrepancy between the level of the plinth and platter but this does not matter and is usually imperceptible visually P O S I T I O N M O T O R P O D F ...

Page 5: ...b aligns to the LED the motor is off One click of the switch clockwise is 33 3 rpm The second click clockwise is 45rpm NOTES The speed should only be finally set with the pod in it s FINAL position and at normal room temperature as speed varies slightly with belt tension and temperature If you move the pod you will need to re check the speed and if necessary correct it by repositioning the pod till...

Page 6: ...es Origin Live decks very significantly VTA vertical tracking adjustment To allow the cartridge needle to track at the correct angle it is important that the base of the arm is at the correct height in relation to the platter this can be set by rotating the chrome threaded VTA adjuster supplied with the deck for Origin Live and Rega derived arms One complete turn of the adjuster clockwise raises th...

Page 7: ...use a hard object or excessive force as this can damage the spindle EXCESSIVE MOTOR NOISE The motor needs a run in time of around 1 2 days continuous running They are sometimes a little noisy to start with It is best to run in the motor on full power with the belt off Most importantly you can tune in the motor to give minimum noise by adjusting the tightness of the 3 small Phillips screws next to ...

Page 8: ... of the base plate not round it This is to provide protection against anything that might knock the end of the motor shaft as this can cause damage Note that the motor pod must be positioned in this corner of the box where there is the greatest depth i e not over the plinth armboard Place the strobe card and belt in the top of the motor pod card tube Place the wallwort transformer in the remaining...

Reviews: