background image

OR-7200ED User’s Manual 


44

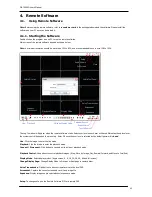
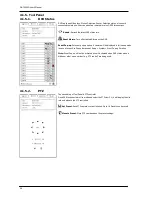
Audio Volume

: Click Audio icon to select audio volume and mute options.   

Select a camera to receive Audio of the selected camera (highlighted in border lines). 

Full Screen

: Display image on full screen mode. 

Close

: Click the icon to close the software 


The below options are only selectable under playback mode. 


Calendar Search

: Search data on a graphic calendar and time table.   

Event Search

: Search data using recorded event logs. 

Text-In Search

: Search data using recorded Text-In data from POS/ATM device. 


Backup

: Shows backup options as below: 

- Save as MP4

: Save the recorded data in MP4 file format. 

- Backup

: Backup the recorded data. 


Storage

: Select a storage type installed in the connected DVR. Either recording HDD or Archiving HDD can be selected for 

playback. 


4.1.2.


Site Set Up 

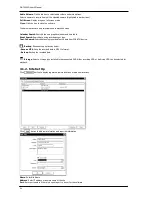
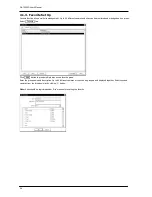
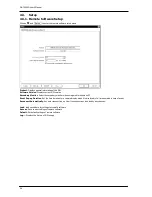
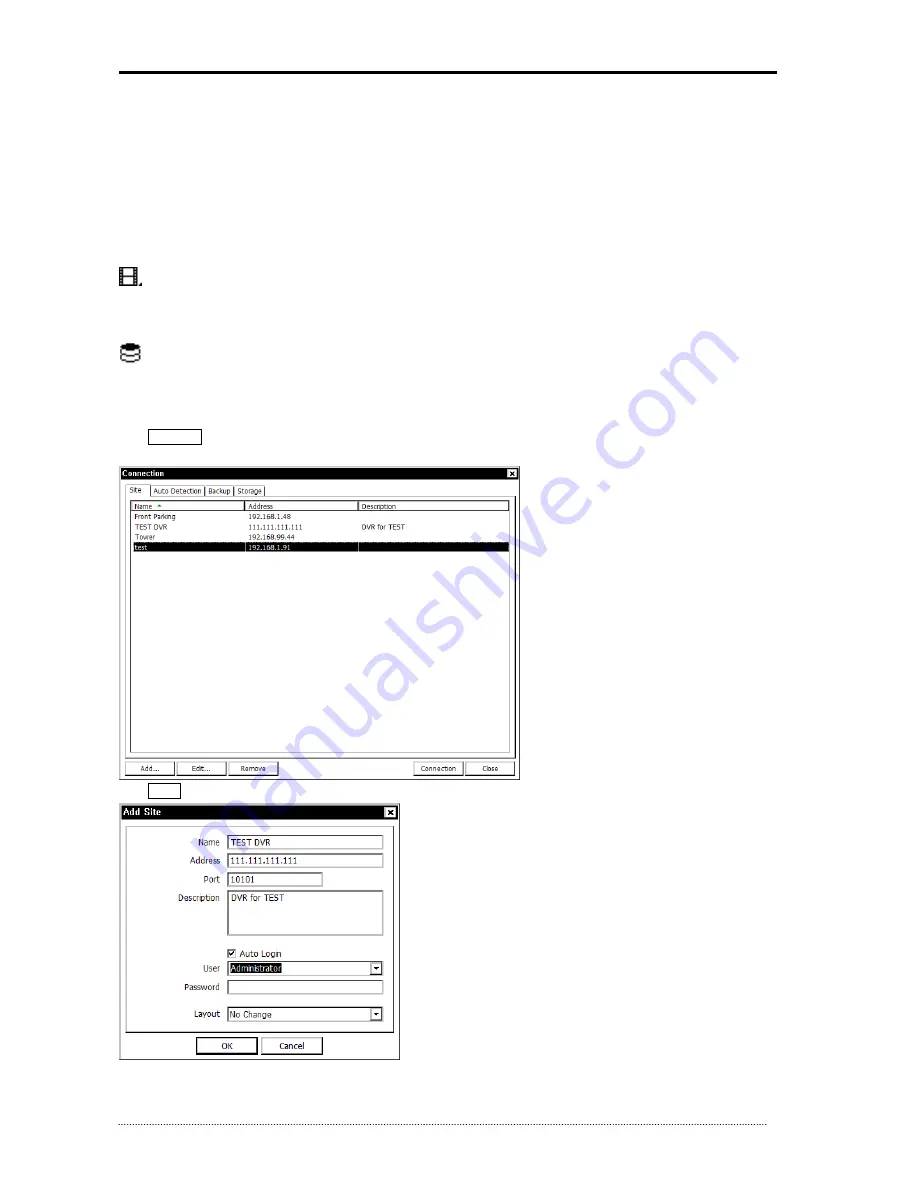
Click    Connect    button to display registered remote locations or add new locations.   


Click    Add    button to add remote location and required information.   


Name

: Enter Site Name 

Address

: Enter IP address or domain name of the site 

Port

: Enter port number if there is a specific port to be set for the software 

Summary of Contents for OR-7200ED

Page 1: ...User s Manual OR 7200ED Premium Entry Level Real Time DVR H 264 Stand Alone DVR Independent Dual Display Triple Streaming Auto IP Detection iPhone Android Phone Support...

Page 2: ...sser degree of injury May also cause damage to the product or to property Risk of minor injury or damage Requirements or limitations regarding operation Users are recommended to read the relevant deta...

Page 3: ...e there is excessive dust Areas where heat from the product cannot be emitted through both of the product s side ventilation openings Do not place credit cards telephone cards bank account books ticke...

Page 4: ...EM Quick Setup 23 3 2 1 5 MENU SYSTEM System Log 24 3 2 2 DEVICE 24 3 2 2 1 MENU DEVICE Camera 24 3 2 2 2 MENU DEVICE Audio 25 3 2 2 3 MENU DEVICE Alarm 25 3 2 2 4 MENU DEVICE Keyboard 26 3 2 2 5 MENU...

Page 5: ...2 6 Play Independent HDD Data on PC 55 4 3 Setup 56 4 3 1 Remote Software Setup 56 4 3 2 Remote DVR Setup 60 4 3 3 Remote Upgrade 61 4 4 Callback 62 5 Appendix A Remote Access Using I E 64 6 Appendix...

Page 6: ...dia Player for Backup Playback Two USB Port for Mouse operation Multi USB Hub and Backup Up to Two SATA HDD and No Limitation of Capacity Two Way Audio Multiple DVRs can be operated with One Keyboard...

Page 7: ...Zoom Search Mode Calendar Search Event Search Text In Search Go to Time Playback Mode Multi Channel Normal Reverse Play RW FF x2 x4 x8 x16 x32 Frame to Frame Pause Network Interface Ethernet 10 100 B...

Page 8: ...Event Time Event Emergency Panic Playback Display 1 4 6 9 Digital Zoom 1 4 6 8 9 13 16 Digital Zoom Search Mode Calendar Search Event Search Text In Search Go to Time Playback Mode Multi Channel Norma...

Page 9: ...Contents The following components are included in the product DVR Unit DC Adaptor Power Cord Remote Controller Quick Guide Customer Card Note Please download Users Guide and Remote Client S W from the...

Page 10: ...mouse on the front panel Video Input Connect the coaxial cables from the cameras to the BNC video connectors Audio Input The DVR can record audio up to 4 sources Connect the audio sources to the Audio...

Page 11: ...ency for monitoring options for users Note VGA Monitor is set as a main monitor when system boots up To move to another monitor CVBS and control it please use one of following control options 1 Press...

Page 12: ...d to connect an ATM or POS machine for Text In function To make connections on the terminal block press and hold the button and insert the wire in the hole below the button ETC Network Connect a Cat5...

Page 13: ...USB port dedicated only for mouse Video Input Connect the coaxial cables from the cameras to the BNC video connectors Loop Through Video Connect the coaxial cables from the Loop BNC connector to anot...

Page 14: ...e wire in the hole below the button ETC Network Connect a Cat5 cable with an RJ 45 connector to the DVR connector for remote monitoring remote playback remote setup See Chapter 3 2 DVR Configuration f...

Page 15: ...t put an heavy object on power cord or avoid it from being pressed by the device May cause fire or electric shock In case of using extension cord do not use several devices at same time May cause fire...

Page 16: ...ode from the live mode PAUSE Button Under playback mode the button can be used to pause the playback screen Display menu to save PTZ preset under PTZ mode PLAY Button Plays the video forward Press the...

Page 17: ...ote To turn off the system select SHUTDOWN under main menu MENU SHUTDOWN and unplug the power cord when the shutdown message appears Note When installing the HDD for the first time the HDD should be f...

Page 18: ...OR 7200ED User s Manual 17 Text In PTZ Camera Instant Backup Clip Maker Blue Backup Red Video Loss...

Page 19: ...er password when using a mouse Click button to pop up virtual keyboard when using the front buttons or remote controller to enter password The factory default password is none so press OK to log in to...

Page 20: ...ach menu Note Please make sure the system log out is done when the system setting or operation completed to prevent any unauthorized changes of system settings or operations MAIN MENU SYSTEM Informati...

Page 21: ...e Begin sequence display Zoom Zoom in image x2 x4 x8 PIP Select PIP mode and camera Audio Select Audio outs PTZ Select PTZ options Backup Select backup options Playback Playback recorded data Remote S...

Page 22: ...the system during the upgrade Removing USB Flash Memory or Turning off the system during the upgrade may cause system malfunctioning Remote Control ID Enter Remote Control ID to control multiple DVRs...

Page 23: ...e to heavy traffic or delays from the Time Synch server Press Holiday to set specific dates for Holiday setup Set specific date by pressing button Change and delete dates using and buttons Note There...

Page 24: ...he system Press Group tap to add and set group Press to add a new group Enter a group name and select access rights for a group To remove an existing Group press next to it 3 2 1 4 MENU SYSTEM Quick S...

Page 25: ...lay video loss display can be disabled by unmarking the box next to it if there is no camera connected Press to change Camera title Press Setup button under Color to adjust video color Click or drag a...

Page 26: ...o image or OSD will be displayed on screen Note Any Covert options will not affect recording data as it only changes monitoring conditions 3 2 2 2 MENU DEVICE Audio Select Audio for Audio recording Ea...

Page 27: ...II code for Text In info on DVR 3 2 3 DISPLAY Under Display menu Display configuration options for OSD and Monitor can be selected 3 2 3 1 MENU DISPLAY Display Language Select system language Press to...

Page 28: ...play 3 2 3 3 MENU DISPLAY CVBS OSD margin Set OSD margin position using Sequence Interval Set time interval between cameras under sequence mode Event Pop up Pops up the camera image in full screen whe...

Page 29: ...al Signage after system is not in use for the time set Picture Interval sec Select the type of data to be displayed under Digital Signage mode Select either Video or Image data format Select the inter...

Page 30: ...get the latest status 3 2 4 2 MENU RECORD Record In Record general recording options can be selected including overwrite resolution speed recording quality and etc Overwrite Select Overwrite to overwr...

Page 31: ...RECORD Utilities In Recording Status current recording options and status are displayed The list will show Recording Frames Video Quality Resolution and Audio recording o x in order In Storage Capaci...

Page 32: ...Client Web Port Set port for Web Remote Client RTSP Port Set port for Android based devices iPhone Port Set port for iPhone UPnP Option By checking the UPnP option it automatically sets ports on a con...

Page 33: ...ll be sent to remote site In Email Events can be notified to personal email addresses by text message E Mail Interval Select E Mail Interval to set time interval between consequential events being sen...

Page 34: ...ned for Emergency recording only It will follow Emergency recording setting when it is triggered In Record each sensor can be synchronized with single and multi cameras Press to select cameras to be s...

Page 35: ...rom Very Low to Very High Area Define the area for motion detection Press Setup under Area to define motions detection areas The blocks indicate the area where is defined for motion detection Select B...

Page 36: ...6 3 MENU EVENT Video Loss In Video Loss single or multi cameras can be synchronized for event recording when there is a video loss Press to select single or multi cameras to be synchronized with came...

Page 37: ...the end If you want additional lines to be displayed after the transaction end select more line options Ignore String Enter a word to ignore strings includes selected word Line Delimiter Enter a symb...

Page 38: ...message for the indication of HDD storage usage level Warning message can be notified in various ways as described below S M A R T Threshold allows to pre set tolerable temperature level of storage If...

Page 39: ...corded data Also search data by 5 10 15 30 60 seconds backward from the current time of search Search Select Calendar Search Event Search and Text In Search OSD Select OSD display option Text In Info...

Page 40: ...shows the full information of recorded data on the selected date Move the indicator line to select specific recorded time of the selected date For a detail display of recorded data please press Detail...

Page 41: ...ion Press Search for detail information From Set beginning time to start search or select First for search from the first data To Set end time to end search or select Last for search to the last data...

Page 42: ...onnected to the system Select date time period of data to be backup using button Select Camera number to be backup or All to backup all the data recorded during the selected period To back up recorded...

Page 43: ...en during the Instant Playback Press backup button one more time to stop and complete Instant Backup Note DO NOT remove the back up media while the data backup is being processed It may cause critical...

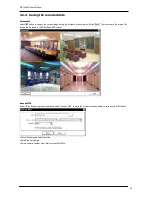
Page 44: ...the image to enter the live mode Playback Click the image to enter the playback mode Connect Disconnect Click button to connect a site as live or playback mode Playback Control Use buttons to control...

Page 45: ...s Text In Search Search data using recorded Text In data from POS ATM device Backup Shows backup options as below Save as MP4 Save the recorded data in MP4 file format Backup Backup the recorded data...

Page 46: ...e registration Double click the location or Highlight it and click Connection button to get connected to the site The DVR and Client program on PC start searching each other once they are on the same...

Page 47: ...aged on one screen Select Favorite tap Click Add button to group multiple sties as one favorite group Enter the group name and description Up to 64 different cameras or sites can be grouped and displa...

Page 48: ...ct the sites Each camera can be dragged and dropped to arrange independent displays This allows making a display by a group of cameras from the different sites Once the group of cameras from the diffe...

Page 49: ...displayed in full screen mode in case of event Set Pop up duration at Setup System Event Pop up Duration Note Event Pop up will not be activated even it is checked when DVR status menu is hidden or ot...

Page 50: ...N tap is activated under playback mode only 4 1 5 4 GPS GPS is for Mobile DVR tracking under playback mode GPS data is recorded with images using built in GPS on Mobile DVR This data will be displayed...

Page 51: ...ge preview will appear when the specific time is selected on the time bar Use below buttons to control the playback image Playback Control Button Beginning Reverse Play Rewind Step Backward Stop Step...

Page 52: ...ct SEARCH button to retrieve the search results Select an event from the list for playback Search trough the list using buttons Select the date of event search for from the Date list Select All or spe...

Page 53: ...rch on the bottom of the screen to open TEXT IN Search Panel Enter Date and Text and select SEARCH button to retrieve the search results Select an text in event from the list for playback Search troug...

Page 54: ...ow below Select Save button to save the image The Image can be saved in JPEG BMP and PNG format Save as MP4 Select button during the playback and select Save as MP4 to open the window as shown below t...

Page 55: ...elect the time period Select Camera number Press Start to create Backup file 4 2 5 Play Backup Data Backed up data from the local site can be played on the remote software Select button during the pla...

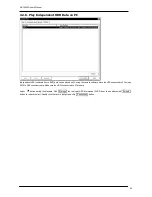
Page 56: ...remote software Have the HDD connected to PC using a SATA to USB connector cable Make sure the HDD is connected to PC properly Select button during the playback Click Storage tap to display HDD inform...
Page 57: ...ary monitor when using multi monitors on PC Event Pop up Duration Set the time duration for a camera display when it is displayed in full screen mode in case of event Reconnect Automatically Set auto...

Page 58: ...atural live image display on the client S W Please do not select this option as it may cause improper live image display Some PC graphic card does not support and comparable with Video Acceleration op...

Page 59: ...up menu Set sequence mode and sequential sites from registered individual or Favorite sites Click the site and select button to add the site into the sequencing list button will move the all sites to...

Page 60: ...er s Manual 59 Click on User tap to enter user setup menu Register the remote software users Each user needs to use the password they set in registration when they log in Select Add to start new user...

Page 61: ...setup menu Select a DVR for setup and select Connection button Setup menu will appear as show below once it is connected Note The remote software provides interactive setup system that allows easy loc...

Page 62: ...C Click on and Remote Setup to enter remote setup menu Select Information under System Click Upgrade next to S W version to find a file for upgrade Select the file location and the file to upgrade the...

Page 63: ...ram remote software folder Callback Callback icon will be displayed on the bottom right of Window once the program starts Callback message will be displayed notified as shown above Click Callback icon...

Page 64: ...ow Up to 100 000 log can be saved 1 000 log lists will be displayed per search Click More button to display next 1 000 logs Click Export button to save searched logs in either txt or csv format Setup...

Page 65: ...ppears once connected to DVR Enter ID PW and Port information and select Live or Playback mode to display desired remote control option Please install Active X when Internet Explore displays Active X...

Page 66: ...ase refer the Diagram and follow this instruction For example If you connect 3 DVRs through local Network 6 1 1 1 Domain Name Creation Go to http www dvr ddns com Click Sign up to make the Account ROU...

Page 67: ...Click Submit to make the account Enter your domain name and click Request Domain to create the domain name You can see the registered dome name dvr1 dvr ddns com You can create 3 domain names for one...

Page 68: ...r Go to Port Forwarding Menu The picture below is for particular Router Please insert the IP address and Port number for DVR in the Port Forward menu The Port number which you insert at this point mak...

Page 69: ...following options accordingly The system should be allocated with individual IP address Make sure the ports for DVR are all set accordingly or set network ports according to DVR port settings DDNS can...

Page 70: ...nage File Conversion Video Files JPG File Name No Limits Filename_00001 JPG Filename_0002_JPG File Size No Limits 256KB per each JPG File Video Type Size No Limits Select either NTSC 704 x 480 or PAL...

Page 71: ...eo Type The file can be saved as NTSC 704 x 480 or PAL 704 x 574 according to Video Type But this does not affect the display resolution e Click Start Button Click the start button Play time and End t...

Page 72: ...ailable ED08 ED16 not available ED08 ED04 ED08 available ED16 not available ED16 ED04 ED08 ED16 available Audio and PTZ are supported Supports Audio in single screen mode Text in Scroll is not support...

Page 73: ...ess Enter the Site address for Remote DVR Port Enter Port for the site It depends on the network setting of the local site User Password Enter User and Password to log in User has to be set with autho...

Page 74: ...wants regardless of the size and numbers 9 1 3 How to use Network Archiver Start Network Archiver Archiving by using Schedule Wizard New Schedule Step 1 Entering Archiving Site address and following...

Page 75: ...ng Interval List Step 3 Setting performing schedule for Archiving Auto Connection Scheduler Set a time schedule for Archiving Select a time for Start Stop point the system will automatically perform A...

Page 76: ...g will be performed once the setting is completed by clicking finish button Use Schedule Wizard to add new Archiving option 9 1 4 Set Up A Main Screen Each schedule information is displayed on the mai...

Page 77: ...t the sites where Archiving is already in progress Stop All Stop all registered Schedule It doesn t affect the sites where Archiving is already stopped Storage Manager Run Storage Manager refer to 4 D...

Page 78: ...is automatically overwritten by the latest data and Archiving continues 9 1 4 1 Storage Manager Manage Storage Group each Archiving schedule Filename Name of Storage File It is possible to check full...

Page 79: ...Try it after stopping Archiving Pause Archiving Detail It is available to check the detail section list of the selected Storage File from separate Dialog 9 1 4 2 Log Check the Log status of each Sched...

Page 80: ...ctions 1 Storage File which is being used by Network Archiver can not be playback at the same time on Nemon2 On the contrary Storage File which is being used by Nemon2 can not be used on Network Archi...

Page 81: ...IS CLASS OF DIGITAL APPARATUS MEETS ALL REQUIREMENTS OF THE CANADIAN INTERFERENCE CAUSING EQUIPMENT REGULATIONS WEEE Waste Electrical Electronic Equipment Correct Disposal of This Product Applicable i...

Reviews: