10
Remember, accurate polar alignment is not needed for casu-
al visual observing. Most of the time, approximate polar align-
ment, as outlined previously, will suffice.
Tracking Celestial Objects
When you observe a celestial object through the telescope,
you’ll see it drift slowly across the field of view. To keep it in
the field, if your equatorial mount is polar-aligned, just turn the
R.A. slow-motion control. The Dec. slow-motion control is not
needed for tracking. Objects will appear to move faster at
higher magnifications, because the field of view is narrower.
Optional Motor Drive
An optional DC motor drive system can be mounted on the
AstroView’s equatorial mount to provide hands-free tracking.
Objects will then remain stationary in the field of view without
any manual adjustment of the R.A. slow-motion control. The
motor drive system is necessary for astrophotography.
Understanding the Setting Circles
The setting circles on an equatorial mount enable you to
locate celestial objects by their “celestial coordinates”. Every
object resides in a specific location on the “celestial sphere”.
That location is denoted by two numbers: its right ascension
(R.A.) and declination (Dec.). In the same way, every location
on Earth can be described by its longitude and latitude. R.A.
is similar to longitude on Earth, and Dec. is similar to latitude.
The R.A. and Dec. values for celestial objects can be found in
any star atlas or star catalog.
The R.A. setting circle is scaled in hours, from 1 through 24,
with small marks in between representing 10 minute incre-
ments (there are 60 minutes in 1 hour of R.A.). The upper set
of numbers apply to viewing in the Northern Hemisphere,
while the numbers below them apply to viewing in the
Southern Hemisphere.
The Dec. setting circle is scaled in degrees, with each mark
representing 2° increments. Values of Dec. coordinates range
from +90° to -90°. The 0° mark indicates the celestial equator.
When the telescope is pointed north of the celestial equator,
values of the Dec. setting circle are positive, while when the
telescope is pointed south of the celestial equator, values of
the Dec. setting circle are negative.
So, the coordinates for the Orion Nebula listed in a star atlas
will look like this:
R.A. 5h 35.4m Dec. -5° 27'
That’s 5 hours and 35.4 minutes in right ascension, and -5
degrees and 27 arc-minutes in declination (there are 60 arc-
minutes in 1 degree of declination).
Before you can use the setting circles to locate objects, the
mount must be well polar aligned, and the R.A. setting circle
must be calibrated. The Dec. setting circle has been calibrat-
ed at the factory, and should read 90° whenever the telescope
optical tube is parallel with the R.A. axis.
Calibrating the Right Ascension Setting Circle
1. Identify a bright star in the sky near the celestial equator
(Dec. = 0°) and look up its coordinates in a star atlas.
2. Loosen the R.A. and Dec. lock levers on the equatorial
mount, so the telescope optical tube can move freely.
3. Point the telescope at the bright star whose coordinates
you know. Lock the R.A. and Dec. lock levers. Center the star
in the telescope’s field of view with the slow-motion control
cables.
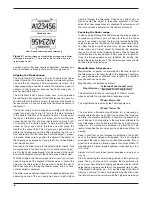
4. Loosen the R.A. setting circle lock thumbscrew (see Figure
5); this will allow the setting circle to rotate freely. Rotate the
setting circle until the arrow under the thumbscrew indicates
the R.A. coordinate listed in the star atlas for the object. Do
not retighten the thumbscrew when using the R.A. setting cir-
cles for finding objects; the thumbscrew is only needed for
polar alignment using the polar axis finder scope.
Finding Objects With the Setting Circles
Now that both setting circles are calibrated, look up in a star
atlas the coordinates of an object you wish to view.
1. Loosen the Dec. lock lever and rotate the telescope until
the Dec. value from the star atlas matches the reading on the
Dec. setting circle. Remember that values of the Dec. setting
circle are positive when the telescope is pointing north of the
celestial equator (Dec. = 0°), and negative when the tele-
scope is pointing south of the celestial equator. Retighten the
lock lever.
2. Loosen the R.A. lock lever and rotate the telescope until the
R.A. value from the star atlas matches the reading on the R.A.
setting circle. Remember to use the upper set of numbers on
the R.A. setting circle. Retighten the lock lever.
Most setting circles are not accurate enough to put an object
dead-center in the telescope’s eyepiece, but they should
place the object somewhere within the field of view of the find-
er scope, assuming the equatorial mount is accurately polar
aligned. Use the slow-motion controls to center the object in
the finder scope, and it should appear in the telescope’s field
of view.
The R.A. setting circle must be re-calibrated every time you
wish to locate a new object. Do so by calibrating the setting cir-
cle for the centered object before moving on to the next one.
Confused About Pointing the Telescope?
Beginners occasionally experience some confusion about how
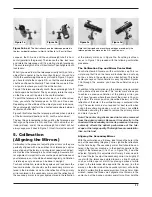
to point the telescope overhead or in other directions. In Figure
1 the telescope is pointed north as it would be during polar
alignment. The counterweight shaft is oriented downward. But
it will not look like that when the telescope is pointed in other
directions. Let’s say you want to view an object that is directly
overhead, at the zenith. How do you do it?
DO NOT make any adjustment to the latitude adjustment
T-bolts. That will spoil the mount’s polar alignment. Remem-
ber, once the mount is polar aligned, the telescope should be
moved only on the R.A. and Dec. axes. To point the scope
overhead, first loosen the R.A. lock lever and rotate the tele-
Summary of Contents for AstroView 6 EQ 9827
Page 19: ...19 ...


